


AlchEm1st's Evo IV Coupe conversion project


Newbie
Joined: Nov 2011
Posts: 50
Likes: 0
From: Jacksonville

Haha yeah, midwest car... You should see my brothers Sable. Was prepping to give it an oil change and put jack stand under the jack points and when we lowered the car onto the jack stands there wasn't even any resistance. Jack stand just poked straight into the car through the floor. Rocker panels were only held together by the paint. Wish they didn't have to use salt on the roads here; it just destroys cars... Mine really isn't too bad in comparison to most 15 year old cars here. Just finished spraying weld through primer on the chassis; so should be able to start installing the floor now! I think we can get a welder and generator home from the shop this week to start welding this Saturday. Then there will finally be some noticeable progress!

Little bit of progress on the floor swap! New corners from the scrap sections of my floor cut have been blasted, treated, and primed. Lucky that I had them!
One of them has a spot that may need to be repaired though. I'm not sure if it's rusted underneath or not. Will let you guys know what's up after I get the skinny
from Dad. Been working 50hr weeks for several weeks opposite his schedule so I haven't actually been able to talk to him for a while. Here's some pics of the new corners!


One of them has a spot that may need to be repaired though. I'm not sure if it's rusted underneath or not. Will let you guys know what's up after I get the skinny
from Dad. Been working 50hr weeks for several weeks opposite his schedule so I haven't actually been able to talk to him for a while. Here's some pics of the new corners!


Welds in the front pockets where the frame meets are done! Look pretty good too!
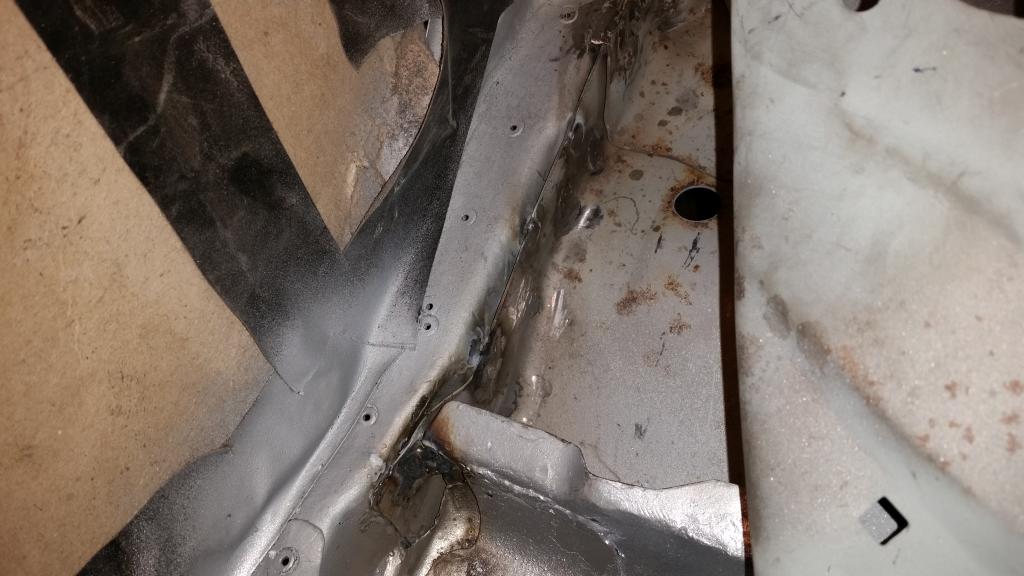
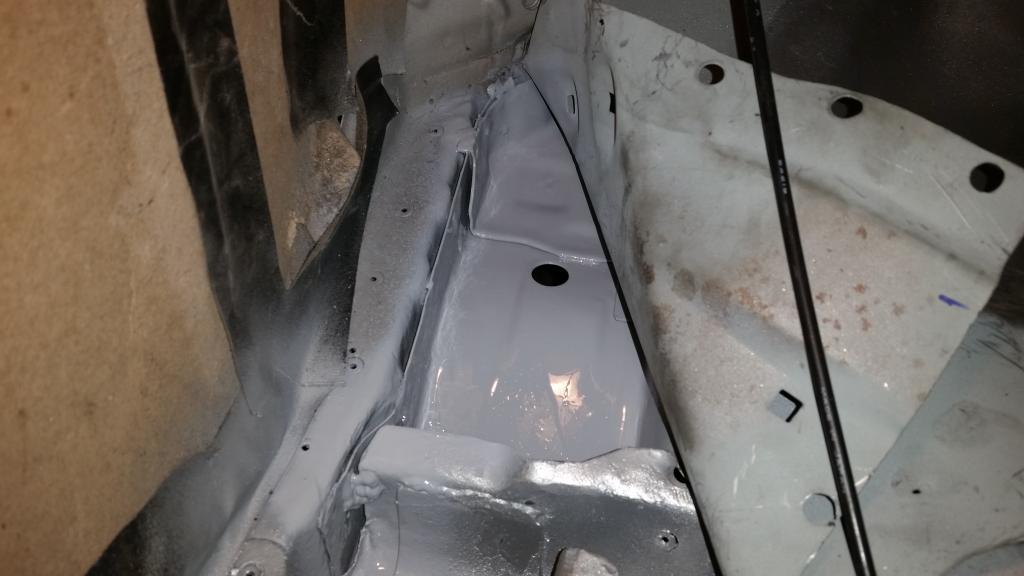
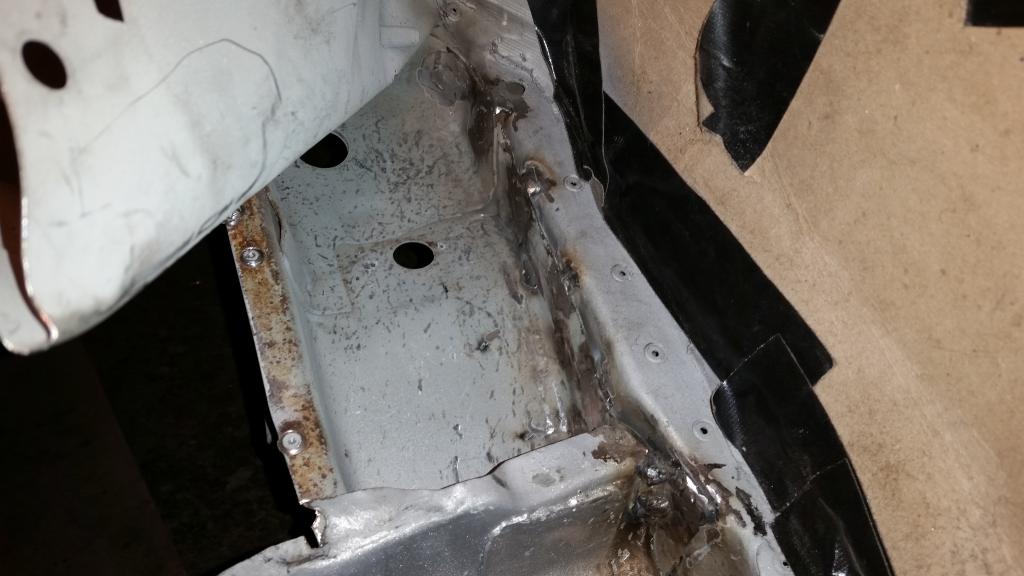
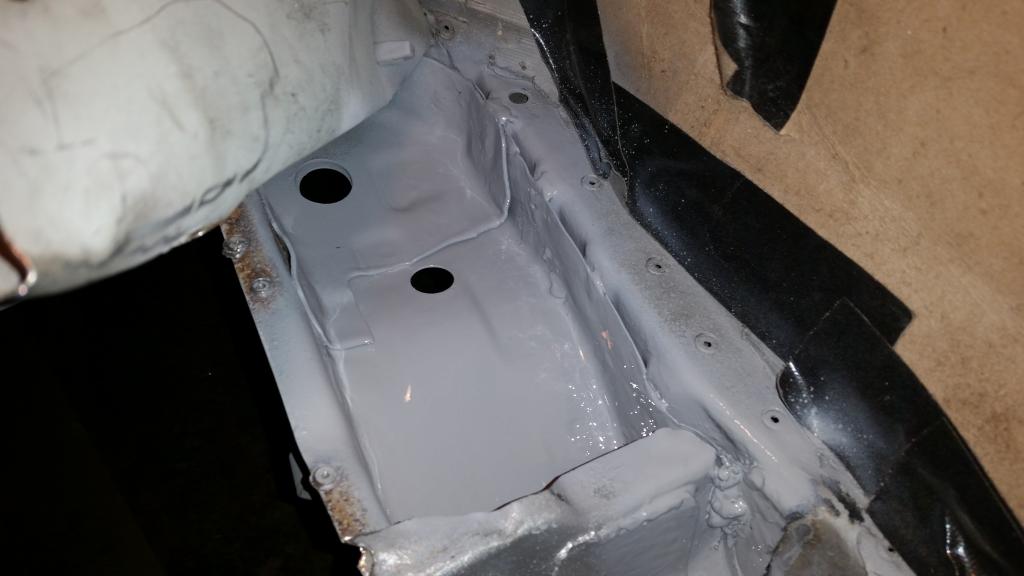
Hoping to finish welding on the lower brackets and get the vertical welds done on the crossmember tonight. Then we'll be able to weld across the front of the floor and that whole section will be buttoned up and done!


Hoping to finish welding on the lower brackets and get the vertical welds done on the crossmember tonight. Then we'll be able to weld across the front of the floor and that whole section will be buttoned up and done!
This weekends progress:
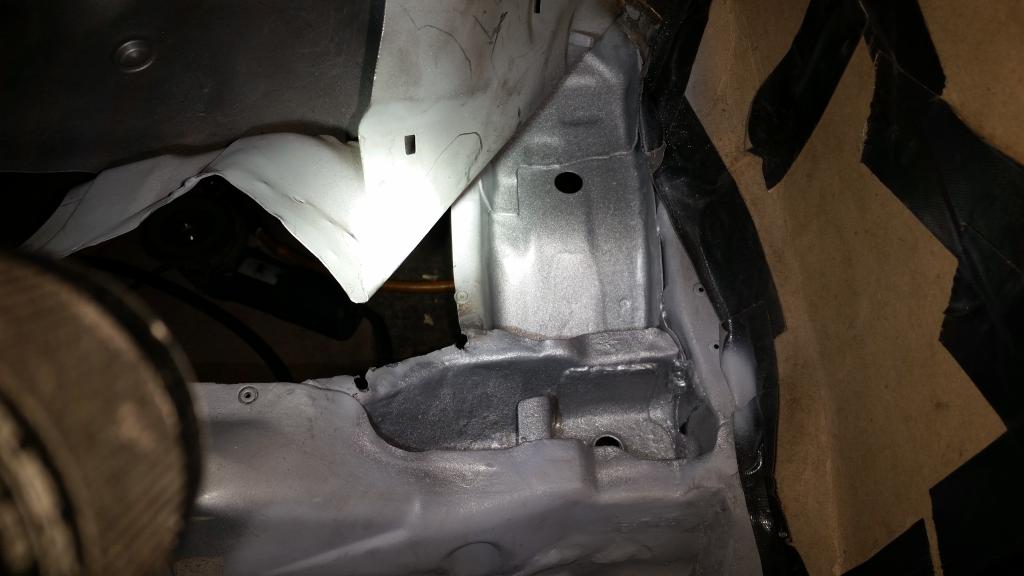
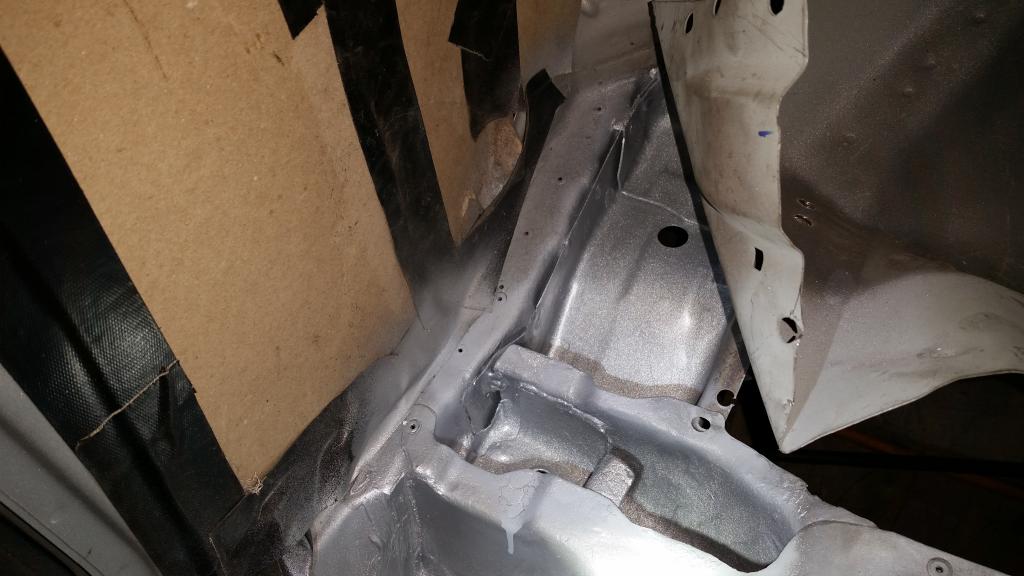
Painted the inside of the frame rails and the crossmember to seal it from rusting again. (They didn't do this at the factory)
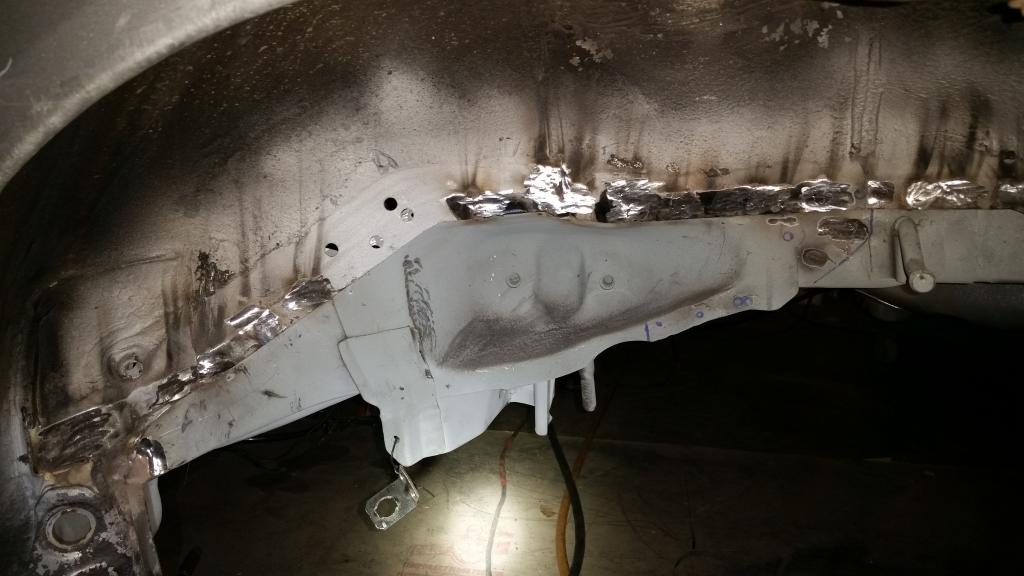
Dad started welding on the drivers side wheel well. This is after I ground the welds flat, but it's still in it's early stage of work.
(the black spots are just shiny metal reflecting the floor)
Some placed need touched up where there are pinholes through the metal still and we haven't made the patch for the rusted out spot yet
(though we did make the template today) or welded the panels on the inside of the car; but it's a start! With me grinding the welds down flat
and Dad rewelding the pinholes shut this floor install will really look factory to the untrained eye. No weld boogers to be seen! (Unless you look
REALLY hard lol) Based on our progress so far I think we will have the floor install 100% complete with the rear end mounted and the car back on
the ground by the end of January! Then the front of the car goes in the air and the engine comes out! (After we run new brake lines and fuel lines)
Painted the inside of the frame rails and the crossmember to seal it from rusting again. (They didn't do this at the factory)


Dad started welding on the drivers side wheel well. This is after I ground the welds flat, but it's still in it's early stage of work.
(the black spots are just shiny metal reflecting the floor)

Some placed need touched up where there are pinholes through the metal still and we haven't made the patch for the rusted out spot yet
(though we did make the template today) or welded the panels on the inside of the car; but it's a start! With me grinding the welds down flat
and Dad rewelding the pinholes shut this floor install will really look factory to the untrained eye. No weld boogers to be seen! (Unless you look
REALLY hard lol) Based on our progress so far I think we will have the floor install 100% complete with the rear end mounted and the car back on
the ground by the end of January! Then the front of the car goes in the air and the engine comes out! (After we run new brake lines and fuel lines)

Newbie


Joined: Jan 2012
Posts: 34
Likes: 3
From: Canada
Don't forget to do some quality seam sealing of all the panel joints underneath - that's another thing that Mitsubishi didn't do on the Evos!
Also, in running brake and fuel lines, why not take a note from Subaru and run them inside the body rather than under the floor? Much better protected.
Also, in running brake and fuel lines, why not take a note from Subaru and run them inside the body rather than under the floor? Much better protected.
Don't forget to do some quality seam sealing of all the panel joints underneath - that's another thing that Mitsubishi didn't do on the Evos!
Also, in running brake and fuel lines, why not take a note from Subaru and run them inside the body rather than under the floor? Much better protected.
Also, in running brake and fuel lines, why not take a note from Subaru and run them inside the body rather than under the floor? Much better protected.

Lots of progress today! Got the drivers side wheel well almost done and got a good start on the passengers side!
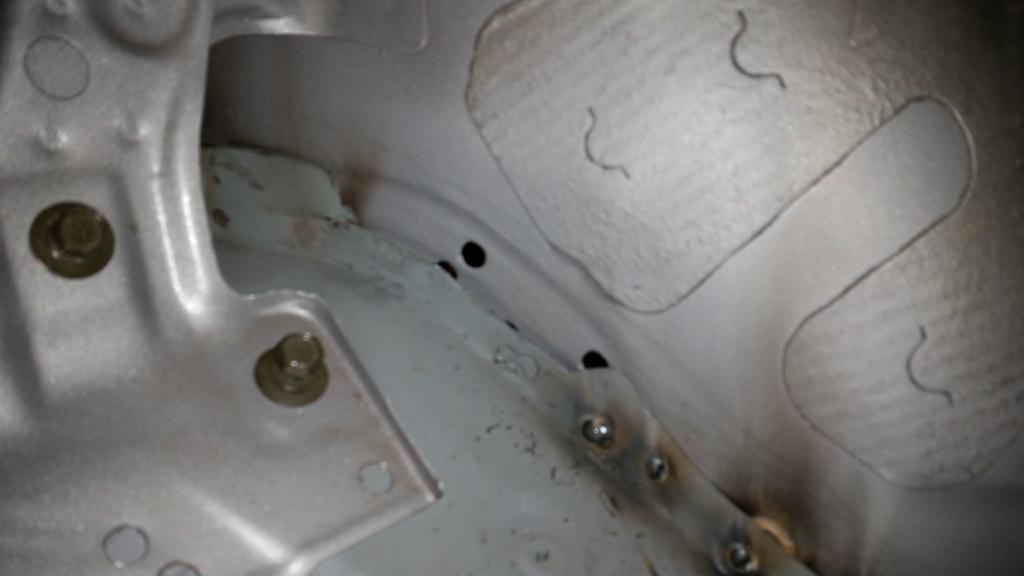
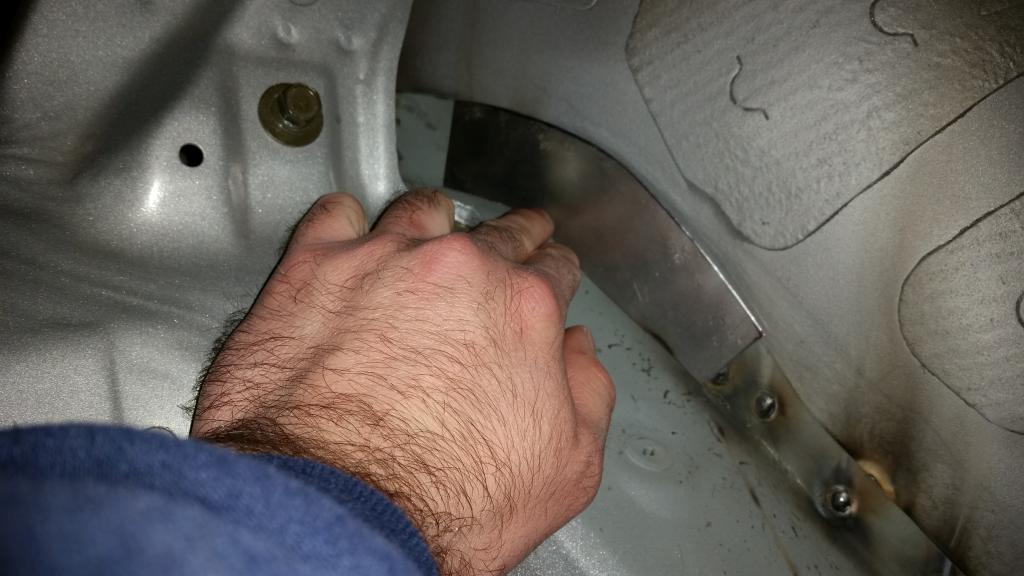
Here's a pic of the spot that was rusted off:
And here's the patch Dad made:
Here's how I finished the day: (just now lol)
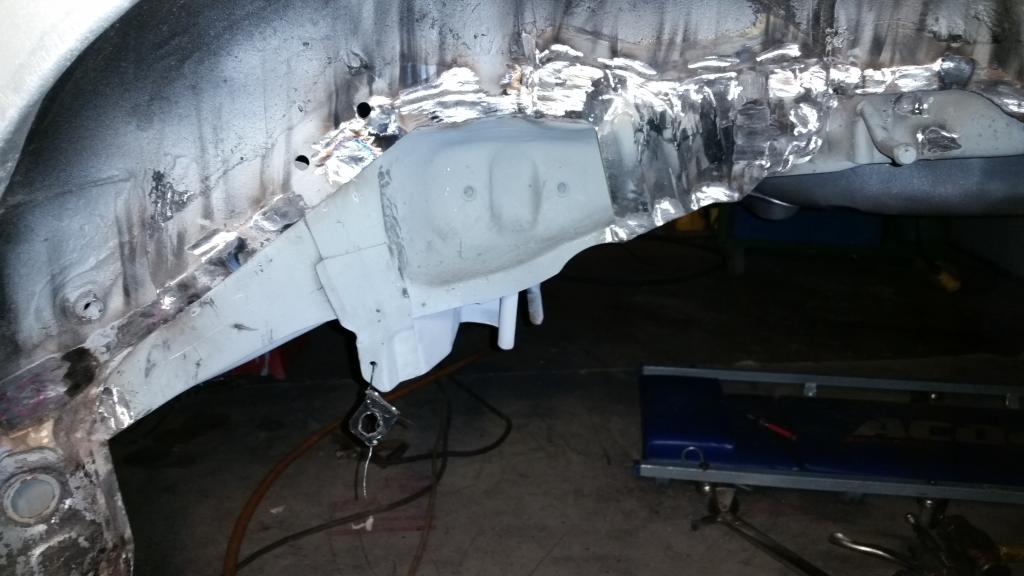
The Evo 4 RS floor brace is on and done! All that's left is to weld the patch in place, weld the brake line bracket on, and touch up
a few spots and the drivers side is finished! Both sides will be done Christmas weekend and hopefully the front and back will be welded
up as well. I think it'll be back on the ground by the end of January or the beginning of February! I think I'm going to paint the underside
and then coat it with epoxy based truck bed liner instead of undercoat. Should last longer and give better protection; but it'll be a bit
noisier. (It's already gonna be noisier so as Ken Block would say, #aintcare)
Here's a pic of the spot that was rusted off:

And here's the patch Dad made:

Here's how I finished the day: (just now lol)

The Evo 4 RS floor brace is on and done! All that's left is to weld the patch in place, weld the brake line bracket on, and touch up
a few spots and the drivers side is finished! Both sides will be done Christmas weekend and hopefully the front and back will be welded
up as well. I think it'll be back on the ground by the end of January or the beginning of February! I think I'm going to paint the underside
and then coat it with epoxy based truck bed liner instead of undercoat. Should last longer and give better protection; but it'll be a bit
noisier. (It's already gonna be noisier so as Ken Block would say, #aintcare
)
