
HOW TO: Make a distribution block for Gauge Installs/Radar Detectors/Anything else.


Thread Starter
Account Disabled
iTrader: (10)
Joined: Dec 2005
Posts: 2,185
Likes: 2
From: Cleveland, OH
For anyone interested in making one of these. This is what I created for my boost gauge and wideband install.
Thanks to: ZWingerRyRy
Installed:
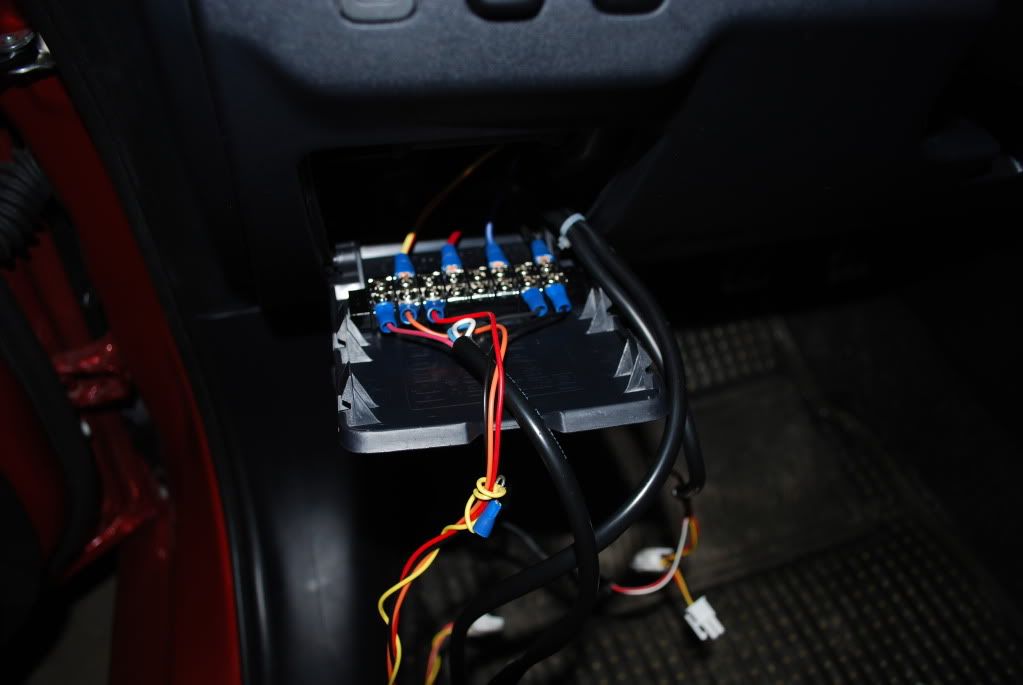
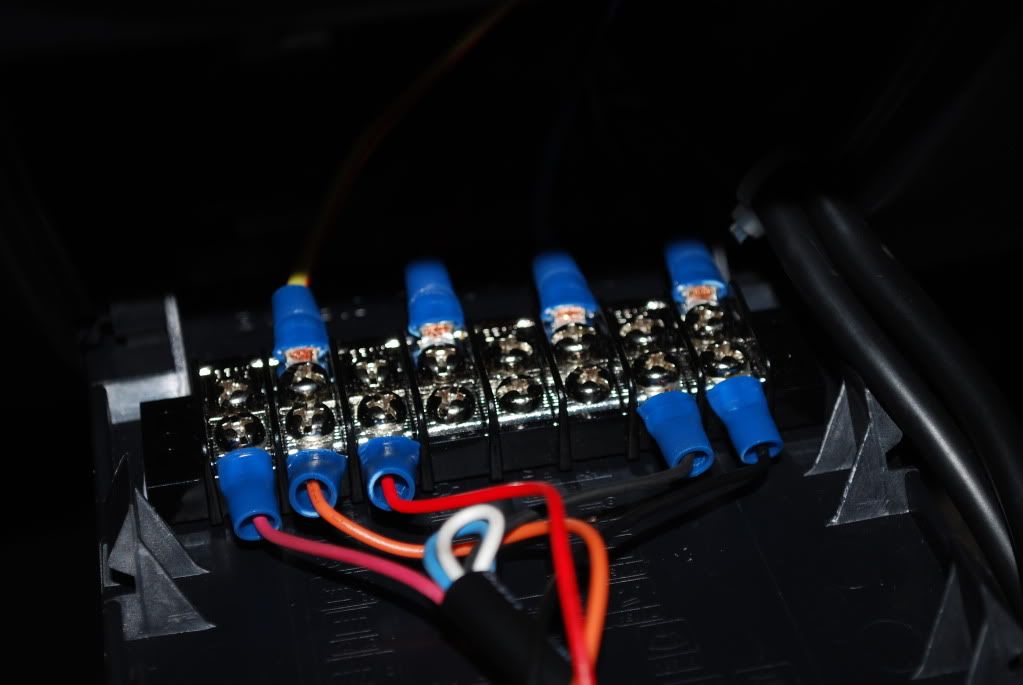
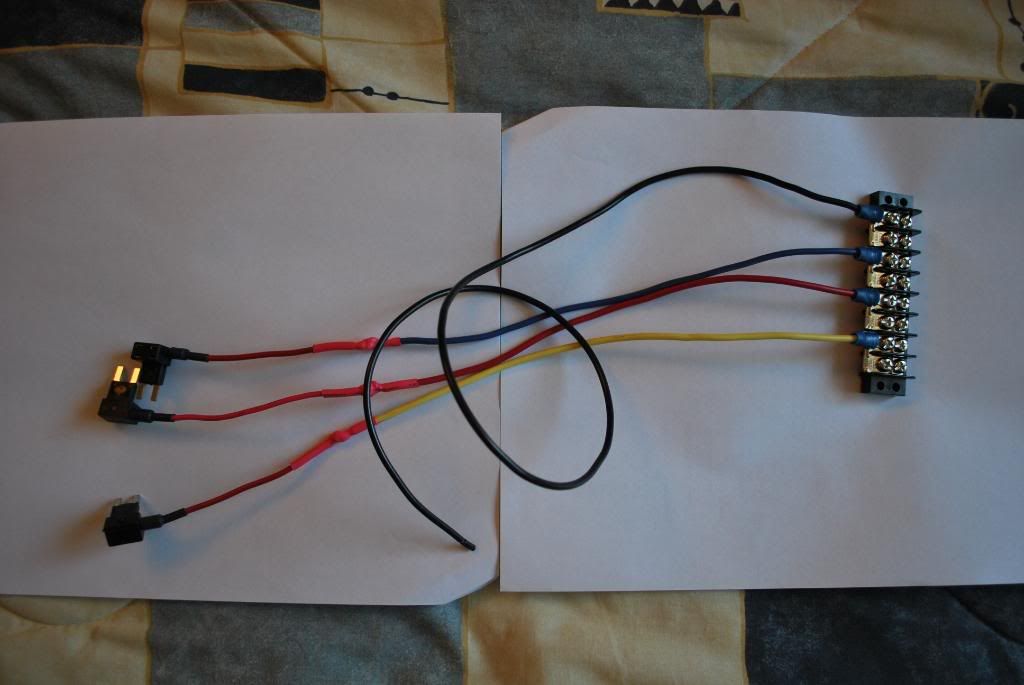
Fuse Block
Finished Product
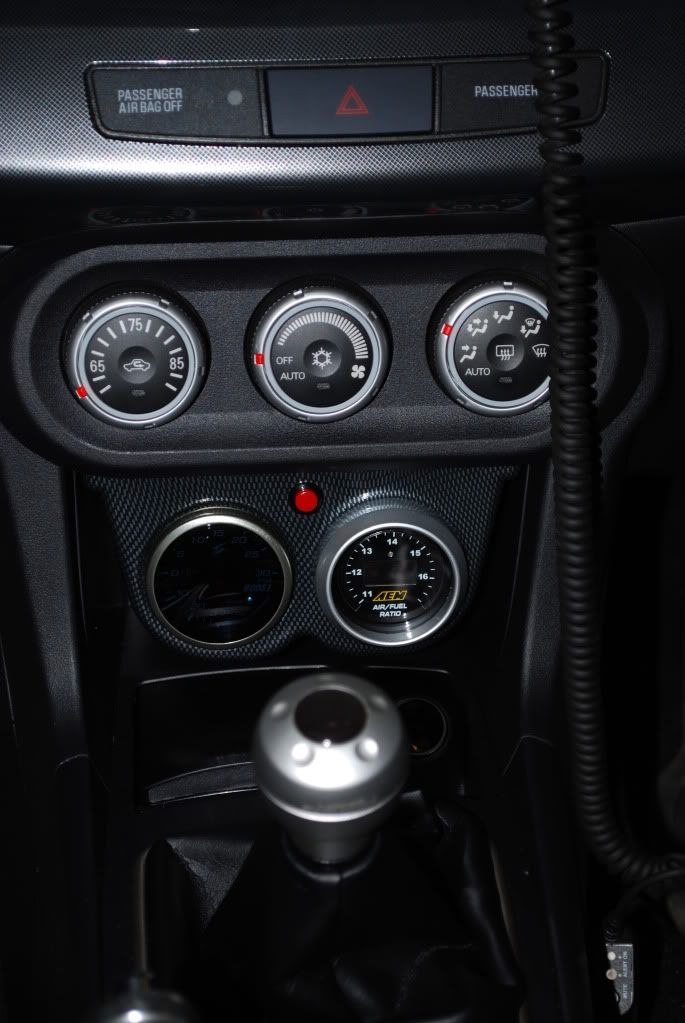
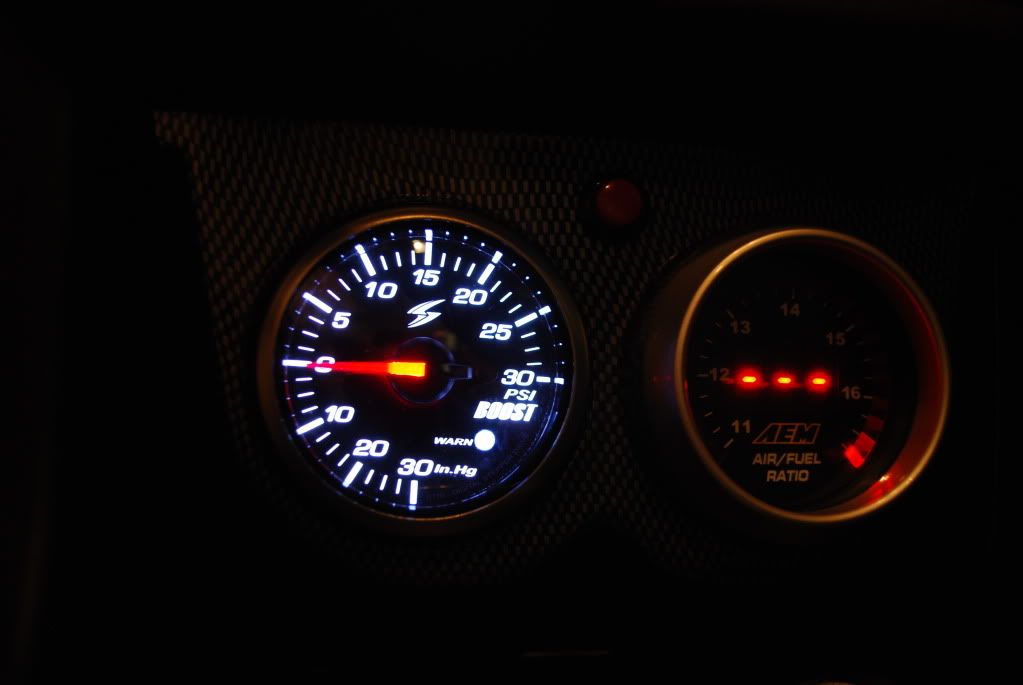
Now you can use the fuse taps to tape into these power sources. Now with your new distribution block you can connect many gauges.
You need the following parts.
From Radioshack:
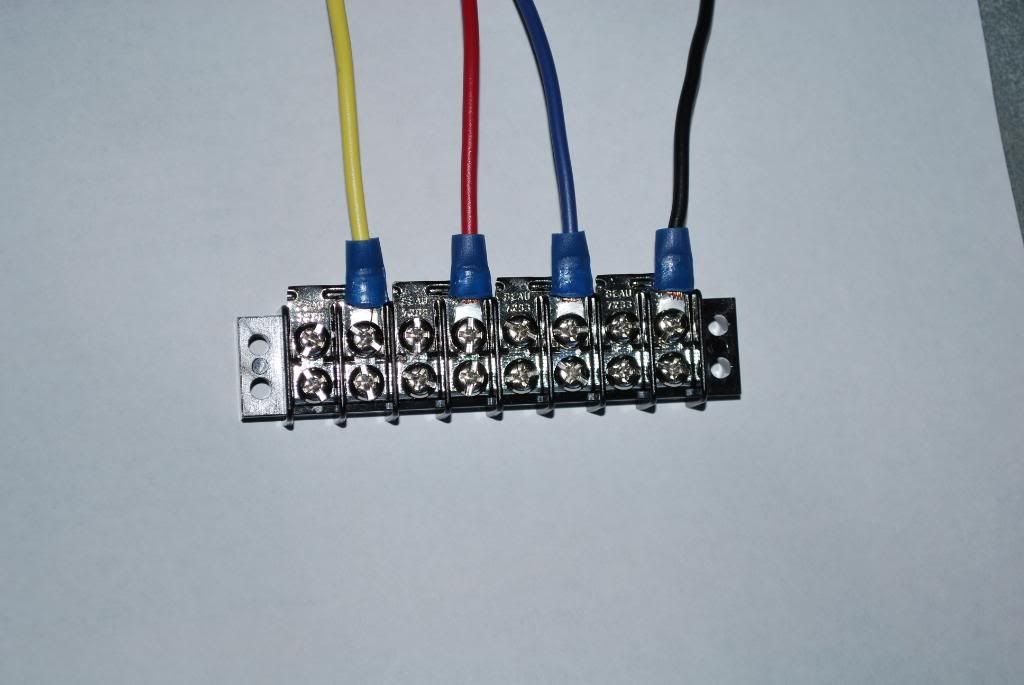
1-8 Prong Bridge
1- 16 Screw Distribution Block
4 Colors of 6"-12" of 14-18GA wire
AdvancedAuto Parts, Autozone, etc...
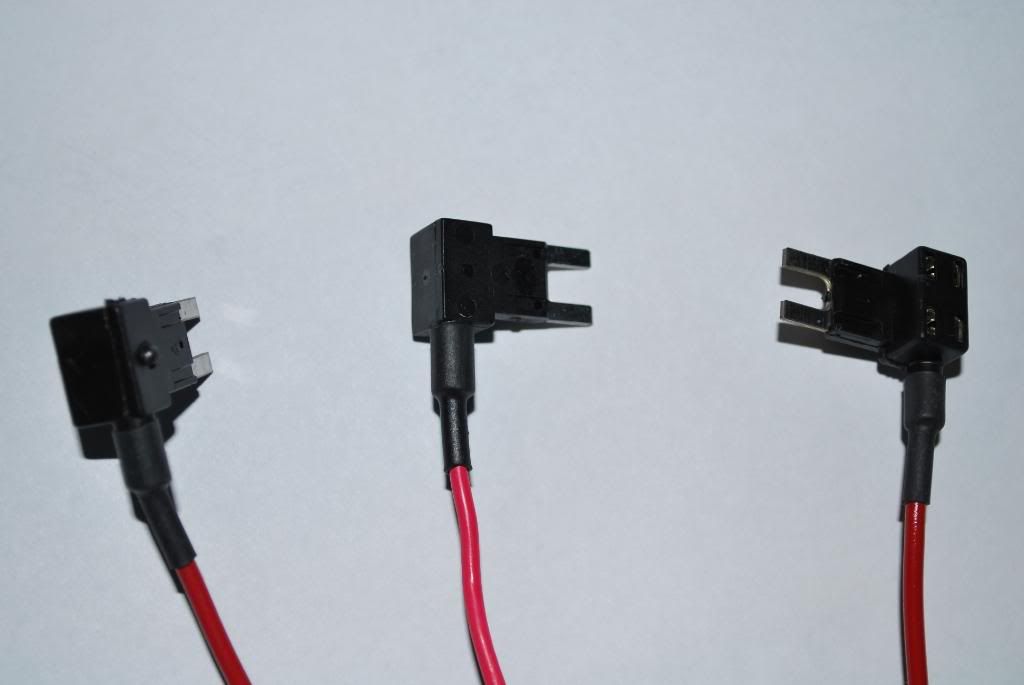
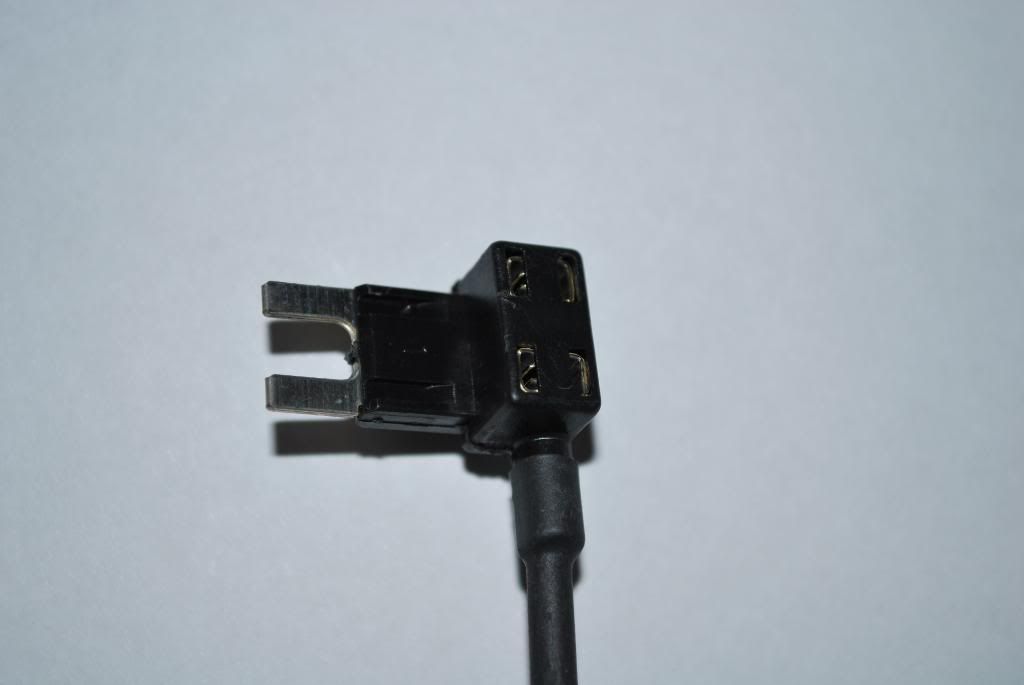
3- Bussman ATM fuse taps
???- Connectors to connect to distribution bridge
Tools
1x Crimp / Cutter
1x Solder Iron & Solder
Heatshrink
Lighter
Double Sided tape hold distribution block in place when mounted
1x Dremel with cutting wheel (cut the 8 prong distribution bridge in 2 prong sections)
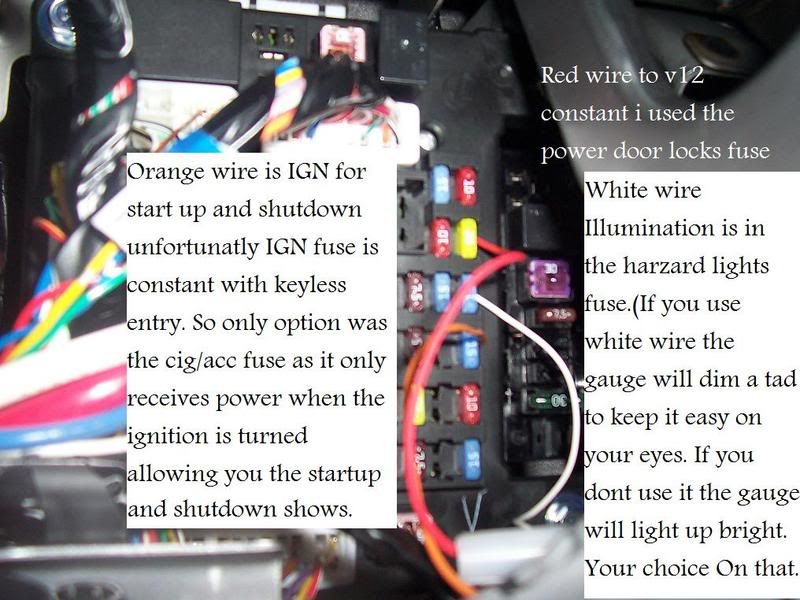
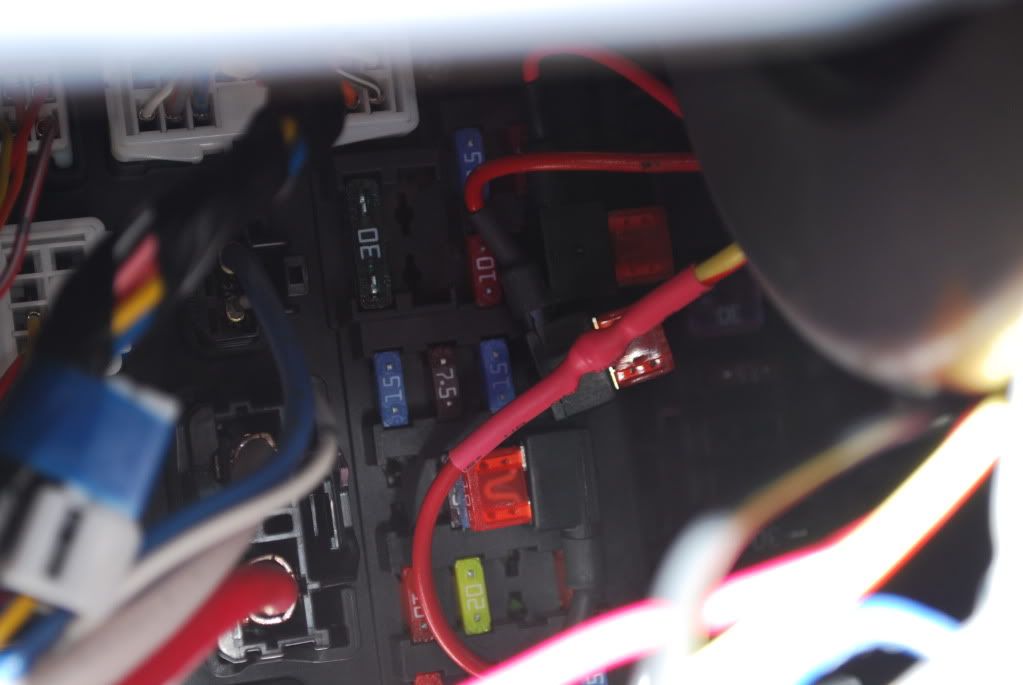
The key to wiring these into the fuse box is to use the proper fuses. I had issues initially when using this.
The two prong holes closest to the prong require your stock fuse, 15A or 20A. The top two prong holes require a 10A this is for your accessory, in my case boost and wideband gauges.
You must use a 10A fuse, I tired to use something like 15A and the gauges would not power on.
Thanks to: ZWingerRyRy
Installed:
Fuse Block
Finished Product
Now you can use the fuse taps to tape into these power sources. Now with your new distribution block you can connect many gauges.
You need the following parts.
From Radioshack:
1-8 Prong Bridge
1- 16 Screw Distribution Block
4 Colors of 6"-12" of 14-18GA wire
AdvancedAuto Parts, Autozone, etc...
3- Bussman ATM fuse taps
???- Connectors to connect to distribution bridge
Tools
1x Crimp / Cutter
1x Solder Iron & Solder
Heatshrink
Lighter
Double Sided tape hold distribution block in place when mounted
1x Dremel with cutting wheel (cut the 8 prong distribution bridge in 2 prong sections)
The key to wiring these into the fuse box is to use the proper fuses. I had issues initially when using this.
The two prong holes closest to the prong require your stock fuse, 15A or 20A. The top two prong holes require a 10A this is for your accessory, in my case boost and wideband gauges.
You must use a 10A fuse, I tired to use something like 15A and the gauges would not power on.
Last edited by Clipse3GT; Mar 29, 2010 at 07:11 PM.
Where did you mount it? I had this same idea, just not nearly as fleshed out. I personally think it'd be simpler, long term, to mount the entire block somewhere, hidden, in the cockpit, so we wouldn't have to be running power leads through the firewall from the gauges.
Nice diagrams and such though, thanks!
Nice diagrams and such though, thanks!
Thread Starter
Account Disabled
iTrader: (10)
Joined: Dec 2005
Posts: 2,185
Likes: 2
From: Cleveland, OH
Where did you mount it? I had this same idea, just not nearly as fleshed out. I personally think it'd be simpler, long term, to mount the entire block somewhere, hidden, in the cockpit, so we wouldn't have to be running power leads through the firewall from the gauges.
Nice diagrams and such though, thanks!
Nice diagrams and such though, thanks!

i had the same setup done. i post a few months ago some pictures. i found a realy confortable place to mont it inside the plastic acces door of the fuse box. it's easy to conect everything seated on the driver seat, no need to go under the panel everytime that i want to conect something.
becouse i'm using also the same fuse conectors i can tell you in advance that you will need to bend one of the cables 90 degrees were the cable meet the conector. all the recomended fuses to tap are so close that there is no space for the cable in the middle fuse (white cable).

becouse i'm using also the same fuse conectors i can tell you in advance that you will need to bend one of the cables 90 degrees were the cable meet the conector. all the recomended fuses to tap are so close that there is no space for the cable in the middle fuse (white cable).
Trending Topics

Newbie
Joined: Jul 2009
Posts: 29
Likes: 0
From: Dallas Tx
Im an electrical noob but correct me if im wrong please. The fuse taps will be on the fuse box with fuses on them and power for accessories(gauges, radar) would mount on the other screw for that fuse tap? This looks so much easier and neater than having to tap for power individually for each gauge.
Thread Starter
Account Disabled
iTrader: (10)
Joined: Dec 2005
Posts: 2,185
Likes: 2
From: Cleveland, OH
Im an electrical noob but correct me if im wrong please. The fuse taps will be on the fuse box with fuses on them and power for accessories(gauges, radar) would mount on the other screw for that fuse tap? This looks so much easier and neater than having to tap for power individually for each gauge.

Evolving Member
Joined: Aug 2009
Posts: 109
Likes: 1
From: Maryland
So, I started tackling all my "electrical installs" today. Should have checked the forums first as I now see. However, our ideas aren't that far off. I can't wait to see your install pics to see how close our ideas are...
Any who, I'm also using the ATC Fuse taps but (since I'm still a basic nub when it comes to electrical stuff) all I could find are the 10A taps... Is this what you are using or did you find some bigger ones? Should the 10A be fine for pretty much everything? I know my fuzz buster has a 2A/250V fuse in it and the cig lighter is a 15A fuse; does the 10A limited tap cause a prob? I know you can always drop Amps and be OK (rather than go bigger, ie run a 25A fuse in a 15A slot).
Any thoughts would be appreciated!
Last edited by Spazo; Sep 6, 2009 at 10:33 AM. Reason: corrected amperage on the fuzz buster
Thread Starter
Account Disabled
iTrader: (10)
Joined: Dec 2005
Posts: 2,185
Likes: 2
From: Cleveland, OH
I'll try to get some pictures tonight.
The key to wiring these into the fuse box is to use the proper fuses. I had issues initially when using this.
The two prong holes closest to the prong require your stock fuse, 15A or 20A. The top two prong holes require a 10A this is for your accessory, in my case boost and wideband gauges.
You must use a 10A fuse, I tired to use something like 15A and the gauges would not power on.
I will try to get pictures later tonight.
