
beastly 2.4 build

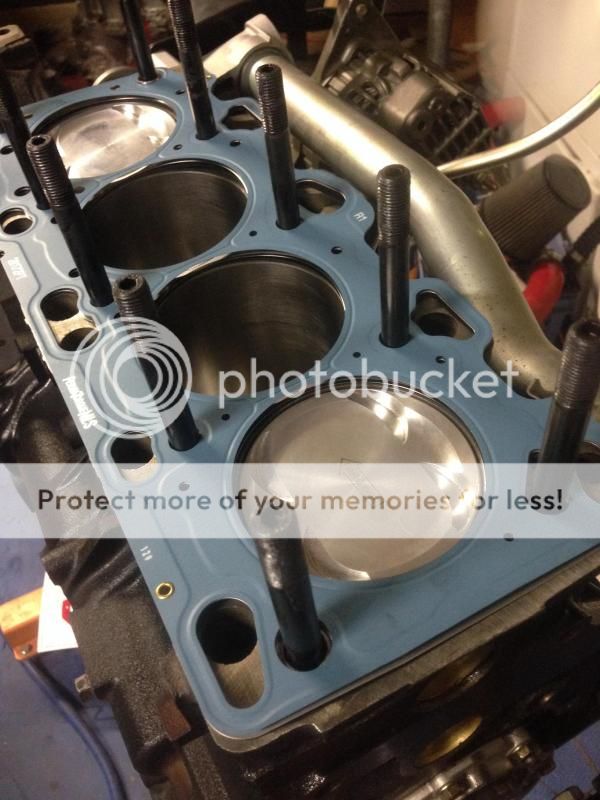
sorry i posted this update in a rush late last night just after i got done driving back from vegas. I left a lot out. Manley recommends a piston ring gap of .024 for medium boost )15-30psi) applications and .027 for high boost (30+ psi). Seems kinda high compared to wiseco piston rings but I've been searching and searching and that seems to be what everybody with these pistons is running. I will be running somewhere between 25psi and 40psi without oil squirters so I'm running a larger cylinder wall to piston gap and i would imagine that the increased gap size has to due with the increased heat expansion in the rings as well as the piston.
since I bought the pistons new but previously installed the rings were previously gapped to .025 on top and .027 on the bottom. I think that will be fine with my set-up so Im probably going to just keep the current rings.
since I bought the pistons new but previously installed the rings were previously gapped to .025 on top and .027 on the bottom. I think that will be fine with my set-up so Im probably going to just keep the current rings.
update....
got lots done in the last few days but have failed to continue posting updates..lol
anyways.. here goes...
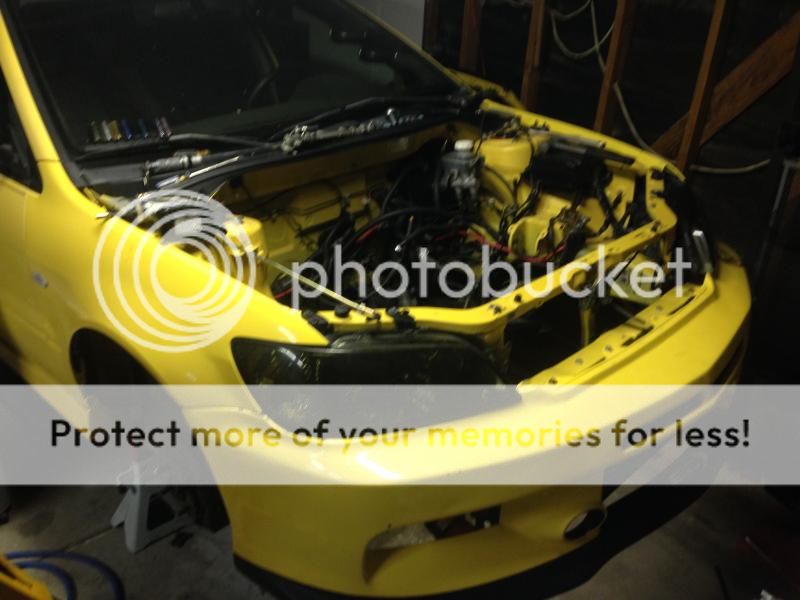
brought the car in and started prepping her for the heart transplant.
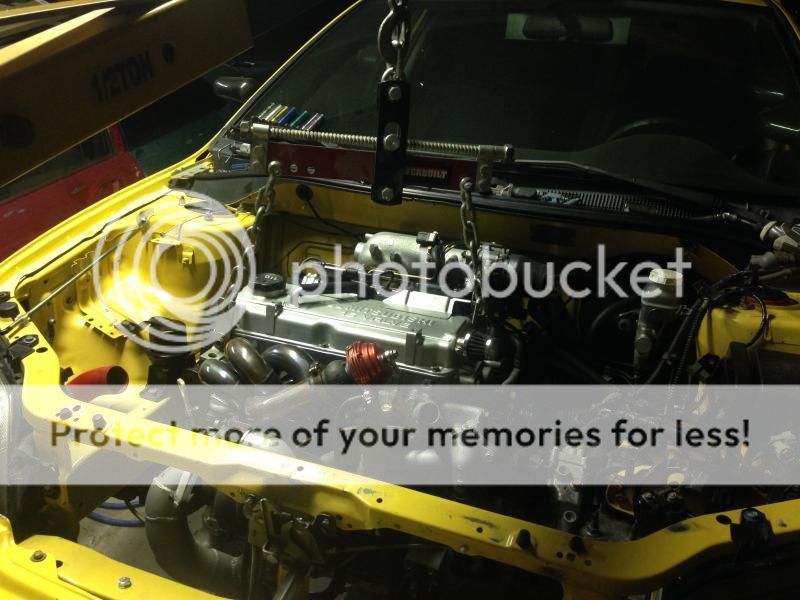
Dropped not pulled...

Now that thats out of the way, time to work more on the new heart...
New head studs arrived so i went and picked up a fel-pro permatorque mls head gasket and installed em.
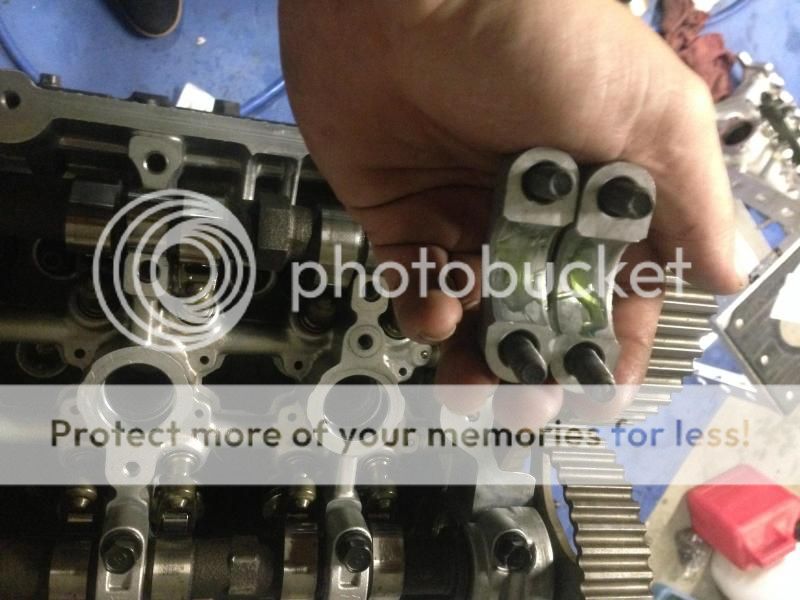
same day the head studs arrived, the cams, cam gears, intake and evo 399 maf arrived, so now timing can be set as well. I was told the cams are gsc s3's but there isn't really any marking on the cams. only the number 2 on one of them.. They seem to have pretty aggressive lift and duration on the lobes. got a super good deal on them so i guess Ill see how well they perform.
don't forget to lube your caps..
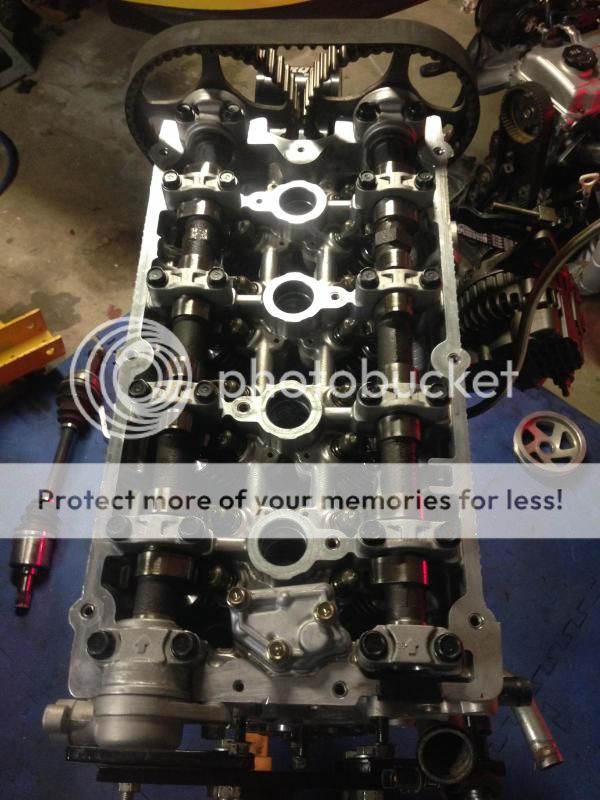
Also picked up the intake manifold, bolted on the timing cover, installed the crank pulley and new alternator/water pump belt. Also had to take a torch and a vise to my dip stick tube for a little friendly persuasion to get it where i want it.

night have to port out my injector holes on the intake manifold in order to get it to fit the fuel injector rubber grommets. not sure if the kia/huyndai injector grommets would be a direct fit or not. I know they would fit in the hole but not sure if the injectors i have will fit inside the grommets.
I was test fitting and evo intake manifold as well but it would take quite a bit more modification to make work. plus I like the look of the long runner manifold. not to mention its just a temporary manifold.
got lots done in the last few days but have failed to continue posting updates..lol
anyways.. here goes...
brought the car in and started prepping her for the heart transplant.

Dropped not pulled...


Now that thats out of the way, time to work more on the new heart...
New head studs arrived so i went and picked up a fel-pro permatorque mls head gasket and installed em.

same day the head studs arrived, the cams, cam gears, intake and evo 399 maf arrived, so now timing can be set as well. I was told the cams are gsc s3's but there isn't really any marking on the cams. only the number 2 on one of them.. They seem to have pretty aggressive lift and duration on the lobes. got a super good deal on them so i guess Ill see how well they perform.
don't forget to lube your caps..


Also picked up the intake manifold, bolted on the timing cover, installed the crank pulley and new alternator/water pump belt. Also had to take a torch and a vise to my dip stick tube for a little friendly persuasion to get it where i want it.

night have to port out my injector holes on the intake manifold in order to get it to fit the fuel injector rubber grommets. not sure if the kia/huyndai injector grommets would be a direct fit or not. I know they would fit in the hole but not sure if the injectors i have will fit inside the grommets.
I was test fitting and evo intake manifold as well but it would take quite a bit more modification to make work. plus I like the look of the long runner manifold. not to mention its just a temporary manifold.
You aren't wasting any time at all. What you going to do as far as turbo, manifold, and downpipe? You getting a shop to custom fab it or you getting one that's already made for the eclipse?
time is money! lol and the turbo setup doesn't have to be for an eclipse. can be for any 4g6x engine, but I really like a couple sheepey built manifolds and may end up picking up one of those. as far as turbo Im looking at a close to or comparable to a gt3582r. probably going to go with a custom down pipe and straight pipe exhaust.
nahh no need for creature comforts... haven't sported ac/ps for over 4 years now. my lady's car doesn't even have power steering..lol Im actually building an ej1 honda civic as well and i took the power steering rack & pinion out and swapped it for a manual rack & pinion. I actually feel like worse of a driver when I go back to a vehicle with power steering. Causes me to over correct too often because I'm used to a more responsive steering wheel.
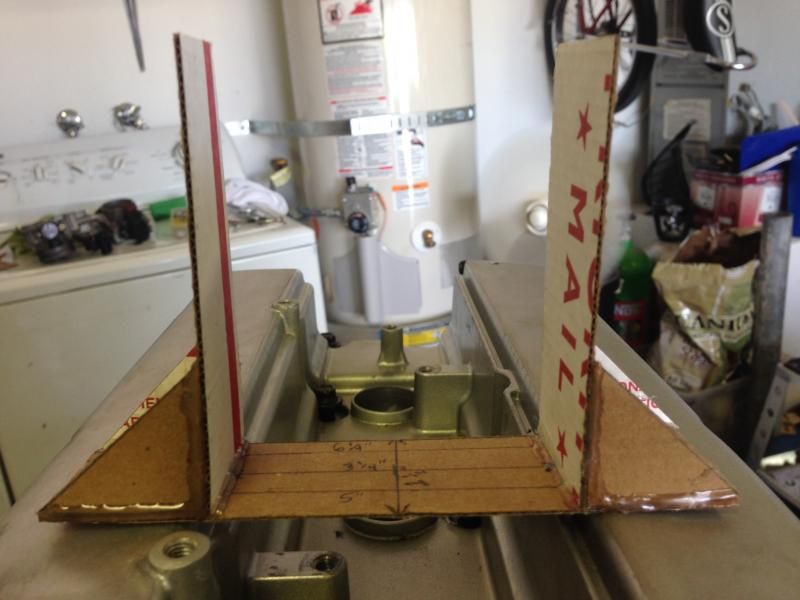
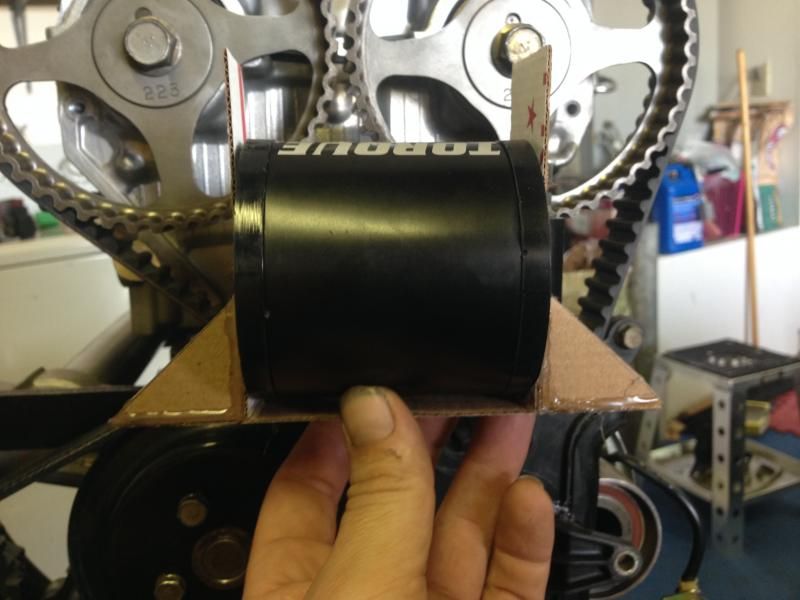
small update.. so i decided to make my custom motor mount bracket today out of card board and hot glue! permanent you ask? I hope not...lol so I mocked it up out of card board because this way I can just hand it to whom ever I decide to have fabricate it..
I thought I would post this because I know a lot of people get intimidated when they hear "custom motor mount", and I feel that its a lot less work than everybody thinks.(took me about an hour to measure, cut and glue together. can't imaging it taking much longer than that with metal) Not to mention that nobody has ever posted the dimensions for this particular custom mount before.
That being said, peep this....
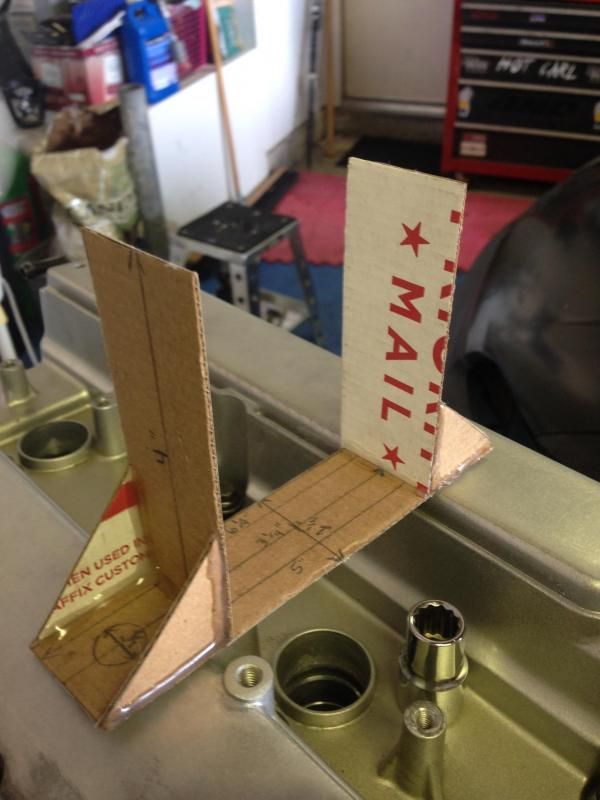
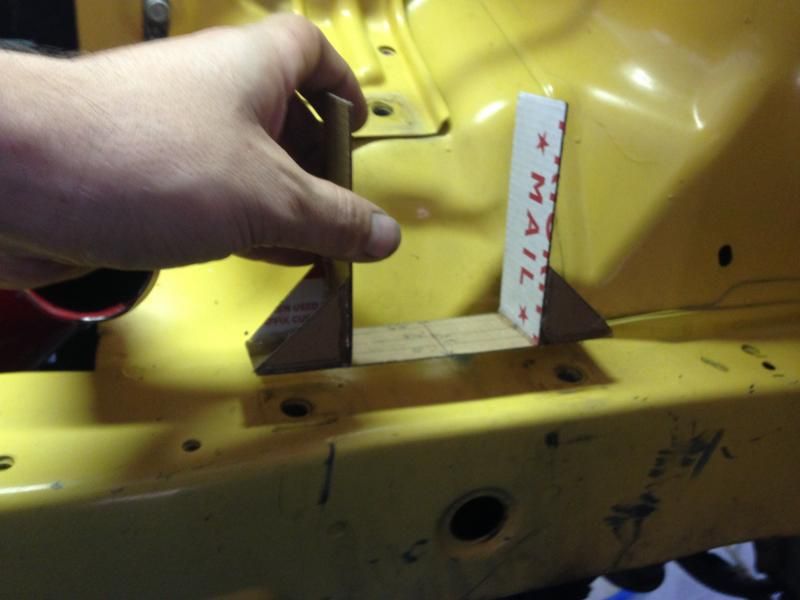
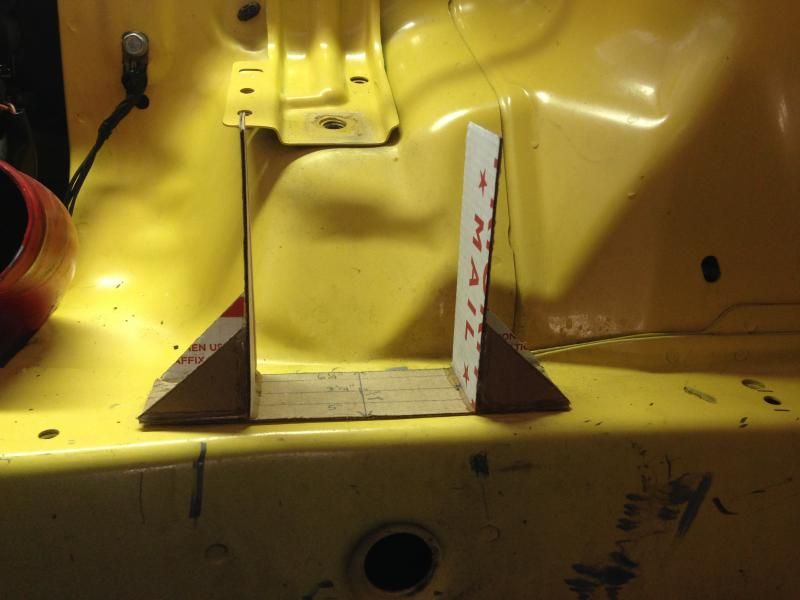
now I left the uprights a little long at 4" and did not mark spots for holes to be drilled out yet because theres no way of knowing exactly how high the passenger side motor mount is going to sit until the engine is actually in place in the engine bay. it can then be cut to size and drilled by me once everything is in place. If you make the risers too short and pre drill the riser holes you may very likely screw yourself in the end and have to get another motor mount bracket made.
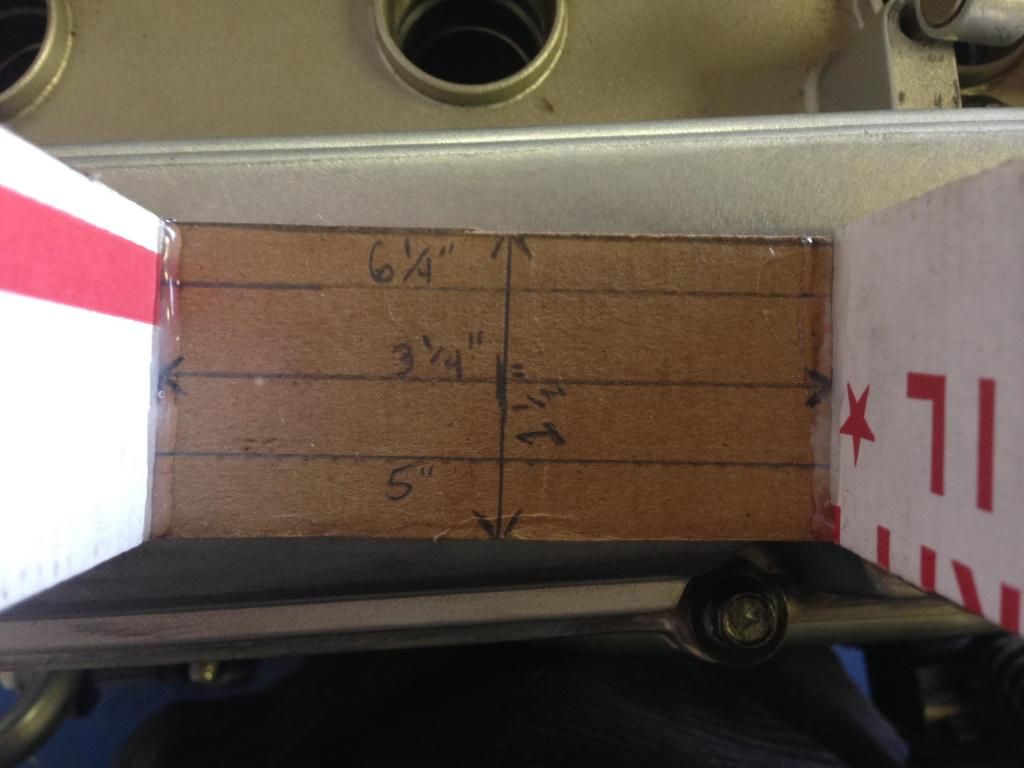
Dimensions:
All bracket widths---- 1 1/2"
length from end to end---- 6 1/4"
length from center line of bolt hole to center line of bolt hole---- 5"
bolt hole diameter---- 1/2"
length between risers---- 3 1/4"
riser hight----4" (can be cut down once desired engine hight is acquired)
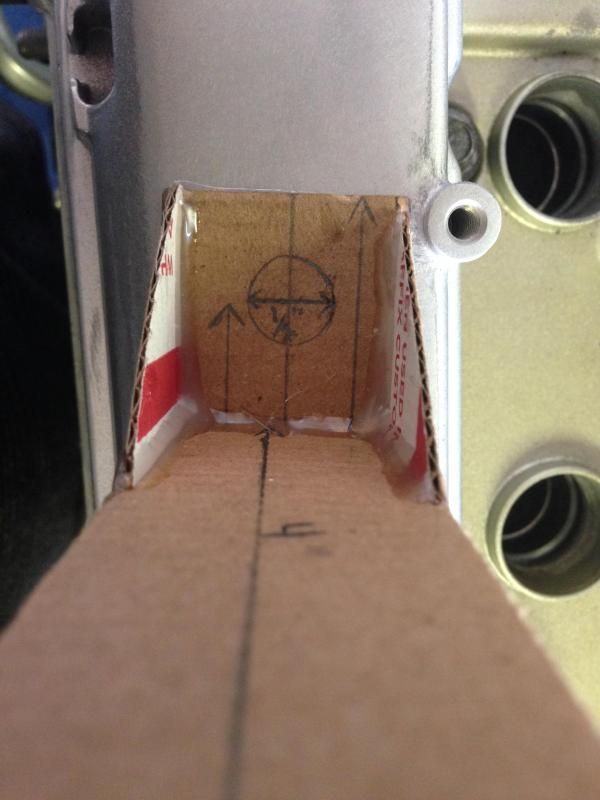
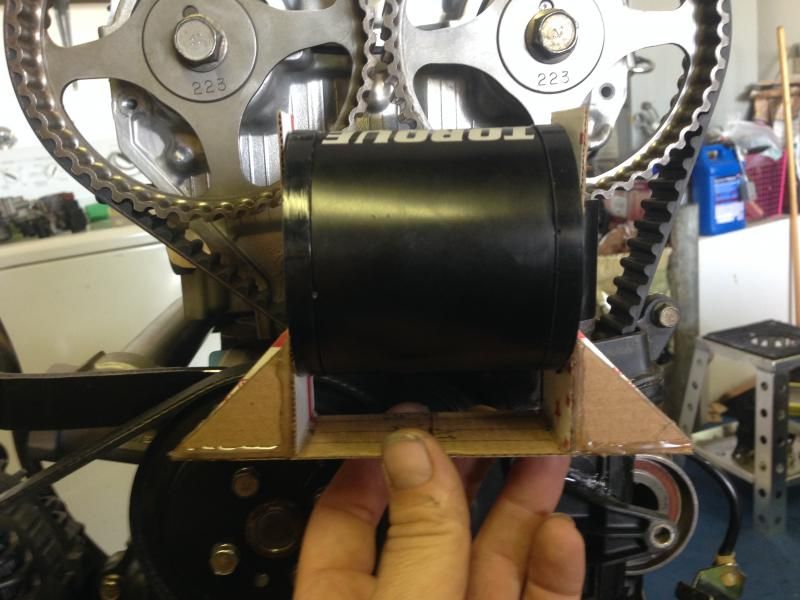
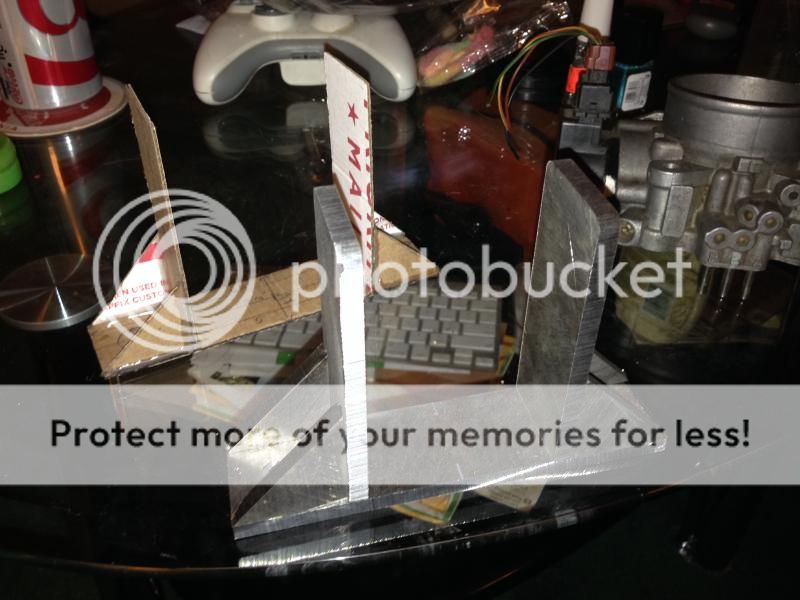
Now obviously this is just a visual aid/reference for the fabricator and not an actual motor mount. The actually motor mount will be made out of steel or thick gauge aluminum.
I hope this is useful to anyone considering doing this swap, I know it would have been for me.
I thought I would post this because I know a lot of people get intimidated when they hear "custom motor mount", and I feel that its a lot less work than everybody thinks.(took me about an hour to measure, cut and glue together. can't imaging it taking much longer than that with metal) Not to mention that nobody has ever posted the dimensions for this particular custom mount before.
That being said, peep this....


now I left the uprights a little long at 4" and did not mark spots for holes to be drilled out yet because theres no way of knowing exactly how high the passenger side motor mount is going to sit until the engine is actually in place in the engine bay. it can then be cut to size and drilled by me once everything is in place. If you make the risers too short and pre drill the riser holes you may very likely screw yourself in the end and have to get another motor mount bracket made.


Dimensions:
All bracket widths---- 1 1/2"
length from end to end---- 6 1/4"
length from center line of bolt hole to center line of bolt hole---- 5"
bolt hole diameter---- 1/2"
length between risers---- 3 1/4"
riser hight----4" (can be cut down once desired engine hight is acquired)


Now obviously this is just a visual aid/reference for the fabricator and not an actual motor mount. The actually motor mount will be made out of steel or thick gauge aluminum.
I hope this is useful to anyone considering doing this swap, I know it would have been for me.
Update..
Got the metal for my motor mount bracket today from a buddy that works at a local aviation fab shop. I didn't expect him to do all the measurements and cuts for me, I just asked for the metal! lol good guy! I guess thats what happens when you provide someone with such an accurate cardboard template..lol I just need to shave the gussets down about an eighth of an inch each to make up for the thick *** metal.
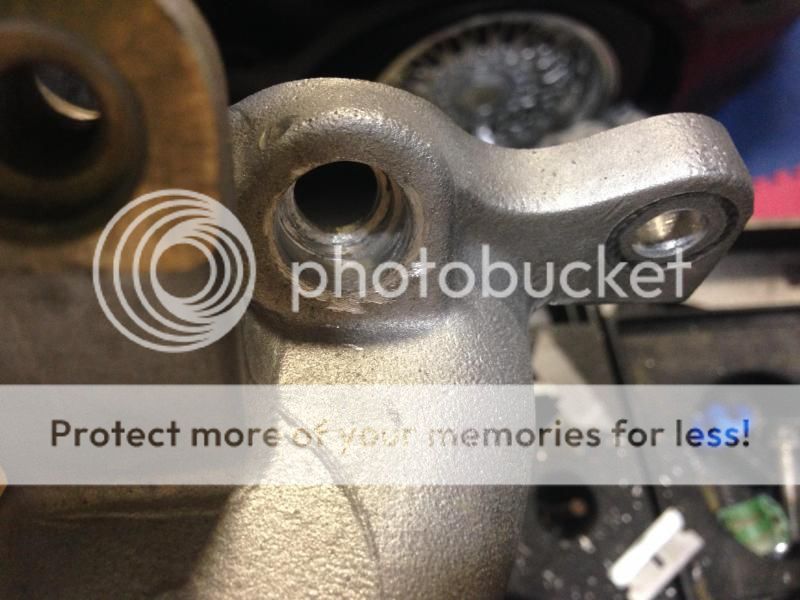
then I decided to go ahead and bore out my fuel injector holes to accommodate for the bigger injector grommets. Turned out nice, but took forever as well as caused some extra headache when I accidentally broke the passenger side window in my civic trying to get my stupid crescent wrench to let go of a tool i was using. I F@C#ing hate those things with a passion but its the only wrench I could turn the tool with.
before
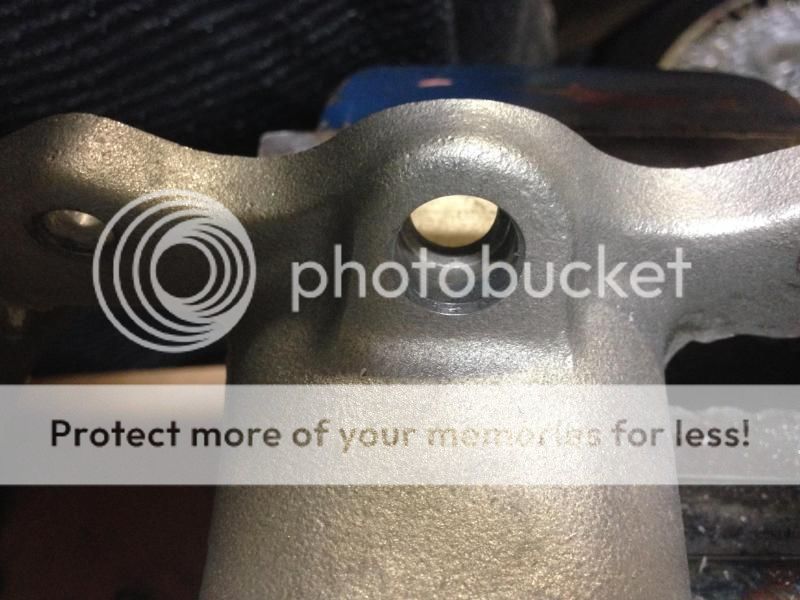
after
This picture is before I polished it up.. just a rough shot of the difference in diameter.
with everything installed.
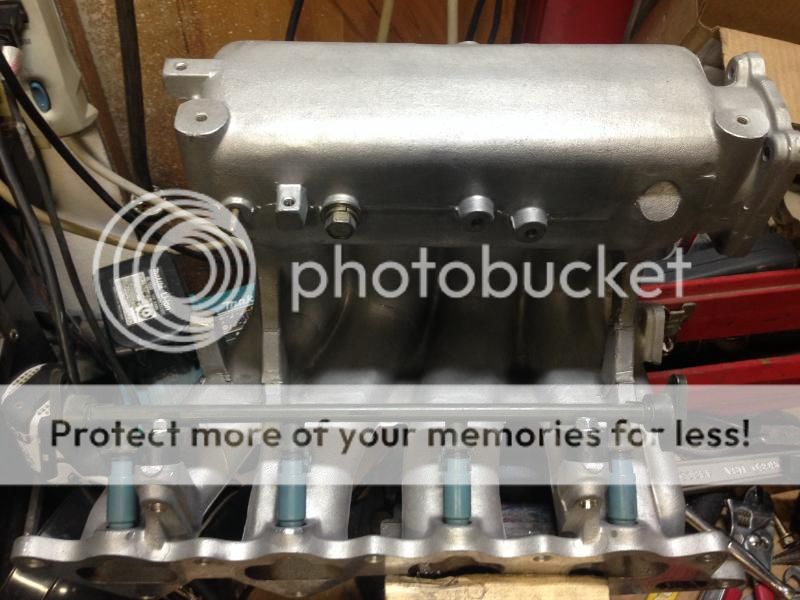
Also, to make the fuel line fit to the fuel rail I had to drill out the bolt holes on the fuel line. they would not screw in because they were a hair off alignment from the threaded holes in the fuel rail. easy fix. you can kinda see that its off a little in the picture.
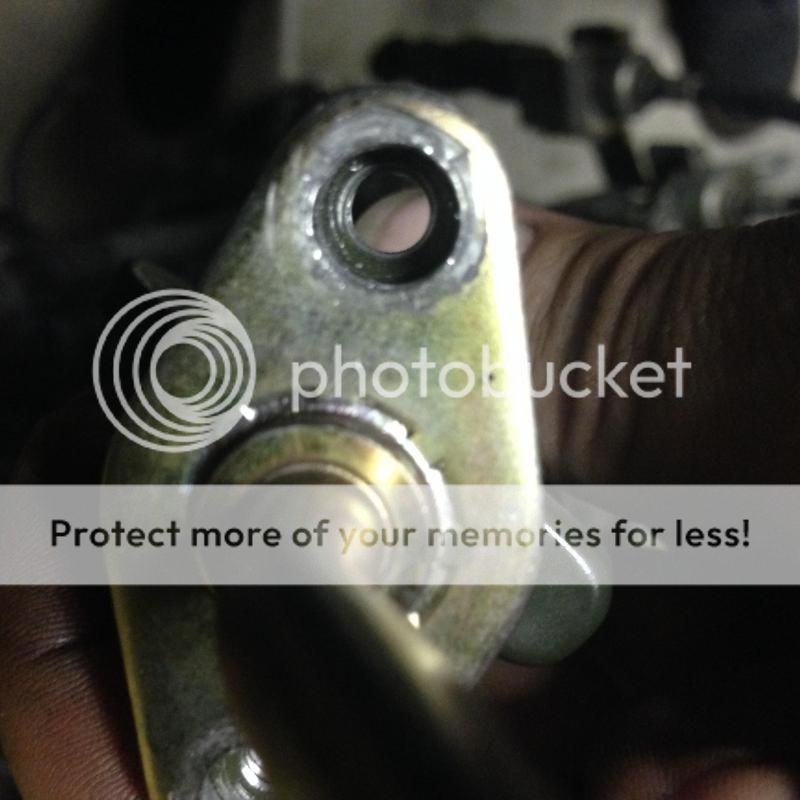

Got the metal for my motor mount bracket today from a buddy that works at a local aviation fab shop. I didn't expect him to do all the measurements and cuts for me, I just asked for the metal! lol good guy! I guess thats what happens when you provide someone with such an accurate cardboard template..lol I just need to shave the gussets down about an eighth of an inch each to make up for the thick *** metal.

then I decided to go ahead and bore out my fuel injector holes to accommodate for the bigger injector grommets. Turned out nice, but took forever as well as caused some extra headache when I accidentally broke the passenger side window in my civic trying to get my stupid crescent wrench to let go of a tool i was using. I F@C#ing hate those things with a passion but its the only wrench I could turn the tool with.
before

after
This picture is before I polished it up.. just a rough shot of the difference in diameter.

with everything installed.

Also, to make the fuel line fit to the fuel rail I had to drill out the bolt holes on the fuel line. they would not screw in because they were a hair off alignment from the threaded holes in the fuel rail. easy fix. you can kinda see that its off a little in the picture.


Newbie
Joined: Aug 2011
Posts: 14
Likes: 0
From: Fort lauderdale
You sir are amazing for providing the info on the custom motor mount. When i start my swap it will make life so much easier. I wanna b just like you when i grow up lol this is an amazing build and i get excited everytime i see an update. And thus last one was more then i could ever expect. Props to you man you are leading the way for lancers
You sir are amazing for providing the info on the custom motor mount. When i start my swap it will make life so much easier. I wanna b just like you when i grow up lol this is an amazing build and i get excited everytime i see an update. And thus last one was more then i could ever expect. Props to you man you are leading the way for lancers
I guess i just never agreed with all the talk of the lancers being bad platforms to start from. If honduhs can be fast, fwd lancers can be fast too. lol

Newbie
Joined: Dec 2013
Posts: 11
Likes: 0
From: Nevada
Much respect. There aren't enough people like you around. And kid I know the feeling of having that mechanical aspiration and the appreciation for the lines of a car. The first car I bought for me was my 03 oz and as soon as they released the evolution X my heart fluttered so just keep at it, work hard some day you'll earn ur lancer and I'll get my X. Just follow your heart.