Notices
Evo Engine / Turbo / Drivetrain Everything from engine management to the best clutch and flywheel.

DIY CUSTOM Battery Relocation!

Thread Tools
 
Search this Thread
 
Old Apr 14, 2012 | 01:57 PM
  #16  
TommiM's Avatar
Evolved Member
iTrader: (19)
 
Joined: Apr 2009
Posts: 3,205
Likes: 2
From: SoCal
Originally Posted by Pirana
Def need a circuit breaker in-line, its just for safety. They are cheap, around $25 for piece of mind.

I did mine, but I used a ground stud to make the connection on the OEM +12v connector.

Vic


Nice setup. I did something similar but I put mine near the firewall.


Last edited by TommiM; Apr 14, 2012 at 01:59 PM.
Reply
Old Apr 14, 2012 | 11:02 PM
  #17  
twnty100drummer's Avatar
Newbie
15 Year Member
iTrader: (4)
 
Joined: Feb 2010
Posts: 41
Likes: 0
From: IL
Originally Posted by Pirana
Def need a circuit breaker in-line, its just for safety. They are cheap, around $25 for piece of mind.

I did mine, but I used a ground stud to make the connection on the OEM +12v connector.

Vic

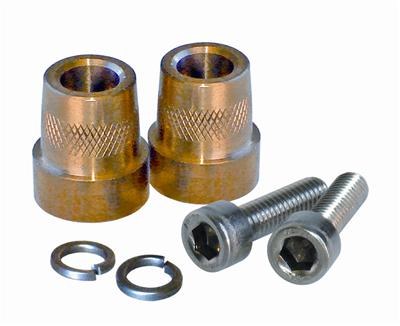
I like that setup! What did you use to mount it on the ground stud? (the bracket and black piece) Mine is just electrical taped in a ball and tucked...ghetto style.
Reply
Old Jun 17, 2012 | 07:17 AM
  #18  
kaonashi's Avatar
Evolved Member
iTrader: (34)
 
Joined: Apr 2006
Posts: 1,748
Likes: 2
From: Port Arthur, TX
PERFECT couldn't be easier.!!!

Name:  IMAG0261.jpg
Views: 0
Size:  39.9 KB

Name:  IMAG0262.jpg
Views: 0
Size:  90.4 KB

Now waiting for New Upper/Lower & get my TiAl setup back in
Reply
Old Jun 17, 2012 | 07:51 AM
  #19  
foxbear2277's Avatar
Evolved Member
iTrader: (3)
 
Joined: Jul 2009
Posts: 700
Likes: 0
From: canada
Originally Posted by TommiM
Nice setup. I did something similar but I put mine near the firewall.


Still havent permanetly mounted my cables under the hood because I have been trying to think of a cleaner way to mount it... This looks great, much better than by the fuse box like what I have now... I will be looking into mounting mine against the firewall now, thanks
Reply
Old Jun 17, 2012 | 08:05 AM
  #20  
kaonashi's Avatar
Evolved Member
iTrader: (34)
 
Joined: Apr 2006
Posts: 1,748
Likes: 2
From: Port Arthur, TX
Yeah I zip tied Mine in a bundle behind the I/C piping about 3" from any metal & stuck the plastic cap back on it. After I do my EGR delete this weekend Ill try to find a nice spot hidden.
Reply
Old Jun 17, 2012 | 08:19 AM
  #21  
foxbear2277's Avatar
Evolved Member
iTrader: (3)
 
Joined: Jul 2009
Posts: 700
Likes: 0
From: canada
Originally Posted by kaonashi
Yeah I zip tied Mine in a bundle behind the I/C piping about 3" from any metal & stuck the plastic cap back on it. After I do my EGR delete this weekend Ill try to find a nice spot hidden.
LMAO better than me.. I left lots of extra 0 gauge battery cable under hood and wrapped up my power distribustion connector in a rag for the time being


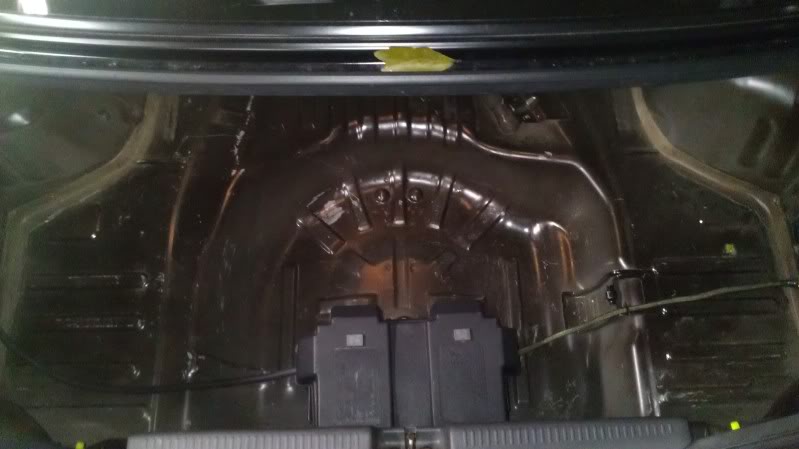
I also see that most of you guys used the stock terminal/b+ junction under the hood... I changed mine... hard to see past the nest but its right by the ts trans mount..


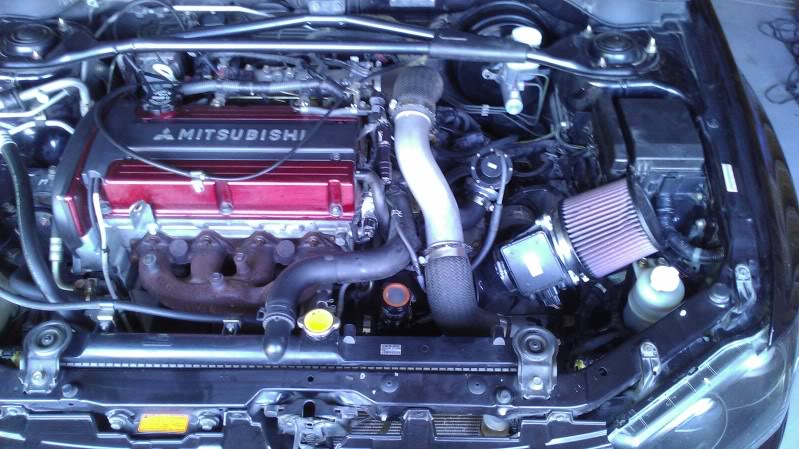
When I mount it to the fire wall, I may have to mount it on its side due to wires comming out the top and bottom... not to mention hobb switch and cdi box power supply mounted on the side aswell... dammit... so many power wires under the hood lol
Reply
Old Jun 17, 2012 | 11:09 AM
  #22  
TommiM's Avatar
Evolved Member
iTrader: (19)
 
Joined: Apr 2009
Posts: 3,205
Likes: 2
From: SoCal
Originally Posted by foxbear2277
Still havent permanetly mounted my cables under the hood because I have been trying to think of a cleaner way to mount it... This looks great, much better than by the fuse box like what I have now... I will be looking into mounting mine against the firewall now, thanks
Thanks. Its still a work in progress. I want to get a cover for it. I also need to make sure it clears everything like the vac booster line, intake manifold, etc.

The nice thing about relocating it here was that I was able to clean up alot of the wiring. By rerouting it to this part of the firewall I was able to shorten alot of wires that are normally redundantely snaked around to extend in the oem location. I shortened lengths and used larger gauge wiring. Win win imo.
Reply
Old Jun 17, 2012 | 11:44 AM
  #23  
kaonashi's Avatar
Evolved Member
iTrader: (34)
 
Joined: Apr 2006
Posts: 1,748
Likes: 2
From: Port Arthur, TX
Originally Posted by TommiM
Thanks. Its still a work in progress. I want to get a cover for it. I also need to make sure it clears everything like the vac booster line, intake manifold, etc.

The nice thing about relocating it here was that I was able to clean up alot of the wiring. By rerouting it to this part of the firewall I was able to shorten alot of wires that are normally redundantely snaked around to extend in the oem location. I shortened lengths and used larger gauge wiring. Win win imo.
Really glad I found this forum Toxic fab wanted 300+ when it cost me 32$ & less then 2 hours
Reply
Old Jun 17, 2012 | 12:39 PM
  #24  
mcm308's Avatar
Evolving Member
15 Year Member
iTrader: (13)
 
Joined: May 2010
Posts: 282
Likes: 3
From: Sayreville,NJ
Originally Posted by foxbear2277
Still havent permanetly mounted my cables under the hood because I have been trying to think of a cleaner way to mount it... This looks great, much better than by the fuse box like what I have now... I will be looking into mounting mine against the firewall now, thanks

I plan on using an audio fuse block in the engine compartment to connect all the cables with fuses and get rid of that factory top mount fuse thingy..
Reply
Old Jun 17, 2012 | 01:51 PM
  #25  
240Z TwinTurbo's Avatar
Evolved Member
15 Year Member
Photogenic
Liked
Loved
iTrader: (25)
 
Joined: Jun 2006
Posts: 2,810
Likes: 329
From: Charlotte, NC
From Summit:


I just drilled/taped the terminal so it screwed onto the isolator.


Reply
Old Jun 18, 2012 | 05:50 AM
  #26  
PatricksEvilEvo's Avatar
Evolved Member
iTrader: (12)
 
Joined: Oct 2010
Posts: 871
Likes: 0
From: Mooresville NC
Why don't you guys use the factory positive and negative mounting, leave everything alone just simply switch the cables for longer ones and run them to the back?
Reply
Old Jun 18, 2012 | 09:21 AM
  #27  
sabrinaEvo's Avatar
Evolving Member
iTrader: (2)
 
Joined: Jun 2011
Posts: 138
Likes: 1
From: San Jose
Great DIY and write up!
Reply
Old Jun 18, 2012 | 09:29 AM
  #28  
n2oiroc's Avatar
Evolved Member
iTrader: (33)
 
Joined: Jul 2009
Posts: 3,180
Likes: 5
From: milwaukee, wi
anyone know what the black box thing is all about? it looks like fusible links in it, right?
Reply
Old Jun 18, 2012 | 11:20 AM
  #29  
kaonashi's Avatar
Evolved Member
iTrader: (34)
 
Joined: Apr 2006
Posts: 1,748
Likes: 2
From: Port Arthur, TX
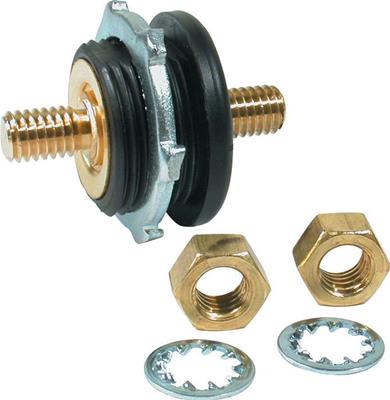
I Took apart the Positive terminal & attached the new copper ring end to it. the negative terminal was used as just another ground. Mine is 100% no hack n slash everything looks pretty!
Reply
Old Jun 18, 2012 | 12:18 PM
  #30  
TommiM's Avatar
Evolved Member
iTrader: (19)
 
Joined: Apr 2009
Posts: 3,205
Likes: 2
From: SoCal
Originally Posted by PatricksEvilEvo
Why don't you guys use the factory positive and negative mounting, leave everything alone just simply switch the cables for longer ones and run them to the back?
I did mine like this because I am cleaning up the engine bay wiring. I was able to reroute all the loomed harness wires away from the shifter cables. The only wiring I have on the trans is the one for the starter, and a ground iirc.
Reply


All times are GMT -7. The time now is 09:59 PM.