
DIY CUSTOM Battery Relocation!

Thread Starter
Evolved Member
iTrader: (23)
Joined: Mar 2007
Posts: 1,515
Likes: 1
From: Madison, WI
DIY CUSTOM Battery Relocation!
So on my day off I got bored and decided to make some space for my custom UICP...
Just wanted to document the change I did to my car...I will post a couple pics later...mainly a before and after picture...
Also wanted to share how cheap this mod is to do!
Supplies (EVERYTHING was bought from the local parts store O'Reilly Auto Parts):
Marine Battery Box ($12.99)

Battery cable 2 Gauge - I bought 15ft. of it but wish I had at least another foot...I made it work...but I had to be stingy with the cable...lol the 15ft I had was enough to make the positive connection and a ground cable in the trunk. ($2.25 per foot)
Battery Terminals 2 @ ($3.19)

Copper Connector Ring for 2 Gauge Wire ($2.99)

Random nuts and bolts/screws and zipties.
Step 1. Disconnect and pull the battery out of the car (10mm)
Step 2. Pull battery tray (12mm and 10mm)
Step 3. Run the whole length of cable leaving 2 feet of extra cable in your trunk.
I opted to run the positive connection underneath the car following the fuel and brake lines.
Step 4. Mount the battery box in the trunk. Your choice of where you want to mount it, I chose the Driver side, to the left of the spare wheel well. I used 4 nuts and bolts to hold the box to the trunk.
Step 5. Cut a section of the 2 feet you left in the trunk for a ground cable. Strip, and Crimp one connector on each of the wires. Then Strip and mount the terminals on the other end of the wire to lead to the battery. (Note in order to crimp those BEASTLY 2 Gauge Ring Connectors you should use a Vice!)
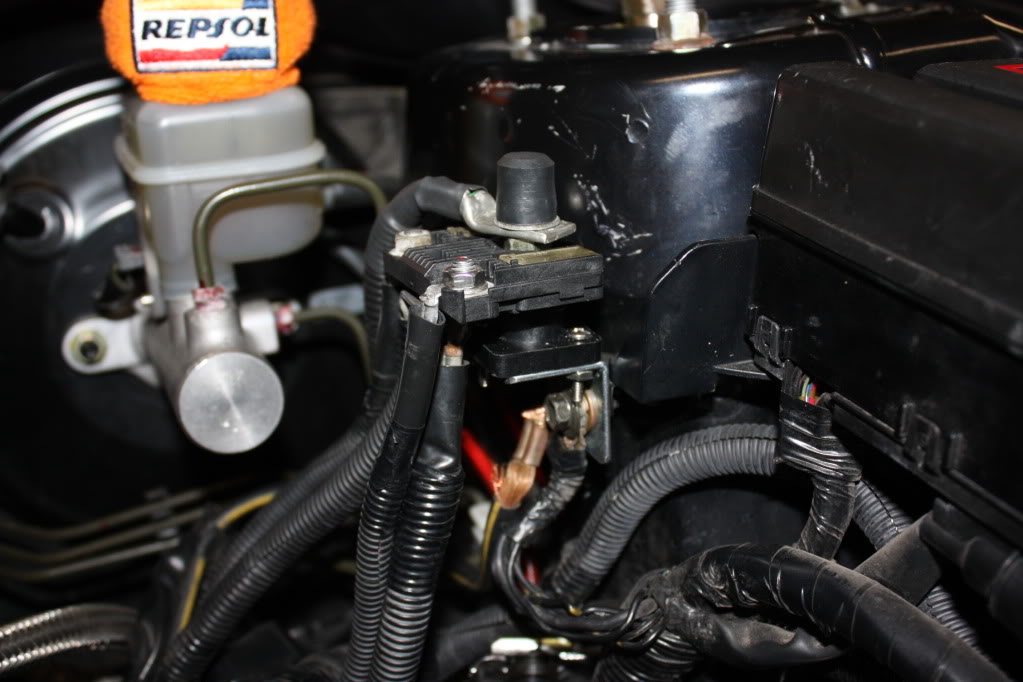
Step 6. Ground the negative cable to the bolt in the rear quarter panel. (10mm) The positive should be connected to the positive terminal in the engine bay by taking off the 12mm nut from the terminal and fitting the ring connector in there.
Step 7a. Put the battery in the box, Secure the terminals (Ground cable first)
Step 7b. As soon as you get your battery connected your trunk light SHOULD turn on. If it did, go ahead and start the car to soak up the awesome-ness of having a relocated battery...lol
Any questions? Ask
Pics will be posted later...

Just wanted to document the change I did to my car...I will post a couple pics later...mainly a before and after picture...
Also wanted to share how cheap this mod is to do!
Supplies (EVERYTHING was bought from the local parts store O'Reilly Auto Parts):
Marine Battery Box ($12.99)
Battery cable 2 Gauge - I bought 15ft. of it but wish I had at least another foot...I made it work...but I had to be stingy with the cable...lol the 15ft I had was enough to make the positive connection and a ground cable in the trunk. ($2.25 per foot)
Battery Terminals 2 @ ($3.19)
Copper Connector Ring for 2 Gauge Wire ($2.99)
Random nuts and bolts/screws and zipties.
Step 1. Disconnect and pull the battery out of the car (10mm)
Step 2. Pull battery tray (12mm and 10mm)
Step 3. Run the whole length of cable leaving 2 feet of extra cable in your trunk.
I opted to run the positive connection underneath the car following the fuel and brake lines.
Step 4. Mount the battery box in the trunk. Your choice of where you want to mount it, I chose the Driver side, to the left of the spare wheel well. I used 4 nuts and bolts to hold the box to the trunk.
Step 5. Cut a section of the 2 feet you left in the trunk for a ground cable. Strip, and Crimp one connector on each of the wires. Then Strip and mount the terminals on the other end of the wire to lead to the battery. (Note in order to crimp those BEASTLY 2 Gauge Ring Connectors you should use a Vice!)
Step 6. Ground the negative cable to the bolt in the rear quarter panel. (10mm) The positive should be connected to the positive terminal in the engine bay by taking off the 12mm nut from the terminal and fitting the ring connector in there.
Step 7a. Put the battery in the box, Secure the terminals (Ground cable first)
Step 7b. As soon as you get your battery connected your trunk light SHOULD turn on. If it did, go ahead and start the car to soak up the awesome-ness of having a relocated battery...lol
Any questions? Ask
Pics will be posted later...
Last edited by tim85851; Apr 13, 2012 at 07:06 AM.


Thread Starter
Evolved Member
iTrader: (23)
Joined: Mar 2007
Posts: 1,515
Likes: 1
From: Madison, WI
Trending Topics
Def need a circuit breaker in-line, its just for safety. They are cheap, around $25 for piece of mind.
I did mine, but I used a ground stud to make the connection on the OEM +12v connector.
Vic
I did mine, but I used a ground stud to make the connection on the OEM +12v connector.
Vic

 .
.
Evolved Member
Joined: Aug 2008
Posts: 1,387
Likes: 3
From: riverside, ca
Nice man your battery tray setup looks clean. When I did mine I used the taylor relocation kit box which is aluminum, now if you plan to track your car you gotta install a battery cut off switch. Any plans to install that, if you do make a thread on that, as I cant go on a drag strip anymore till I install mine, im too lazy to go through the headache of installing it haha.
Lol. Not anymore. I used a selfadhesive soft plastic to glue over the strut tower and trimmed the OEM red cover to protect the wire 
The battery cutoff, it just goes inline with the positive wire. Easy.
The battery cutoff, it just goes inline with the positive wire. Easy.
Evolved Member


Joined: Mar 2008
Posts: 2,108
Likes: 316
From: Croatia

