
Spring Install - Tein S.Tech


Thread Starter
Account Disabled
Joined: Jan 2007
Posts: 160
Likes: 2
From: SLC, UT
Spring Install - Tein S.Tech
I wrote this up last night for my Mitsubishi site and I figured I post it here as well. Original thread: http://mitsubishipowered.com/evo-x-h...tech-t382.html
Decided to put the first mod on my Evo X. Some Tein S.Tech springs to get rid of the terrible factory ride height. I purchased them locally at RallySportDirect: http://www.rallysportdirect.com/shop...gs-p-3829.html. Thanks to Tanner from RSD for being a huge help as usual!
Here is a run down on the springs:
Front drop: 1.4"
Rear drop: 1.0"
Front spring rate: 4.2 kg/mm
Rear spring rate: 3.8 kg/mm
First off the drop is pretty ideal if you want to achieve even wheel gap. These springs are also geared to induce more oversteer as the rear rate increases more than the front versus stock and the rear stays higher. Both of these attributes will help the car to rotate better.
I've yet to see an Evo X spring install documented with photos, so I'll give it a shot. I was so impressed with the suspension and chassis design in comparison to my 8G Galant... I just had to take photos of everything.
Here are the service manual sections I referenced.
Front Suspension: http://mitsubishipowered.com/downloa...0003900-33.pdf
Rear Suspension: http://mitsubishipowered.com/downloa...0002200-34.pdf
First step is to loosen the lug nuts on the front wheels and get the car up in the air on jackstands.
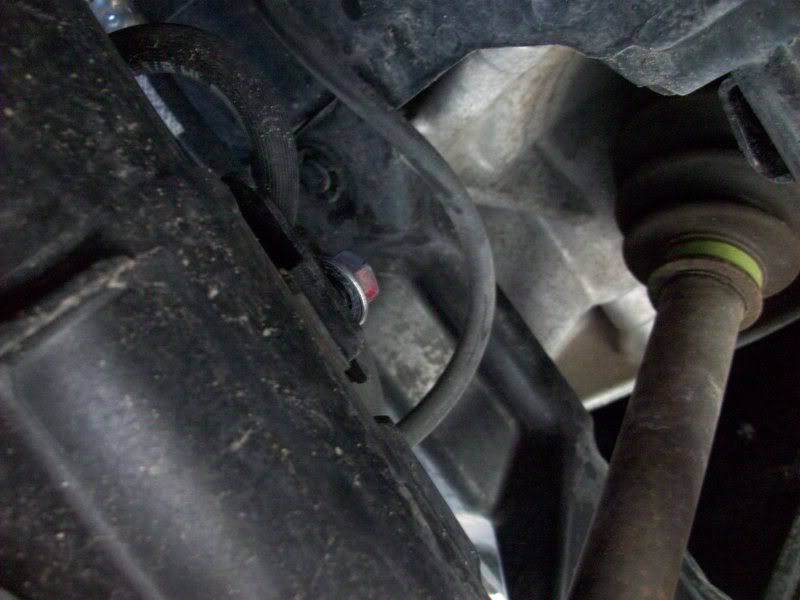
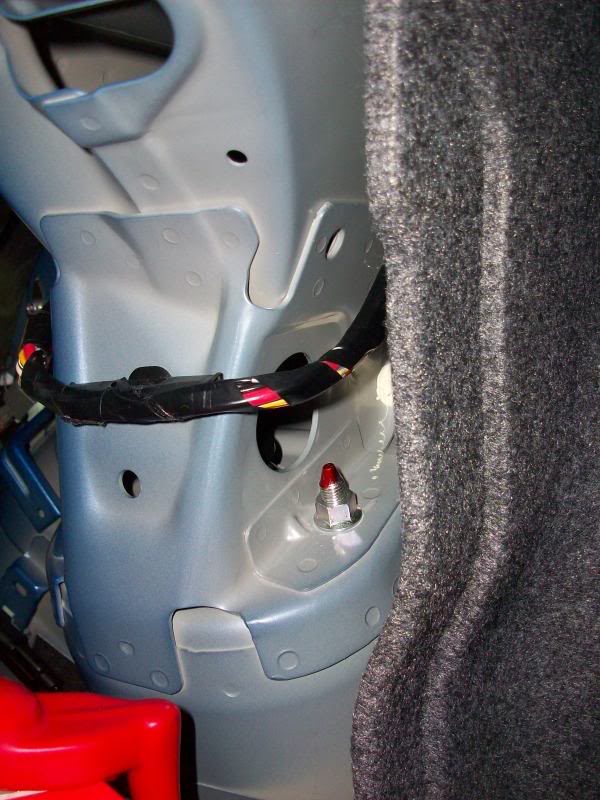
This is where we'll be messing with first. I removed the two push clips that hold that part of the cowl piece in place as it blocks access to the rear strut mount nut. Remove 2 of these nuts and loosen the last one so that only a few threads are engaged.

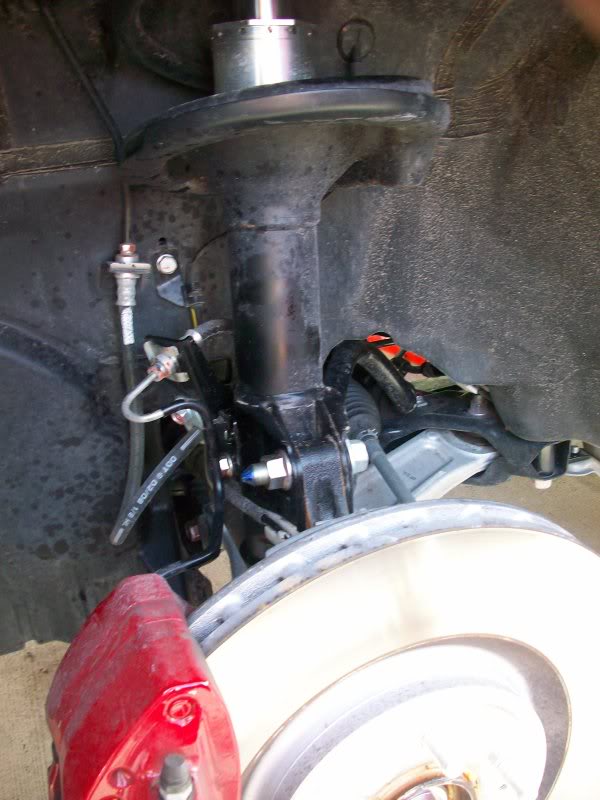
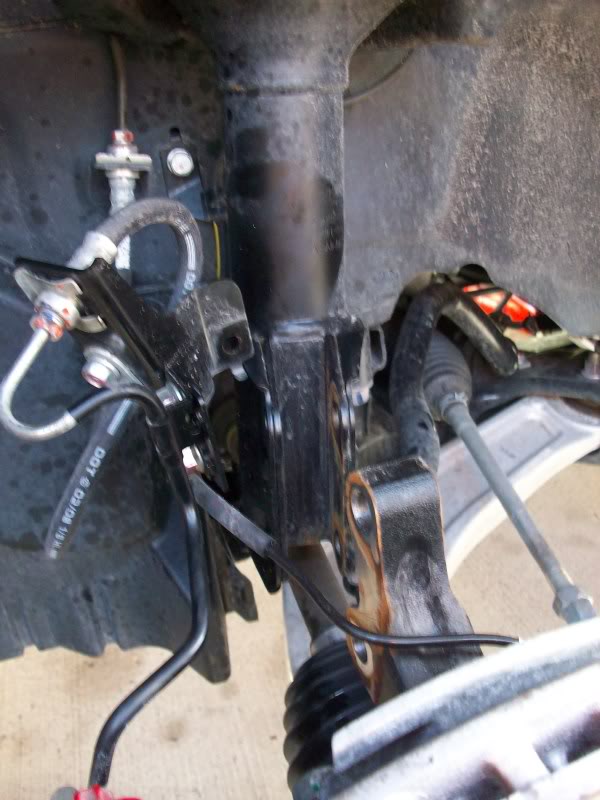
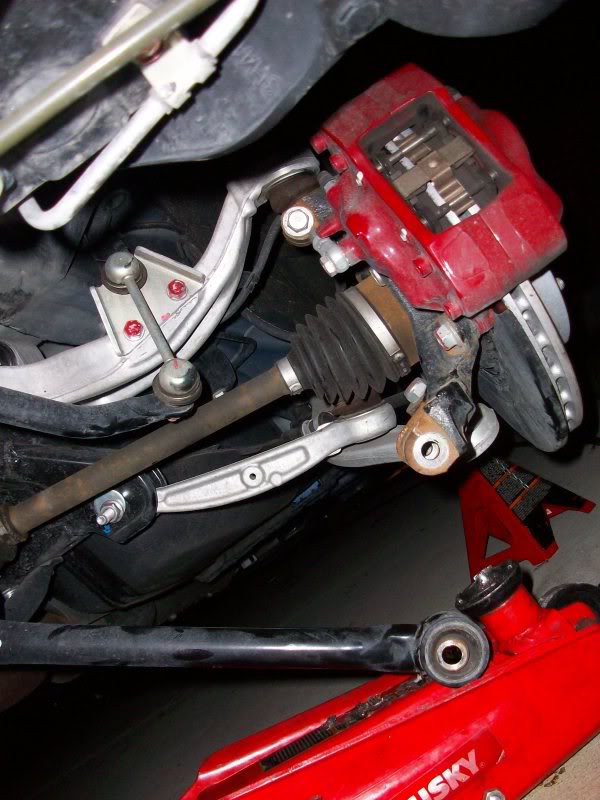
Once you're done with that, remove the wheel and take a look at the strut assembly. You'll need to remove the bracket that secures the ABS sensor and brake fluid line and the clip that routes the ABS sensor wiring. Then you can disconnect the strut assembly.
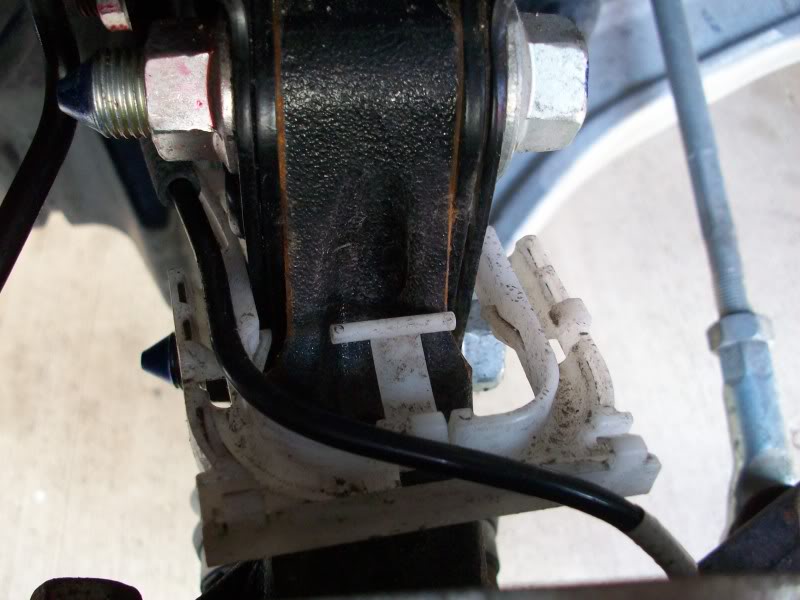
Remove this nut that secures the bracket and push it out of the way. Don't bend the hard brake line, though.

And pull the wire from the clip and remove it as well. It clips into two holes on the sides of the strut assembly.
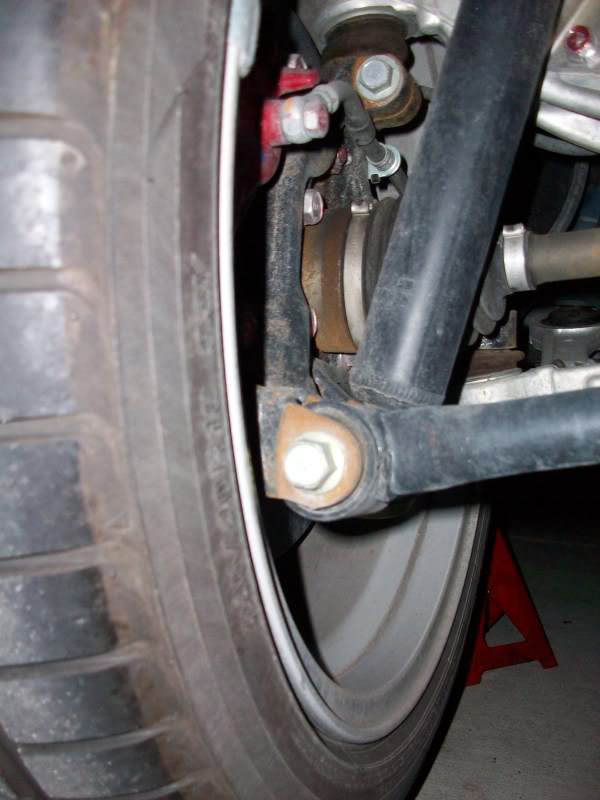
Next you'll need to remove these two bolts. The top one is special and you'll want to make sure it goes back in the same orientation it was in, with the red dot on the inboard side.
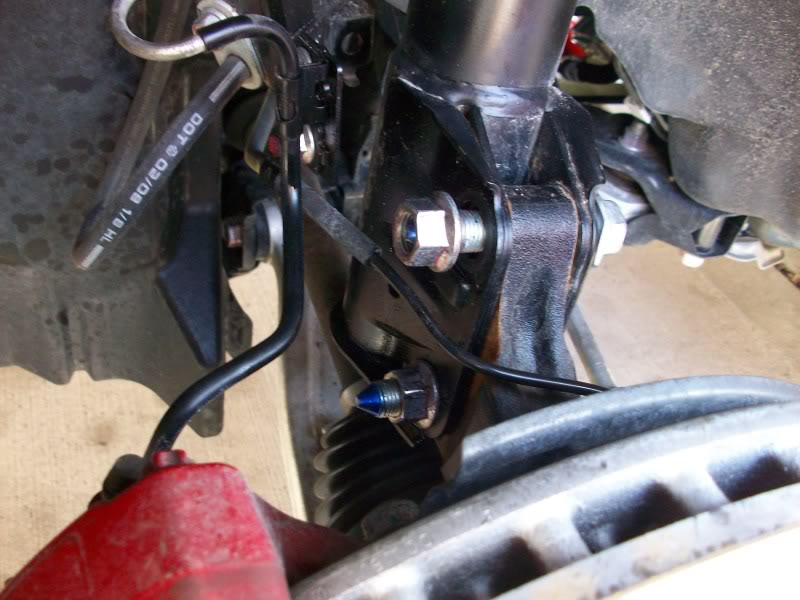
Once it is disconnected at the lower point, you can remove the last bolt up top while holding the strut assembly to keep it from falling.
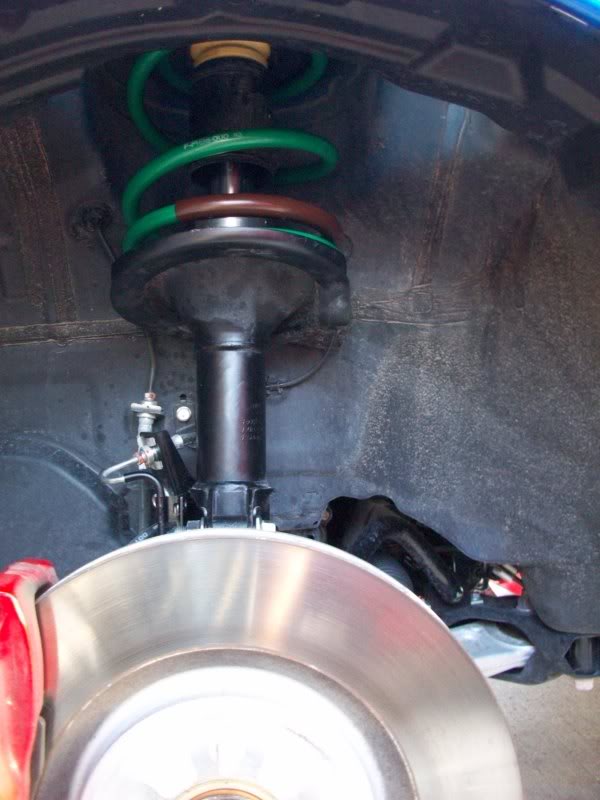
Now you're free to remove the strut.
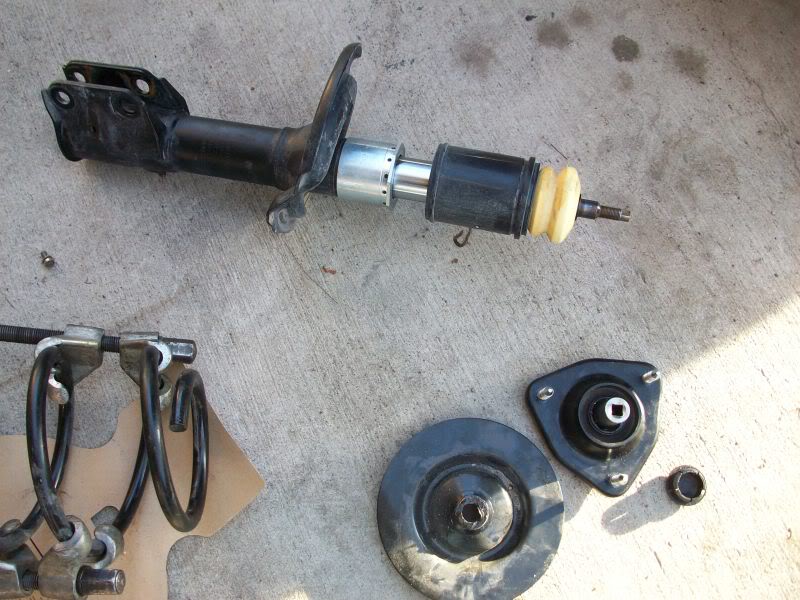
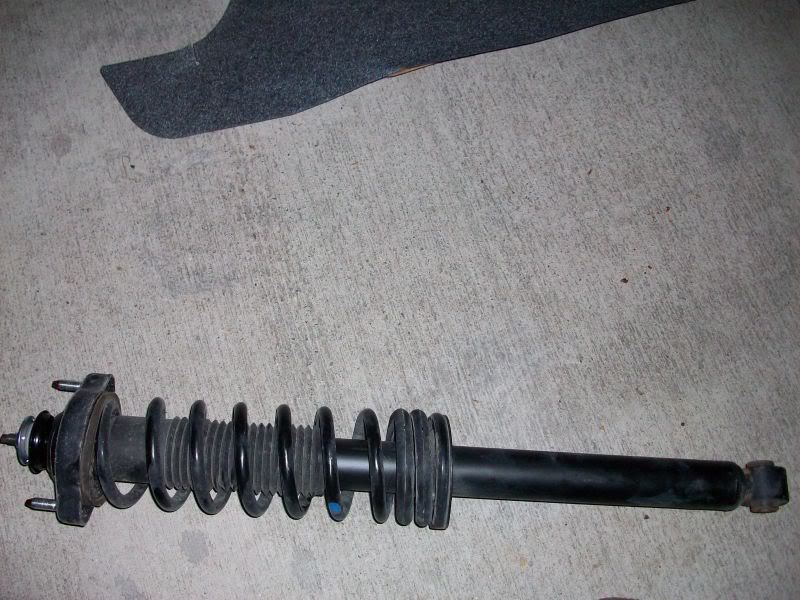
This is how it looks off the car.

You will be removing this top nut to get the spring off.

Like with any spring install, this is where you need a hydraulic spring compressor (lucky you if you have access to one) or some screw-type compressors as shown. If you're not confident in using them, it's probably best to let somebody show you how the first time. Being careless with these things can land you in the hospital. In the photo I've compressed the spring enough to safely remove the top nut and upper mount.

After disassembling the strut.
The S.Tech spring.
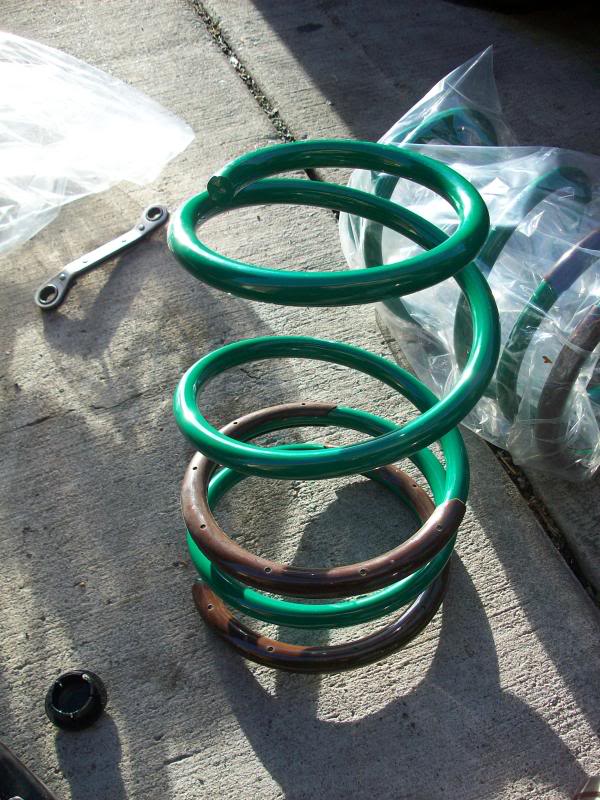

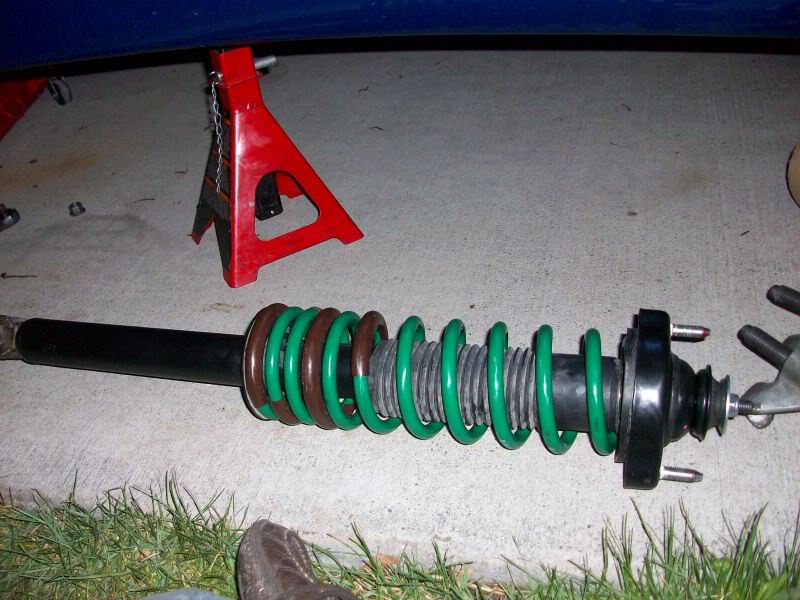
And the spring installed. Pretty much the reverse order of removing the old one. You'll need to use the spring compressors and make sure the spring is oriented like the stock one, as well as having the top plate with the "inside" mark pointing toward the middle of the car. The top nut gets torqued to 45 lb-ft. I used my impact to get it snug and then torqued it with a torque wrench once the strut was back on the car.

Installed. The top 3 nuts are torqued to 33 lb-ft and the 2 lower bolts are torqued to 81 lb-ft. Don't forget to use the correct bolt, oriented as described above, for the top bolt.
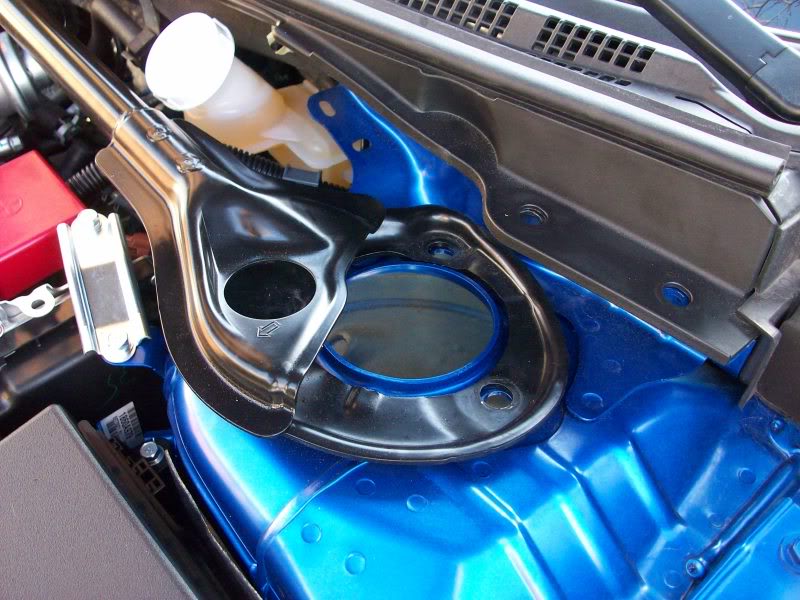
Do the same for the other front strut. Onto the rear... you can lower the front of the car now. You'll need to remove the cover plate that hides the battery and washer bottle. First remove the carpet, panels, and the two styrofoam blocks. The cover plate is held on by 4 clips. Just pop out the center portion with a flat-head and pull em out.
Here you can see one of the 2 top mount nuts. You can safely loosen these and then move down below...
This is the lower mount bolt you'll remove. It also runs through the LCA.
Once removed you can let the shock drop and pull it out.
Here is the shock off the car:
Do the same as with the front with the compressors. Make sure you get the upper mount oriented just like it was when you pulled it off. It doesn't rotate freely like the front mounts. The top nut is torqued to 19 lb-ft.
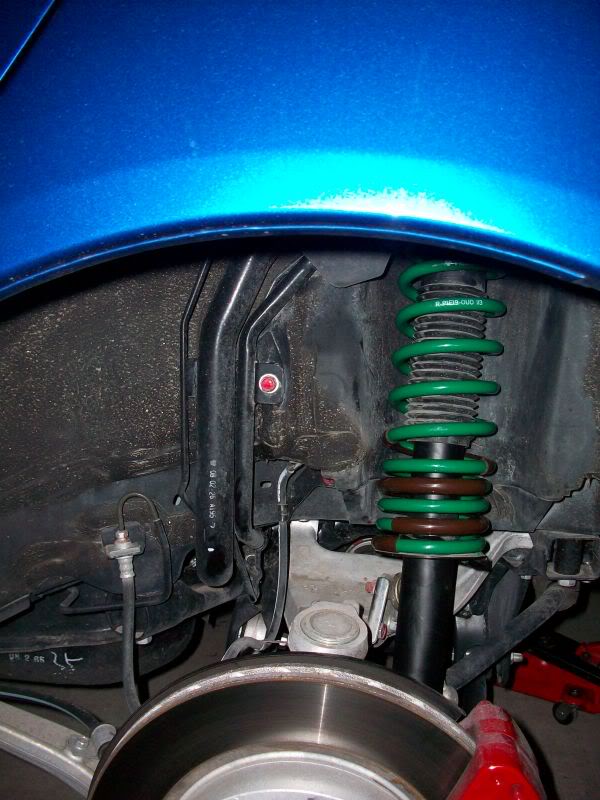
When you install the shock, you need to make sure the side that has the end of the bottom coil faces the rear of the car as shown here.
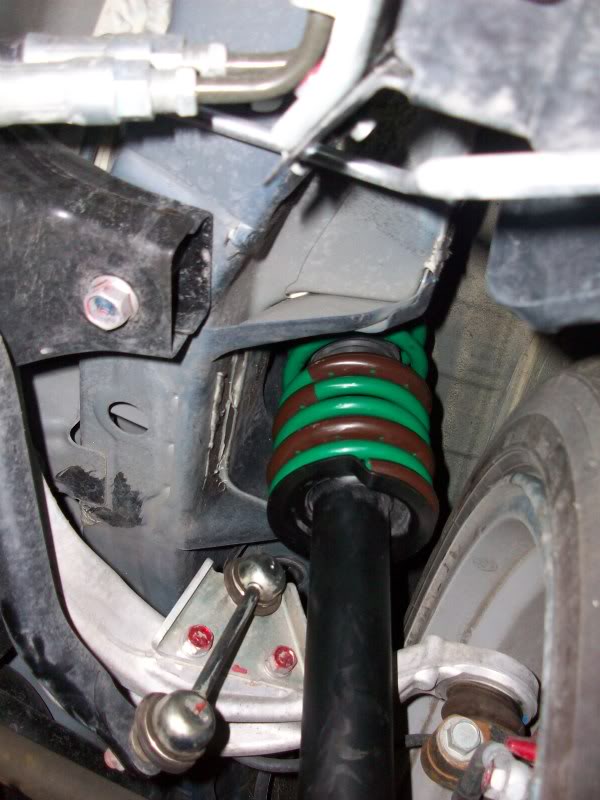
The top nuts are torqued to 33 lb-ft and the bottom through bolt is torqued to 52 lb-ft.
Do the same for the other side and you're all done!
This is how the ride height on my car was before the S.Tech srings.

And now, with the springs still settling.


Perfect ride height for a daily driver IMHO
Driving Impressions
Well the X handles superb to begin with, but I went through a few "35 mph" corners under full power and the rear really likes to rotate now. The whole car is much more composed and I can DEFINITELY tell there is less body roll.
As far as ride quality is concerned, you can feel a bit more of the road and bumps transferred into your *** with these springs on. But honestly I like feeling every bump, so these are perfect in my eyes.
Decided to put the first mod on my Evo X. Some Tein S.Tech springs to get rid of the terrible factory ride height. I purchased them locally at RallySportDirect: http://www.rallysportdirect.com/shop...gs-p-3829.html. Thanks to Tanner from RSD for being a huge help as usual!
Here is a run down on the springs:
Front drop: 1.4"
Rear drop: 1.0"
Front spring rate: 4.2 kg/mm
Rear spring rate: 3.8 kg/mm
First off the drop is pretty ideal if you want to achieve even wheel gap. These springs are also geared to induce more oversteer as the rear rate increases more than the front versus stock and the rear stays higher. Both of these attributes will help the car to rotate better.
I've yet to see an Evo X spring install documented with photos, so I'll give it a shot. I was so impressed with the suspension and chassis design in comparison to my 8G Galant... I just had to take photos of everything.
Here are the service manual sections I referenced.
Front Suspension: http://mitsubishipowered.com/downloa...0003900-33.pdf
Rear Suspension: http://mitsubishipowered.com/downloa...0002200-34.pdf
First step is to loosen the lug nuts on the front wheels and get the car up in the air on jackstands.
This is where we'll be messing with first. I removed the two push clips that hold that part of the cowl piece in place as it blocks access to the rear strut mount nut. Remove 2 of these nuts and loosen the last one so that only a few threads are engaged.
Once you're done with that, remove the wheel and take a look at the strut assembly. You'll need to remove the bracket that secures the ABS sensor and brake fluid line and the clip that routes the ABS sensor wiring. Then you can disconnect the strut assembly.
Remove this nut that secures the bracket and push it out of the way. Don't bend the hard brake line, though.
And pull the wire from the clip and remove it as well. It clips into two holes on the sides of the strut assembly.
Next you'll need to remove these two bolts. The top one is special and you'll want to make sure it goes back in the same orientation it was in, with the red dot on the inboard side.
Once it is disconnected at the lower point, you can remove the last bolt up top while holding the strut assembly to keep it from falling.
Now you're free to remove the strut.
This is how it looks off the car.
You will be removing this top nut to get the spring off.
Like with any spring install, this is where you need a hydraulic spring compressor (lucky you if you have access to one) or some screw-type compressors as shown. If you're not confident in using them, it's probably best to let somebody show you how the first time. Being careless with these things can land you in the hospital. In the photo I've compressed the spring enough to safely remove the top nut and upper mount.
After disassembling the strut.
The S.Tech spring.
And the spring installed. Pretty much the reverse order of removing the old one. You'll need to use the spring compressors and make sure the spring is oriented like the stock one, as well as having the top plate with the "inside" mark pointing toward the middle of the car. The top nut gets torqued to 45 lb-ft. I used my impact to get it snug and then torqued it with a torque wrench once the strut was back on the car.
Installed. The top 3 nuts are torqued to 33 lb-ft and the 2 lower bolts are torqued to 81 lb-ft. Don't forget to use the correct bolt, oriented as described above, for the top bolt.
Do the same for the other front strut. Onto the rear... you can lower the front of the car now. You'll need to remove the cover plate that hides the battery and washer bottle. First remove the carpet, panels, and the two styrofoam blocks. The cover plate is held on by 4 clips. Just pop out the center portion with a flat-head and pull em out.
Here you can see one of the 2 top mount nuts. You can safely loosen these and then move down below...
This is the lower mount bolt you'll remove. It also runs through the LCA.
Once removed you can let the shock drop and pull it out.
Here is the shock off the car:
Do the same as with the front with the compressors. Make sure you get the upper mount oriented just like it was when you pulled it off. It doesn't rotate freely like the front mounts. The top nut is torqued to 19 lb-ft.
When you install the shock, you need to make sure the side that has the end of the bottom coil faces the rear of the car as shown here.
The top nuts are torqued to 33 lb-ft and the bottom through bolt is torqued to 52 lb-ft.
Do the same for the other side and you're all done!
This is how the ride height on my car was before the S.Tech srings.
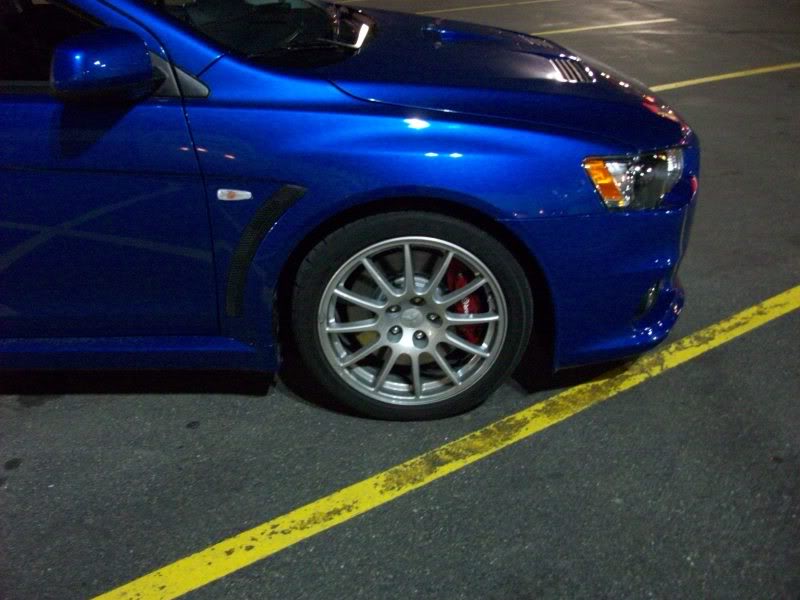
And now, with the springs still settling.
Perfect ride height for a daily driver IMHO
Driving Impressions
Well the X handles superb to begin with, but I went through a few "35 mph" corners under full power and the rear really likes to rotate now. The whole car is much more composed and I can DEFINITELY tell there is less body roll.
As far as ride quality is concerned, you can feel a bit more of the road and bumps transferred into your *** with these springs on. But honestly I like feeling every bump, so these are perfect in my eyes.


Arrrgggh, I wish I read this before I did mine. I removed the rear seats to get to the bolts. I didn't realize that you could get to the front ones from the trunk. I still took out the rear panels just to have more access to the rear nuts. Took me a bit longer but it's done.
Nice write up!
Nice write up!


Trending Topics
Thread Starter
Account Disabled
Joined: Jan 2007
Posts: 160
Likes: 2
From: SLC, UT
Arrrgggh, I wish I read this before I did mine. I removed the rear seats to get to the bolts. I didn't realize that you could get to the front ones from the trunk. I still took out the rear panels just to have more access to the rear nuts. Took me a bit longer but it's done.
Nice write up!
Nice write up!
Settled:


Sorry that the wheels were turned.... I was trying to be cool

More aggressive drop with the Teins, local availability (I literally installed them the night I picked them up), and I've used Tein products before with great results.

awesome! great write up! seems a lot easier then my spring install for my STi!
How long did it take you to finish? and did you do it by your self? just trying to get an idea
also, do you have any input on what the stock strut life is going to be with the aftermarket springs?
Thanks in adavance! looks great
How long did it take you to finish? and did you do it by your self? just trying to get an idea
also, do you have any input on what the stock strut life is going to be with the aftermarket springs?
Thanks in adavance! looks great

Newbie
Joined: Mar 2009
Posts: 74
Likes: 0
From: So cal
can you explain why the rear strut need to be installed with the bottom of the spring end facing the rear of car.. isn't the rear strut symmetrical there for should not matter how you put it back unlike the fron't ones where the top need to point a certain way.
