
How To: HID Install w/ Harness


Thread Starter
Newbie
Joined: Nov 2007
Posts: 50
Likes: 0
From: FL
First and foremost, this installation guide is the first one I've wrote so I'll try to be as comprehensive in it as possible. Please keep in mind that my HIDs are already in so the pictures I've taken are post install pictures to try to help you out in placements. Also I've installed my HIDs with the help of a harness which came with my kit. You can get them in many places I've got mine from www.aandrmotorsport.com but www.mobilehid.com carries a harness only option if you get lights from somewhere else.
Install time between 30-60 minutes.
You'll need some basic tools and I highly recommend getting EZ Splice connectors (2) or more in case you screw up on one of them like I did the first time.
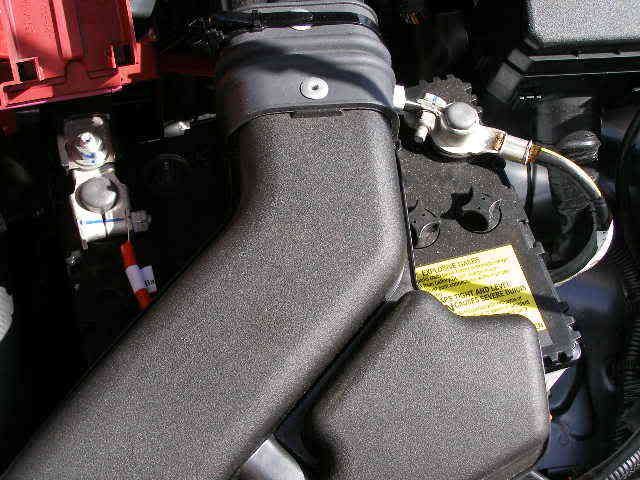
1, If you have a stock intake or an SRI remove the plastic ram scoop that runs from the grill to your intake. It should be as easy as removing the two screws in the front of the scoop and pulling it off the air box.
2, Disconnect your battery wires, yes you'll need to disconnect both.
3, Locate both of your low beam headlight plugs (the ones that plug directly into the bulb) and unplug them. Go ahead and twist the bulb and it should just pull right out.
4, You will not be doing anything else with the low beam plugs so you can leave them where they are or zip tie them to some other nearby wiring if you don't want it floating around.
5, Insert your new HID bulbs into the headlights and make sure it's securely twisted in there. DO NOT TOUCH THE BULBS! Wear gloves if you have to but under no circumstances touch the HID bulbs with your free hand.
6, Remove your parking light closest to the battery. This is also accomplished in the same manner as the headlight. It twists and then pulls out. You'll need this later.
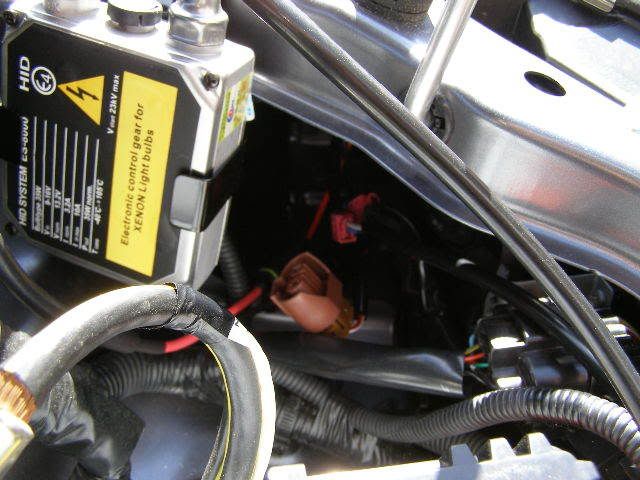
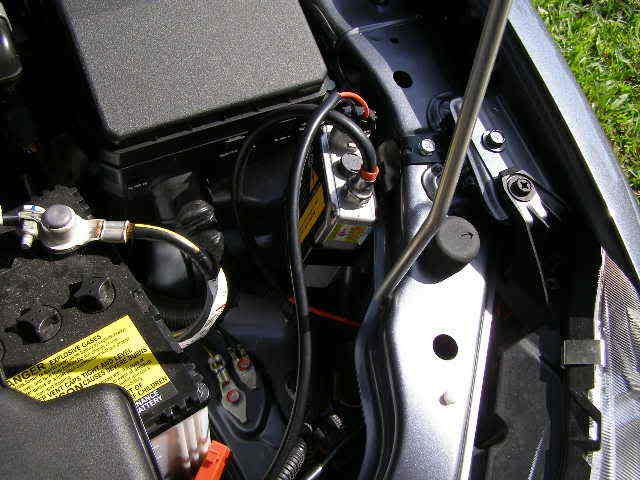
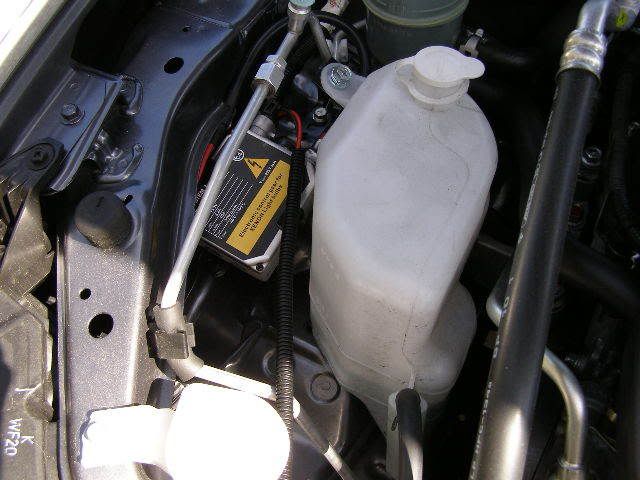
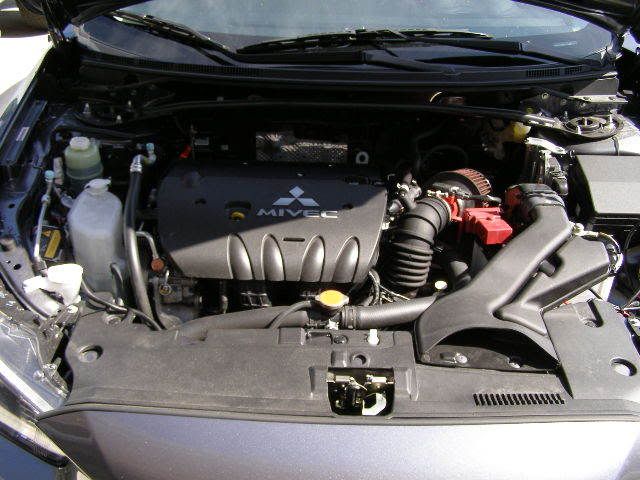
7, Insert your ballasts into the brackets that are provided with the kit you purchased and go ahead and mount them. The kit that I purchased came with bolts that matched the threading on the frame of my car so installing the driver side one was really easy. The passenger side one took a little extra work. It ended up being mounted under a bracket that was already there.
* You can mount them where ever you want to just make sure your harness reaches.
I mounted mine in the following locations:
8, Connect the HID bulb's 2 wires to the 2 wires coming from the ballast.
9, Lay out the harness and find a good semi-hidden place from it for a clean look. Connect the harness to both of your ballasts. Then connect the positive and negative wires to your respective battery terminals.
10, Here comes one of the last steps and probably the most troublesome.
You will need to clip off the "Remote Turn On" plug off the harness. Just cut it off so you are left with 2 wires. You need to connect the POSITIVE wire of the "Remote Turn On" to the POSITIVE wire of the parking light (blue wire) and the NEGATIVE wire of the "Remote Turn On" to the NEGATIVE wire of the parking light (black wire). I used the EZ Splice connectors so I didn't have to cut any wires.
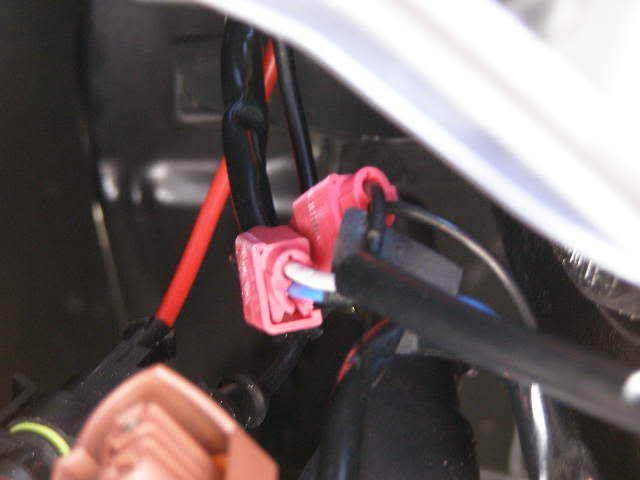
The wire off the remote turn on just plugs into the EZ Splicer and then you slide the other end over the parking light wire. Once you have it in place you close it with some pliers and listen to it click to make a good connections.
11, Technically you should be done. Now to make sure everything works go ahead and turn on your headlights. As soon as you turn the stalk 1 to go to parking lights the HIDs should kick on.
***TROUBLE SHOOTING***
My lights did not turn on initially, I rechecked the connection at the EZ Splicers and found them to be good. You can check it by poking the "Remote Turn On" wire with a 12V Test Light.
My problem lied in the ballasts. The harness plugs can be installed both way into the ballasts. It will fit either way and look right. Mine were reversed, so I just had to unplug it and replug it the other way and the next time I turned my lights on the HIDs kicked on.
12, Now you can reinsert the parking light back into it's rightful place, clean up the wires with some zip ties and reinstall the ram air scoop.
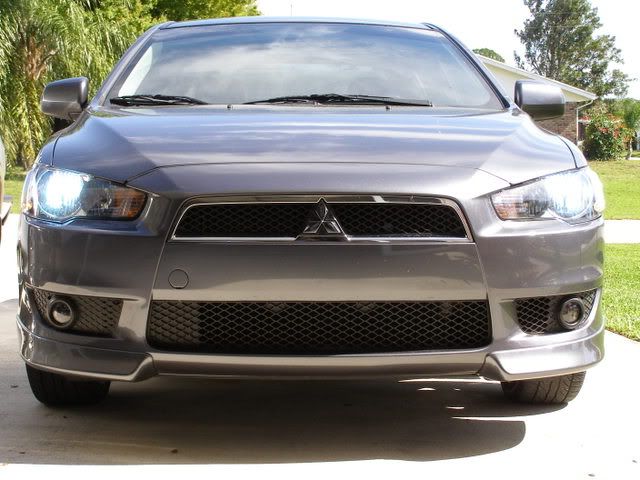
Hot Florida sun and the lights still look hot!
Install time between 30-60 minutes.
You'll need some basic tools and I highly recommend getting EZ Splice connectors (2) or more in case you screw up on one of them like I did the first time.
1, If you have a stock intake or an SRI remove the plastic ram scoop that runs from the grill to your intake. It should be as easy as removing the two screws in the front of the scoop and pulling it off the air box.
2, Disconnect your battery wires, yes you'll need to disconnect both.
3, Locate both of your low beam headlight plugs (the ones that plug directly into the bulb) and unplug them. Go ahead and twist the bulb and it should just pull right out.
4, You will not be doing anything else with the low beam plugs so you can leave them where they are or zip tie them to some other nearby wiring if you don't want it floating around.
5, Insert your new HID bulbs into the headlights and make sure it's securely twisted in there. DO NOT TOUCH THE BULBS! Wear gloves if you have to but under no circumstances touch the HID bulbs with your free hand.
6, Remove your parking light closest to the battery. This is also accomplished in the same manner as the headlight. It twists and then pulls out. You'll need this later.
7, Insert your ballasts into the brackets that are provided with the kit you purchased and go ahead and mount them. The kit that I purchased came with bolts that matched the threading on the frame of my car so installing the driver side one was really easy. The passenger side one took a little extra work. It ended up being mounted under a bracket that was already there.
* You can mount them where ever you want to just make sure your harness reaches.
I mounted mine in the following locations:
8, Connect the HID bulb's 2 wires to the 2 wires coming from the ballast.
9, Lay out the harness and find a good semi-hidden place from it for a clean look. Connect the harness to both of your ballasts. Then connect the positive and negative wires to your respective battery terminals.
10, Here comes one of the last steps and probably the most troublesome.
You will need to clip off the "Remote Turn On" plug off the harness. Just cut it off so you are left with 2 wires. You need to connect the POSITIVE wire of the "Remote Turn On" to the POSITIVE wire of the parking light (blue wire) and the NEGATIVE wire of the "Remote Turn On" to the NEGATIVE wire of the parking light (black wire). I used the EZ Splice connectors so I didn't have to cut any wires.
The wire off the remote turn on just plugs into the EZ Splicer and then you slide the other end over the parking light wire. Once you have it in place you close it with some pliers and listen to it click to make a good connections.
11, Technically you should be done. Now to make sure everything works go ahead and turn on your headlights. As soon as you turn the stalk 1 to go to parking lights the HIDs should kick on.
***TROUBLE SHOOTING***
My lights did not turn on initially, I rechecked the connection at the EZ Splicers and found them to be good. You can check it by poking the "Remote Turn On" wire with a 12V Test Light.
My problem lied in the ballasts. The harness plugs can be installed both way into the ballasts. It will fit either way and look right. Mine were reversed, so I just had to unplug it and replug it the other way and the next time I turned my lights on the HIDs kicked on.
12, Now you can reinsert the parking light back into it's rightful place, clean up the wires with some zip ties and reinstall the ram air scoop.
Hot Florida sun and the lights still look hot!

Thread
Thread Starter
Forum
Replies
Last Post
EvokidIX
Evo How Tos / Installations
31
Mar 12, 2016 04:08 PM
xtnct
Evo General
11
Mar 30, 2007 06:38 AM