
Refabricating the Interior

HOW-TO: ReUpholster the Interior
Tools:
(also include anything with a blunt thin edge: EG Spatula)
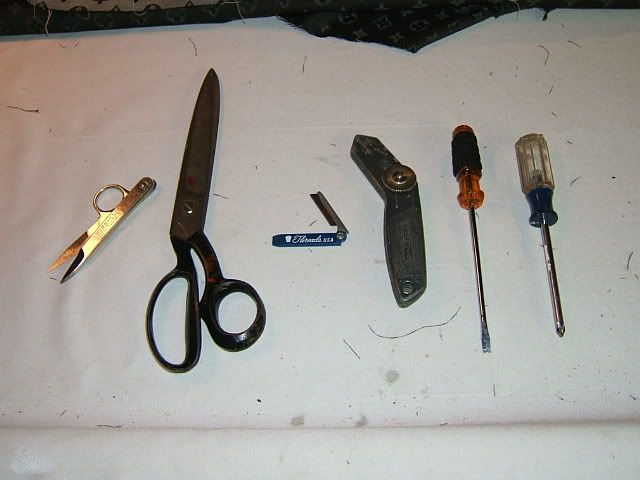
Thread Sissors, Fabric Sissors, Small Razor, Safety Razor, Flathead, Phillipshead...
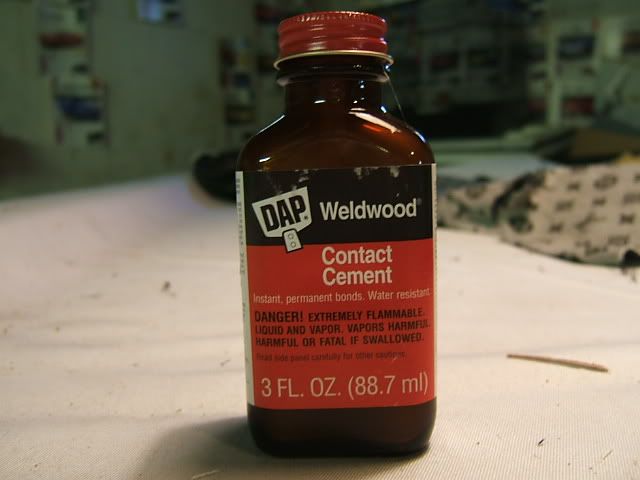
and VERY importantly, the right Glue.
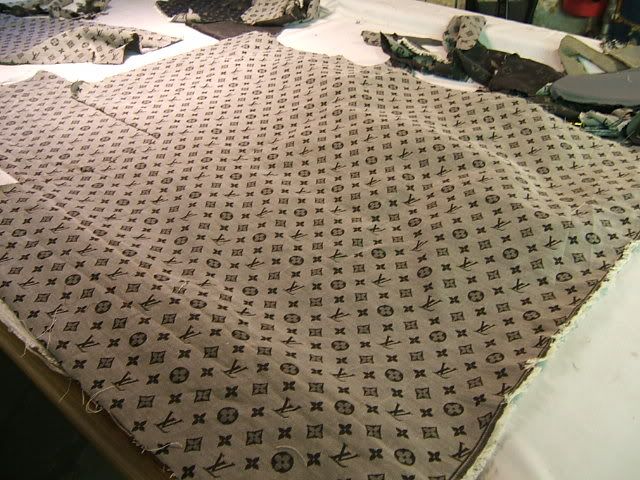
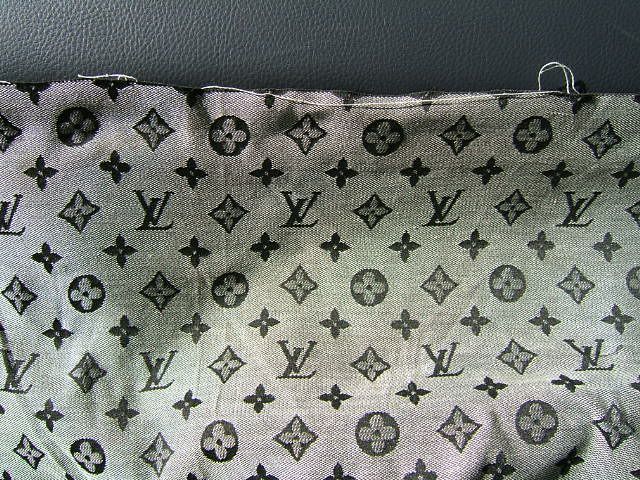
Lay out your fabric (I bought 3 yards, though I only need 1. Its good to always give yourself room for error)
The stock door cloth actually peels right off, do it Inch by Inch carfully so as not to mess it up or tear it. The pannel its on (portion of the door) is made to look like a seperate peice that detatches. It doesnt. The fabric is tucked in the seem, and its all one door pannel, so theres not need to pull it off.
The Door fabric is gonna be your template. (Be sure to cut it maybe an inch extra large, not an exact trace of the stock peice, I did a rectangle around it actually)
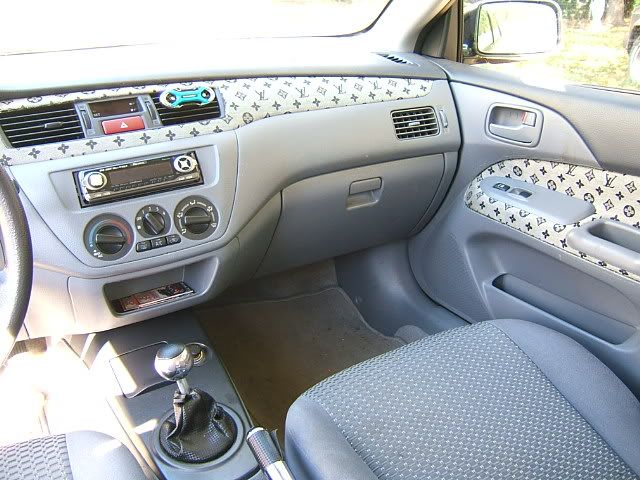
Now, Im showing you the door pannels cus the dash is simple.
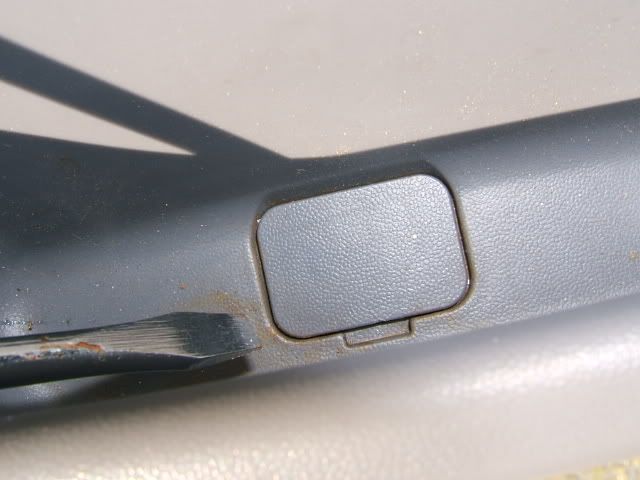
In the door handle is a lil' cap. Use your flat head and pop it out.
The Philips to remove the screw beneath. When thats done, put them somewhere you wont lose 'em. The handle just pops right out. Pull Up. Use the flathead to also pop up the window button pannel, it just pops up and then you pull it out. Disconnect the wire harness.
Next with the stock fabric gone, apply your glue BUT make sure you spread it thin, rather than globby. You dont want lumps in your pannels nor it bleeding through the fabric.
Be sure to get inside the door pannel seems to, cus your gonna tuck fabric into that crevice.
Allow about 15 minutes for it to get tacky, and also spread some liberally on the backside of your fabric, in that 15 minute space.
Then come back after 15 and it should appear as such...
Now apply the peice of new fabric which you cut around the template.
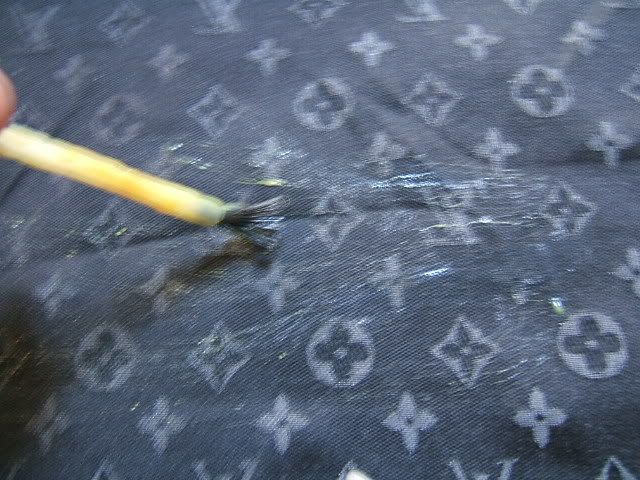
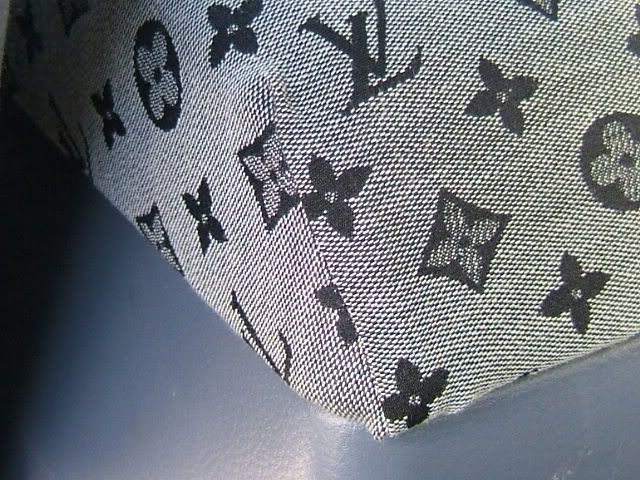
If it has logos like this one does, be sure that their all STRAIGHT and LINED UP.
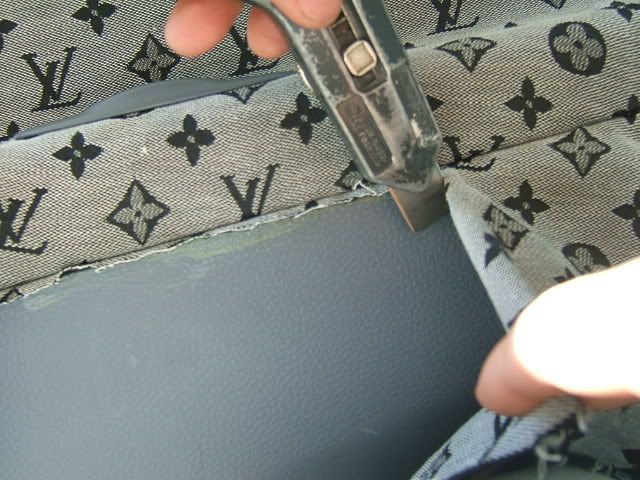
Use your spatula (or blunt thin, whatever) to tuck in the fabric into the seem.
Go all the way around.

Press all your fabric flat against the glued wall, making sure not to have any stretching, wrinkles, or bubbles.
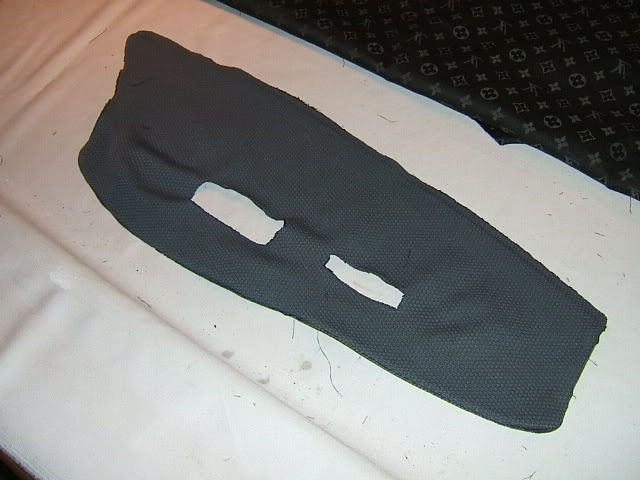
Cut a slit shaped like a sideways letter "I" into the Hole where the handle was, like so. DONT cut the fabric to the edge of the hole, you want the handle to pin it down or stretch it a lil. These flaps will tuck inwards. Pop the handle back in and screw down, replacing the lil' cap.

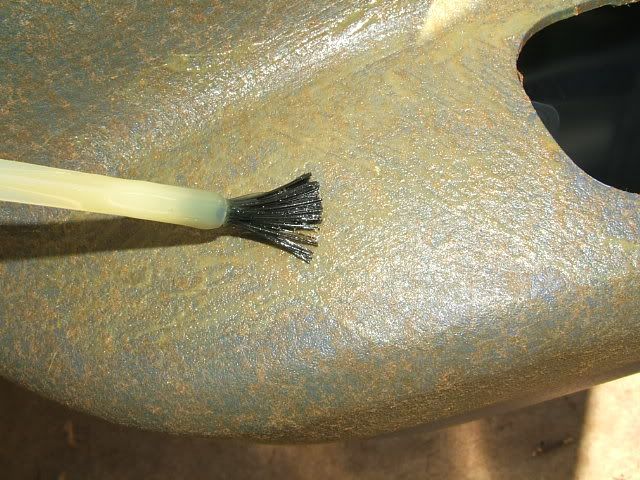
Now with it all tucked, and pressed on. Simply take the excess and use your safety razor to carfully slice across, leaving about a 1/4in. Then tuck that away tightly, and neatly in the same manner as before.
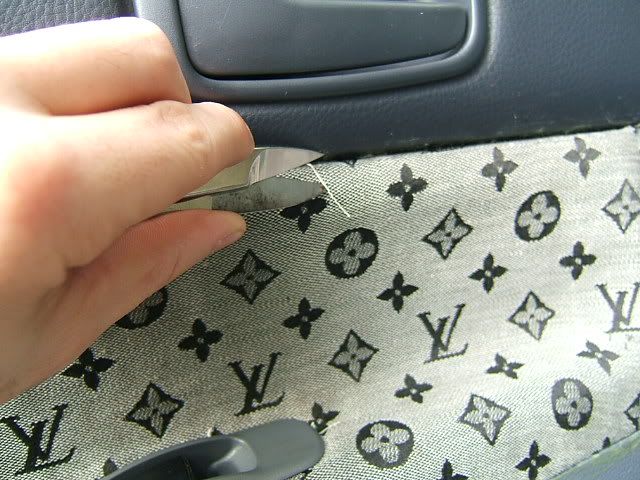
You may have little strings hangin' out, after you tuck. Simply use your thread sissors and clip them off one by one. DO NOT PULL THEM, you will **** up your fabric and the patterns. Take your time, and do it right. Clip 'em.
Once complete... It should appear as such. VOILA!!!
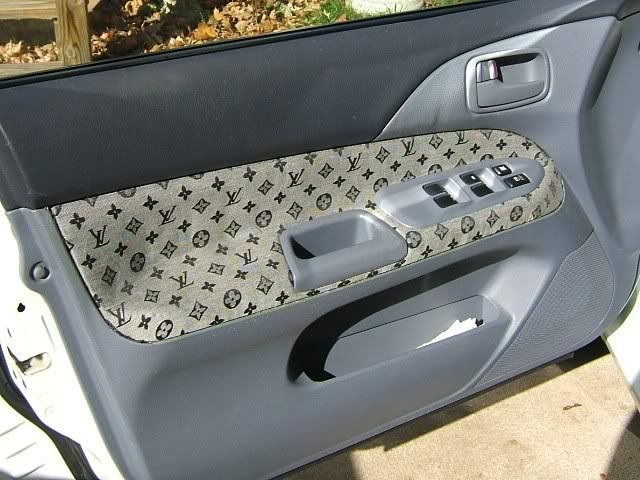
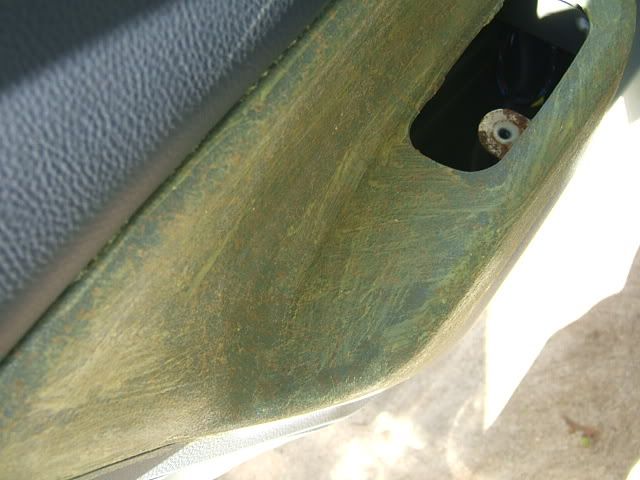
Now, wipe off any excess glue, or dirt & debree from your door pannel, handle, edges where its tucked etc.
with a moist sponge, (which I have yet to do in this picture...) so its all clean and hott lookin'...
The Dash pannel is simple. (Sorry, I had it done prior to taking pics...)
Pull the A/C plugs straight out. Pop off the surrounding dash peice.
Unscrew the 2 screws. Then it just It pops off and unscrews (from the backside) off the A/C Vents.
Its really smooth so sand the face down a bit with fine soft grit paper.
Wipe it, Glue it, Add it, cut around and through center gap (vents), tuck behind, and replace with all screws again into car.
Once you did the door, this'll take no time.
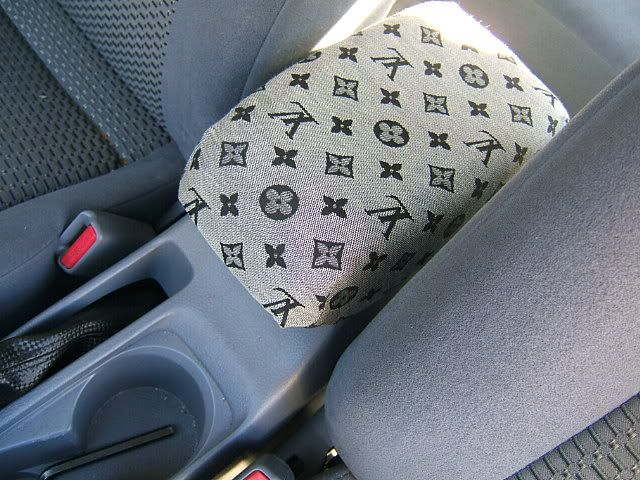
If you want the center box done, youll have to stitch, I had this done for me by a family member cus I dont stitch or any o' that.
Heres what it looks like:
Hope this helped you guys!
- City Knight
(also include anything with a blunt thin edge: EG Spatula)
Thread Sissors, Fabric Sissors, Small Razor, Safety Razor, Flathead, Phillipshead...
and VERY importantly, the right Glue.
Lay out your fabric (I bought 3 yards, though I only need 1. Its good to always give yourself room for error)
The stock door cloth actually peels right off, do it Inch by Inch carfully so as not to mess it up or tear it. The pannel its on (portion of the door) is made to look like a seperate peice that detatches. It doesnt. The fabric is tucked in the seem, and its all one door pannel, so theres not need to pull it off.
The Door fabric is gonna be your template. (Be sure to cut it maybe an inch extra large, not an exact trace of the stock peice, I did a rectangle around it actually)
Now, Im showing you the door pannels cus the dash is simple.
In the door handle is a lil' cap. Use your flat head and pop it out.
The Philips to remove the screw beneath. When thats done, put them somewhere you wont lose 'em. The handle just pops right out. Pull Up. Use the flathead to also pop up the window button pannel, it just pops up and then you pull it out. Disconnect the wire harness.
Next with the stock fabric gone, apply your glue BUT make sure you spread it thin, rather than globby. You dont want lumps in your pannels nor it bleeding through the fabric.
Be sure to get inside the door pannel seems to, cus your gonna tuck fabric into that crevice.
Allow about 15 minutes for it to get tacky, and also spread some liberally on the backside of your fabric, in that 15 minute space.
Then come back after 15 and it should appear as such...
Now apply the peice of new fabric which you cut around the template.
If it has logos like this one does, be sure that their all STRAIGHT and LINED UP.
Use your spatula (or blunt thin, whatever) to tuck in the fabric into the seem.
Go all the way around.
Press all your fabric flat against the glued wall, making sure not to have any stretching, wrinkles, or bubbles.
Cut a slit shaped like a sideways letter "I" into the Hole where the handle was, like so. DONT cut the fabric to the edge of the hole, you want the handle to pin it down or stretch it a lil. These flaps will tuck inwards. Pop the handle back in and screw down, replacing the lil' cap.
Now with it all tucked, and pressed on. Simply take the excess and use your safety razor to carfully slice across, leaving about a 1/4in. Then tuck that away tightly, and neatly in the same manner as before.
You may have little strings hangin' out, after you tuck. Simply use your thread sissors and clip them off one by one. DO NOT PULL THEM, you will **** up your fabric and the patterns. Take your time, and do it right. Clip 'em.
Once complete... It should appear as such. VOILA!!!
Now, wipe off any excess glue, or dirt & debree from your door pannel, handle, edges where its tucked etc.
with a moist sponge, (which I have yet to do in this picture...) so its all clean and hott lookin'...
The Dash pannel is simple. (Sorry, I had it done prior to taking pics...)
Pull the A/C plugs straight out. Pop off the surrounding dash peice.
Unscrew the 2 screws. Then it just It pops off and unscrews (from the backside) off the A/C Vents.
Its really smooth so sand the face down a bit with fine soft grit paper.
Wipe it, Glue it, Add it, cut around and through center gap (vents), tuck behind, and replace with all screws again into car.
Once you did the door, this'll take no time.
If you want the center box done, youll have to stitch, I had this done for me by a family member cus I dont stitch or any o' that.
Heres what it looks like:
Hope this helped you guys!
- City Knight
Last edited by CityKnight; Oct 4, 2009 at 06:13 PM.
Wow! That was freakin' awesome. I was planning on having a shop do my door panels in red vinyl, but after seeing how easy this looks. I think I'll do it myself. They were charging me $120. Oh yeah, on the OZ door panels, I have black leather and I see some stitching there, should I just pull like in your example or would I need to cut anything first?
Originally Posted by ozmaster
Wow! That was freakin' awesome. I was planning on having a shop do my door panels in red vinyl, but after seeing how easy this looks. I think I'll do it myself. They were charging me $120. Oh yeah, on the OZ door panels, I have black leather and I see some stitching there, should I just pull like in your example or would I need to cut anything first?
If its actually stitched and not just made to "look" like it is, I would suggest takin a small razor and with the point, just take your time clip through the stitches, and then that section should pull right out.
If its not real stitching, F-it!
Place the razor inside the seem/crack and pluck a little till it peels your way.
Grab that piece stickin out and start peeling across...
Hope this helps, good luck on your interior man, sounds good

(Post some pics!)
Marcos M. Duarte


Originally Posted by CityKnight
Why do people move threads around like this (Discuss this topic here) ???
Why doesnt it just get discussed in the thread it was opend in???
Someone educate me here please...
Marcos M. Du... Whatever, Im tired of Signing my name now, people are copying off me, and some are even placing MY NAME on their posts...?

Fu*k It...
Why doesnt it just get discussed in the thread it was opend in???
Someone educate me here please...
Marcos M. Du... Whatever, Im tired of Signing my name now, people are copying off me, and some are even placing MY NAME on their posts...?
Fu*k It...
Trending Topics
even though i'm not a fan of Louis-Vutton interior, you did a very good job and it looks really nice! The how-to seems simple enough that this would've been done already. Well done!

nice write up by teh way, ill post up what mine looks like, my setup is similar to urs in that my fabric is replaced.
Last edited by Blacksheepdj; Nov 23, 2005 at 10:24 AM.
Originally Posted by akasirlancerlot
Marcos M. Duarte
nice write up by teh way, ill post up what mine looks like, my setup is similar to urs in that my fabric is replaced. but mines a lil more.. how u say tastefull.
OH NO, SCLC!!! *GASP
They're such a reputable team (of immature youths), and their all laughin' at me
(in their undertuned economy cars)!!! *SHOCK!!!
"SoCal Lancer Club".....Oooooh *Shivers that (original) name just screeeams "High Caliber".
This is the part where I ignore you from now on, and continue with the thread discussion, and then you dont say anything in argumentative reply, as proof that youre not an "immature youth"... SCLC is counting on you to uphold their dignity.
Pick a Fro & Bens, thanx for the feedback you guys, I appretiate it.
Kaymin, what color is your interior now?
I like the swede idea very much, Ive seen smooth leather, vinyl, and cloths, but not swede yet.
I was thinking perhaps alcantara maybe, have you seen that?
Marcos M. Duarte
Last edited by CityKnight; Nov 21, 2005 at 10:14 AM.