
infected's 2013 RVR SE AWD


Evolved Member
Joined: Feb 2014
Posts: 609
Likes: 39
From: Montreal, QC, Canada
Just came back from a short trip. No noise whatsoever. This one comes with the foam that stretches across the entire holder. I noticed others only partially cover the interior so be sure to keep an eye out for that.
As for the color, like I mentioned, it matches quite well and unless you compare the original handle and cover side by side, you won't be able to notice much of a difference. It looks good against the headliner.
As for the color, like I mentioned, it matches quite well and unless you compare the original handle and cover side by side, you won't be able to notice much of a difference. It looks good against the headliner.
Thread Starter
Evolving Member
Joined: Sep 2013
Posts: 265
Likes: 1
From: Calgary, AB
61. Bazooka BTA8100 Bass Tube Subwoofer
I've been on the fence about this for some time but since it came up on sale the other day, I finally decided to give it a try. I wanted an active sub so I wouldn't have to deal with trying to find a spot to hide an amp and enclosure. It seems Bazooka has a very easy installation procedure without the need for extra harnesses and trying to route power from the battery. Anyways, here she is in all her glory...
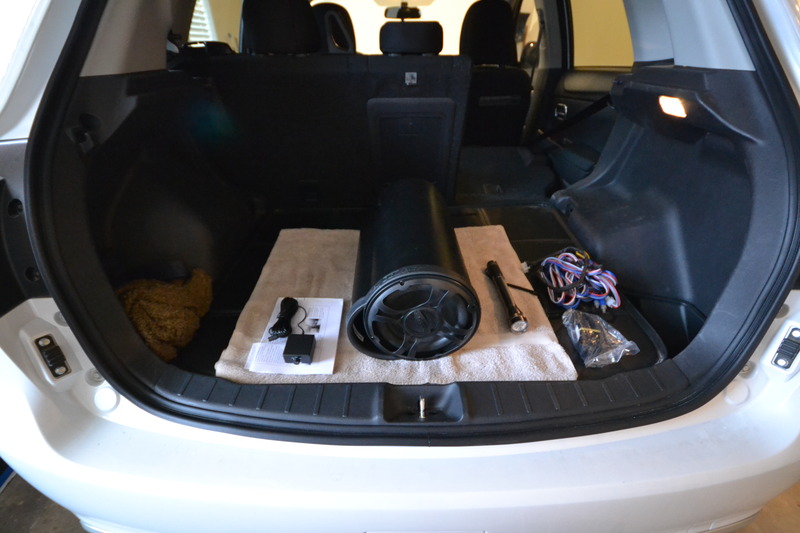
It's an 8" rated at 100 watts. It seemed more than enough as I am over the phase of rattling trunks. I simply want more enhancement to the upgraded Pioneer in-door speakers as they've been taking a bit more abuse than they deserve. At the same time, I definitely did not want to sacrifice any trunk space.
I looked into the RF sub and enclosure from the factory but the price was simply too outrageous. Luckily, if my measurements are correct, then the Bazooka should fit in the same location without much interference to cargo space.
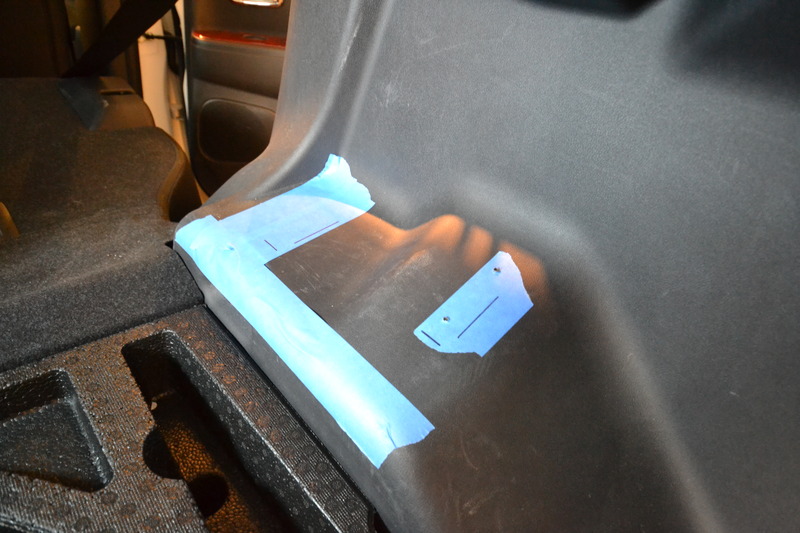
I scratched my arms up trying to reach in under the panel to make sure there wouldn't be any hidden wires when drilling the brackets. Bazooka recommends placing the bracket 3" from each end but since space is at a premium here and we're dealing with an oddly shaped panel, we'll have to compromise.

I grounded to one of the brackets next to the shock tower and ran the harness and remote controller along the right lower floor panels towards the glove box.
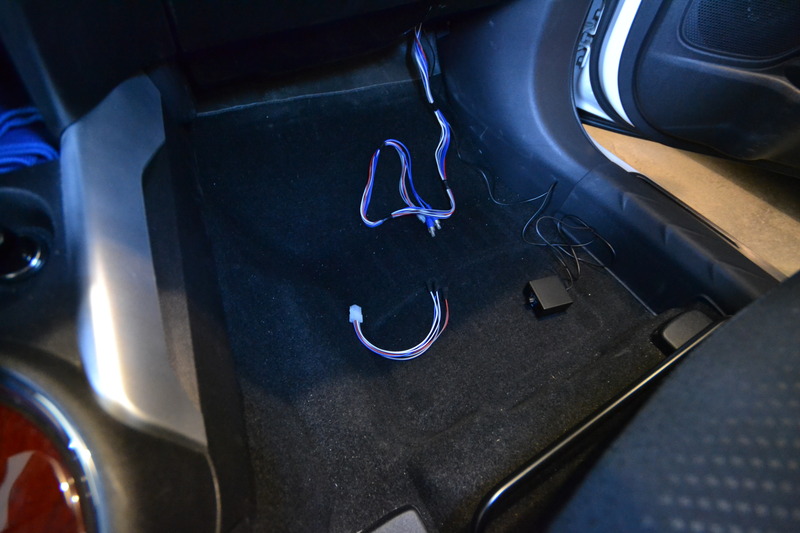
Here we are again, I always dread having to repeat previous work but I think the head unit install write-up from before really paid off as I didn't leave behind as much of a rats nest as I recall. The Bazooka harness simply taps into the front speakers, ignition power, and amp power. That's it. Very easy and I'm glad they made it as such.
Buttoned everything back up and did a test run. No sound. Turns out there is a power switch on the back of the sub. This will come in handy when the in-laws are over. Flick of a switch and everything works!
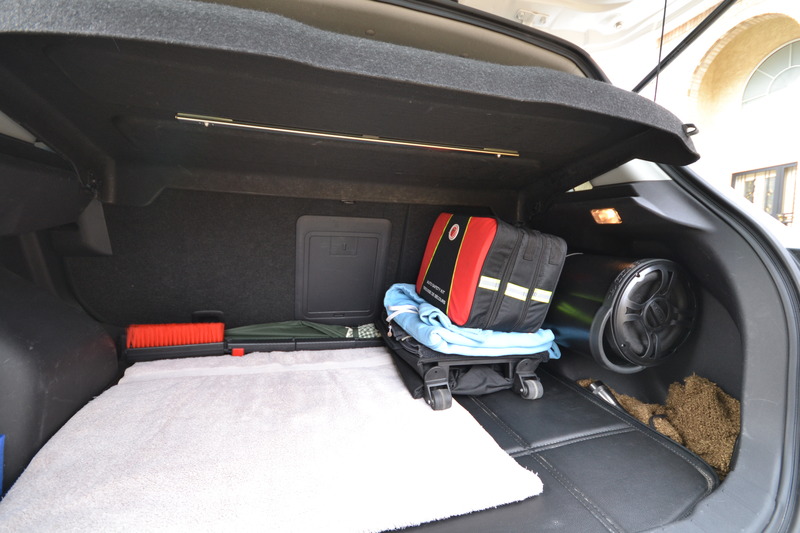
Really happy about the measurements. I didn't lose any trunk space (I don't put anything on top of the right hump in the panel anyways).
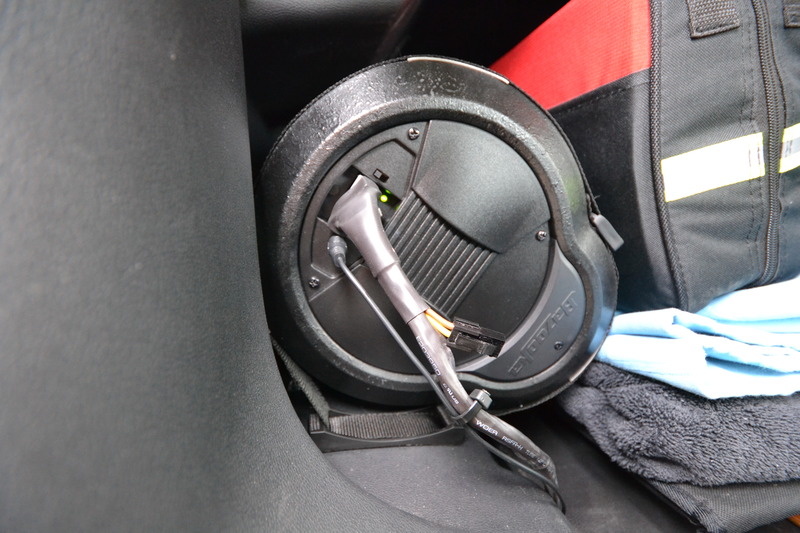
The backside is simply the harness, a volume control knob, plug-in for the remote control switch, and a power on/off switch. The hanging yellow/brown wire is for the sound loop if your head unit doesn't have an amp switch or power antenna. Otherwise it can be left disconnected and set aside the loop harness.
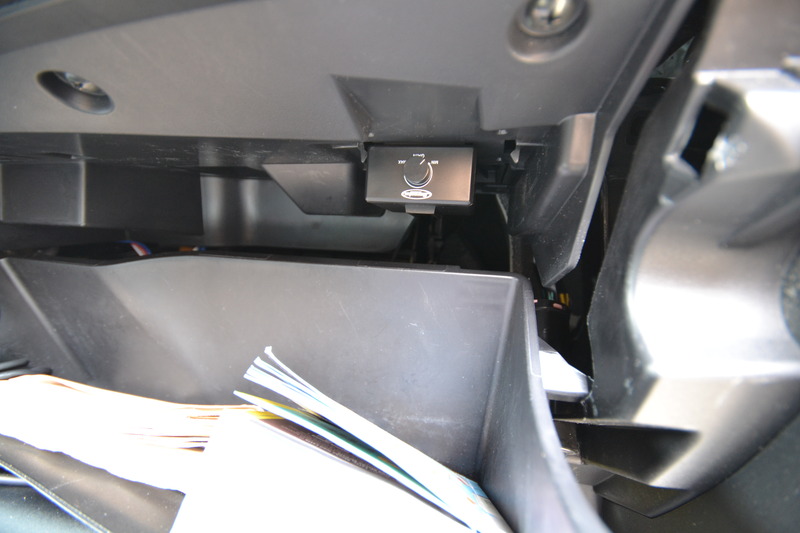
Here is the remote control switch I wired in the glove box for easy access. My aux and USB input is also in the glove box if you recall from my previous head unit install write-up.
That's all there is to it. Very easy install and most of my time was spent measuring and getting the sub to fit as snugly as possible in the corner. The sub sounds like it has more than 100 watts for sure and the remote switch really comes in handy being just an arms reach away. If you don't have the RF system already and want to add a little more dynamic to your music then I highly recommend the Bazooka tube without hindering cargo space.

It's an 8" rated at 100 watts. It seemed more than enough as I am over the phase of rattling trunks. I simply want more enhancement to the upgraded Pioneer in-door speakers as they've been taking a bit more abuse than they deserve. At the same time, I definitely did not want to sacrifice any trunk space.
I looked into the RF sub and enclosure from the factory but the price was simply too outrageous. Luckily, if my measurements are correct, then the Bazooka should fit in the same location without much interference to cargo space.

I scratched my arms up trying to reach in under the panel to make sure there wouldn't be any hidden wires when drilling the brackets. Bazooka recommends placing the bracket 3" from each end but since space is at a premium here and we're dealing with an oddly shaped panel, we'll have to compromise.

I grounded to one of the brackets next to the shock tower and ran the harness and remote controller along the right lower floor panels towards the glove box.

Here we are again, I always dread having to repeat previous work but I think the head unit install write-up from before really paid off as I didn't leave behind as much of a rats nest as I recall. The Bazooka harness simply taps into the front speakers, ignition power, and amp power. That's it. Very easy and I'm glad they made it as such.

Buttoned everything back up and did a test run. No sound.
Turns out there is a power switch on the back of the sub. This will come in handy when the in-laws are over. Flick of a switch and everything works!
Really happy about the measurements. I didn't lose any trunk space (I don't put anything on top of the right hump in the panel anyways).
The backside is simply the harness, a volume control knob, plug-in for the remote control switch, and a power on/off switch. The hanging yellow/brown wire is for the sound loop if your head unit doesn't have an amp switch or power antenna. Otherwise it can be left disconnected and set aside the loop harness.

Here is the remote control switch I wired in the glove box for easy access. My aux and USB input is also in the glove box if you recall from my previous head unit install write-up.

That's all there is to it. Very easy install and most of my time was spent measuring and getting the sub to fit as snugly as possible in the corner. The sub sounds like it has more than 100 watts for sure and the remote switch really comes in handy being just an arms reach away. If you don't have the RF system already and want to add a little more dynamic to your music then I highly recommend the Bazooka tube without hindering cargo space.
Last edited by infected; Mar 21, 2016 at 02:04 PM. Reason: Pics

Thread Starter
Evolving Member
Joined: Sep 2013
Posts: 265
Likes: 1
From: Calgary, AB
I picked it up from a local electronics store on sale for half price from $300 to $150. It also came with the wiring harness and remote control which would have been an additional $40 and $20. $90 for the sub isn't that bad so I couldn't resist.
Thread Starter
Evolving Member
Joined: Sep 2013
Posts: 265
Likes: 1
From: Calgary, AB
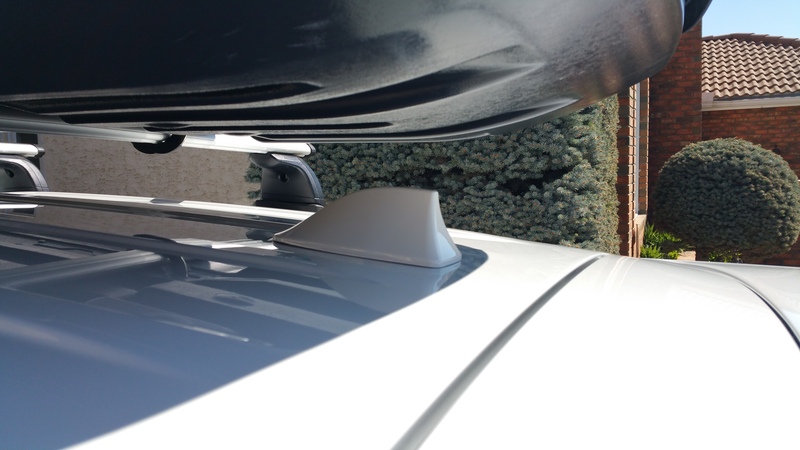
62. Shark Fin Antenna
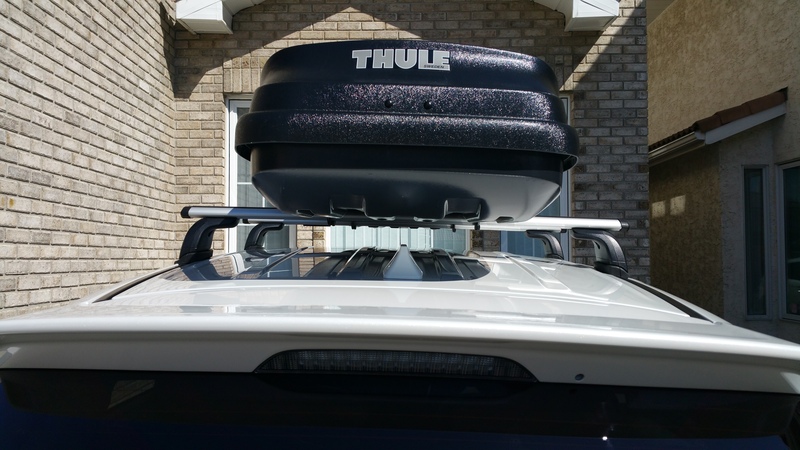
I used to have a stubby antenna but it didn't quite fit all that well. I then switched back to the OEM antenna but it hits the cargo box as seen here:
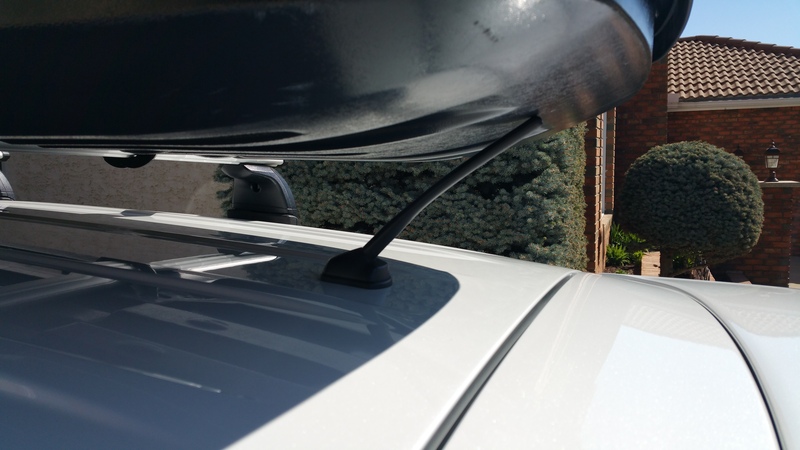
Although not too big of a deal, I still wanted to try the shark fin for fun.
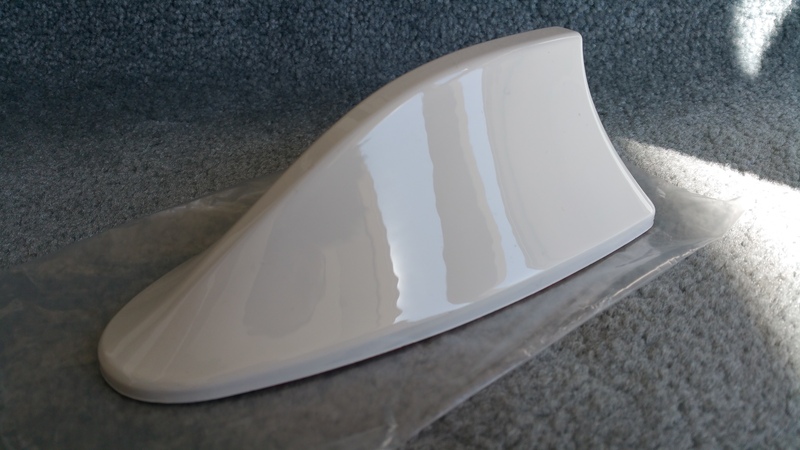

Very straight forward install. I'm not sure how well the chip improves radio reception if any at all. Some of the feedback I've been hearing is that the shark fin is worse than the OEM antenna but since I don't listen to the radio much anyways, that doesn't bother me.
Pretty cool. Two thumbs up!

Although not too big of a deal, I still wanted to try the shark fin for fun.


Very straight forward install. I'm not sure how well the chip improves radio reception if any at all. Some of the feedback I've been hearing is that the shark fin is worse than the OEM antenna but since I don't listen to the radio much anyways, that doesn't bother me.

Pretty cool. Two thumbs up!

Thread Starter
Evolving Member
Joined: Sep 2013
Posts: 265
Likes: 1
From: Calgary, AB
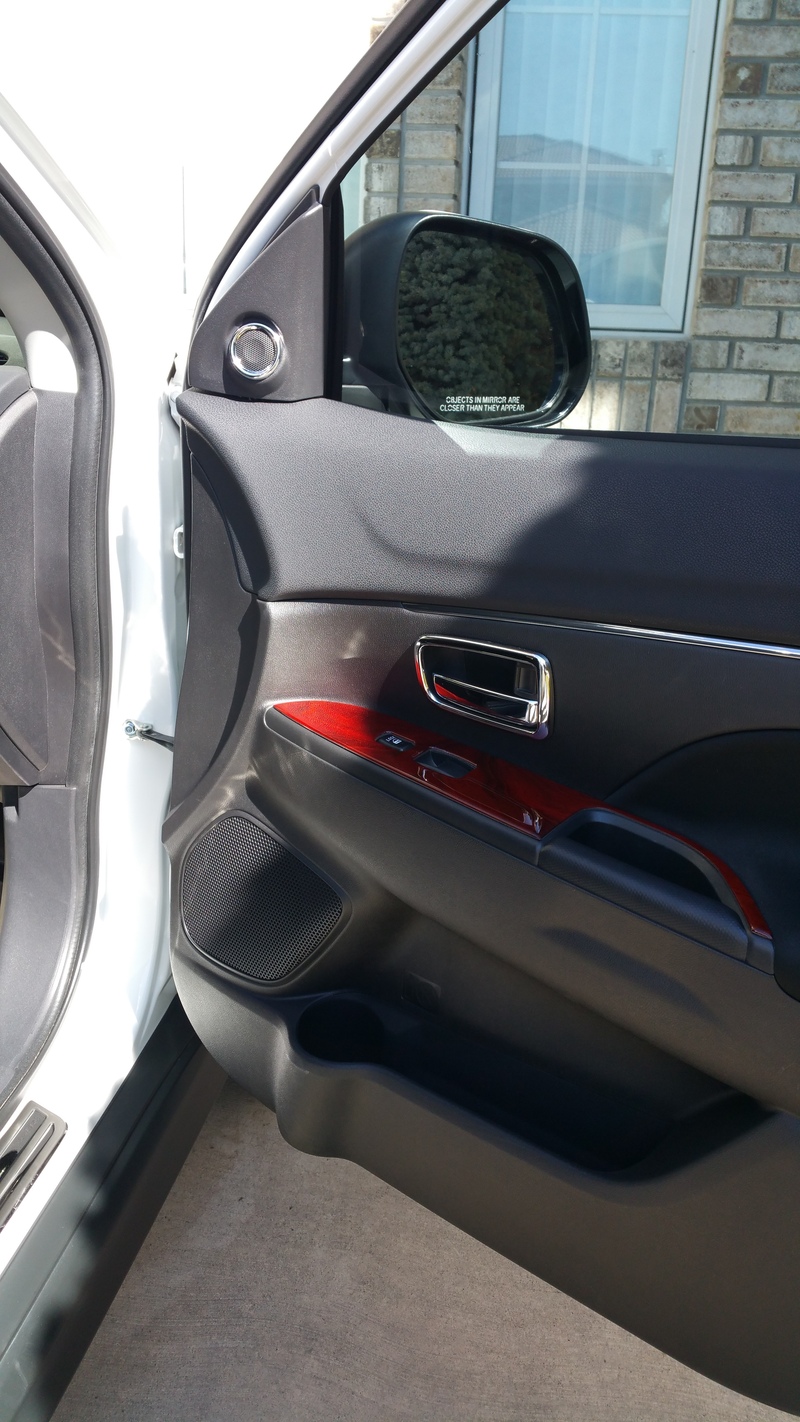
63. Tweeter Speaker Rings
I've been on the fence about these for a while due to the fear that the chrome will be a distraction while driving. It's not a pricey mod so worth a try for now to see if it'll grow on me.
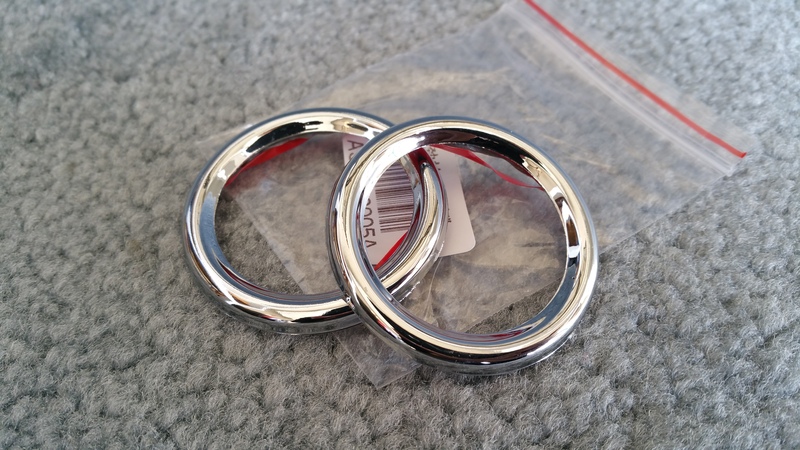
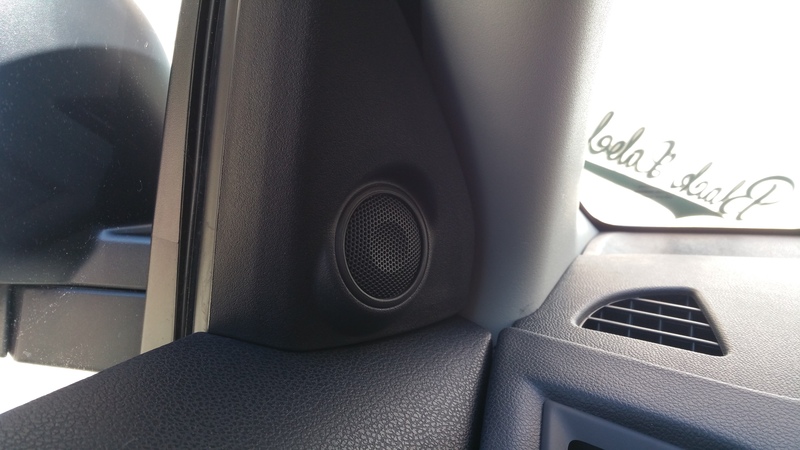
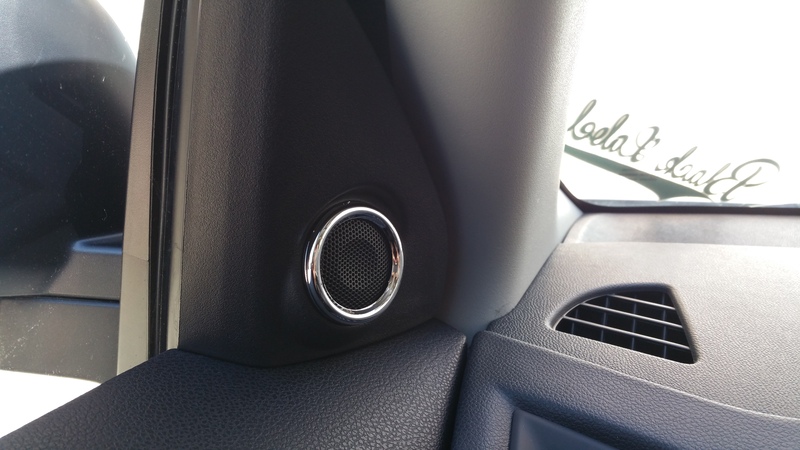
I do like that they bring more detail to the door and compliment the door handle rings.


I do like that they bring more detail to the door and compliment the door handle rings.

Thread Starter
Evolving Member
Joined: Sep 2013
Posts: 265
Likes: 1
From: Calgary, AB
64. Refinished SSR Type C Wheels and Pirelli P4 Plus Tires
This year I decided to change up the look a bit without going too overboard. The Type C's were a gunmetal/grey which complimented the color scheme pretty well but they were chipping around the edges. I thought about switching to 18's but ultimately decided to stay with 16's for a number of reasons. The main ones being ride comfort and also aesthetics. I prefer the full face brake "look" filling up the inside of the wheel. Just personal preference.
I had the wheels powdercoated and ordered replacement spoke decals from SSR. One of the TPMS from last year couldn't make it out in one piece during dismounting so I ended up replacing the set (old set for sale on the forums now, btw). I also sold the OEM Geolanders as they were obnoxiously loud on the road and with the 8" rim, I didn't like the mini stretch on the tires. I picked up a set of Pirelli P4 Four Seasons Plus tires instead. Ride comfort and road noise is much improved. I'm now running 235/65/16 to not stretch the tires. I'm still deciding if I like the color but so far I'm pretty happy with how it came together.
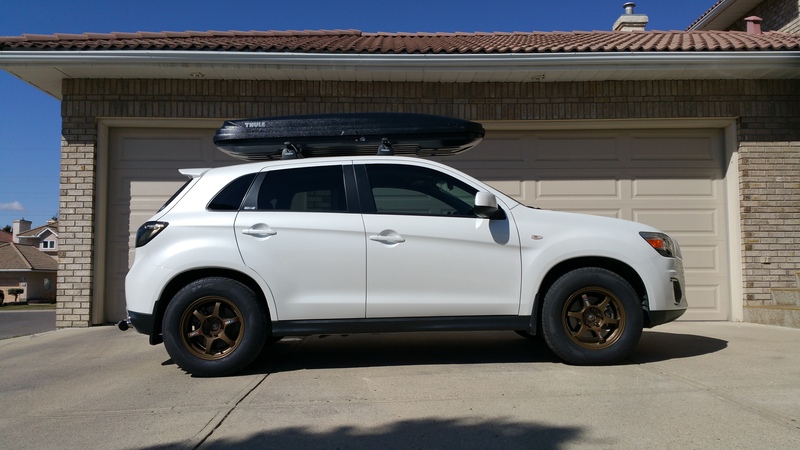
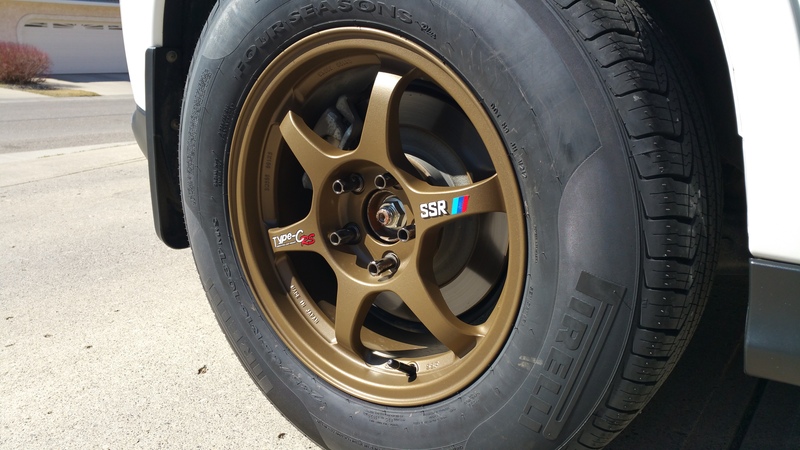
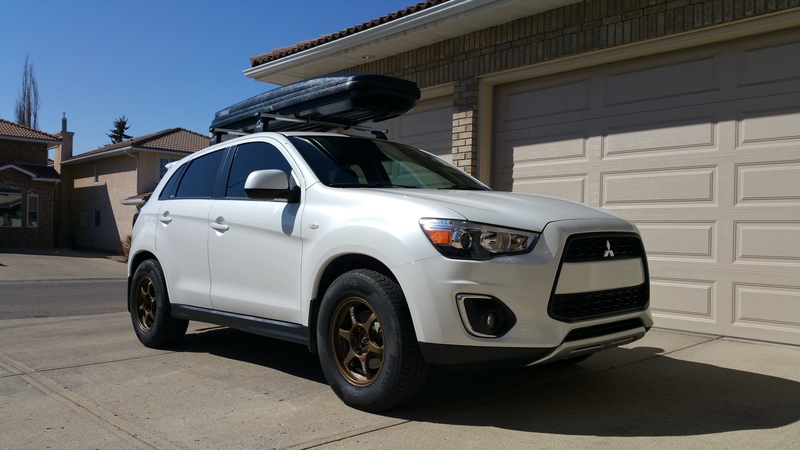
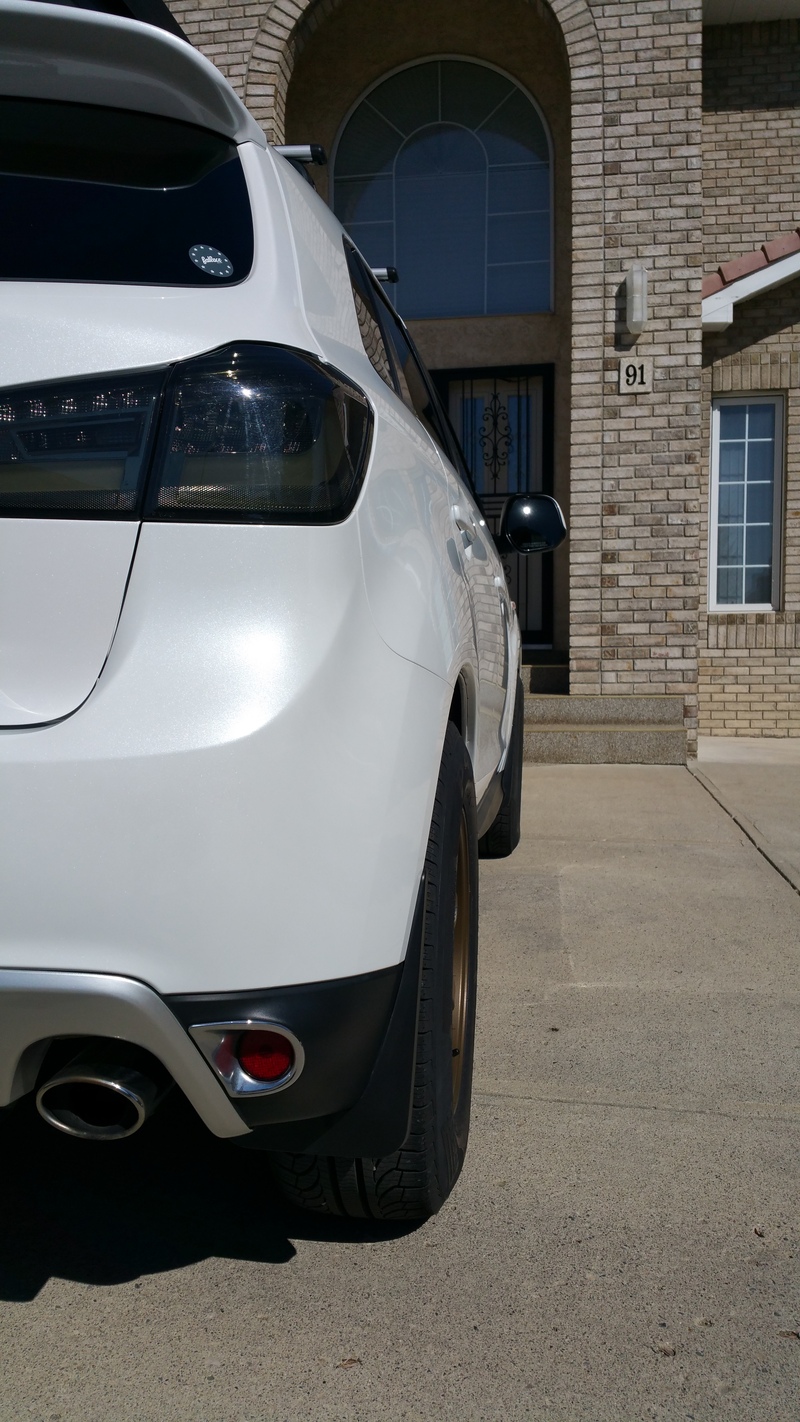
The wheels stick out a bit more now with the wider tires. I have center caps on order from SSR so hopefully that'll clean up the look a little more when they arrive.
I had the wheels powdercoated and ordered replacement spoke decals from SSR. One of the TPMS from last year couldn't make it out in one piece during dismounting so I ended up replacing the set (old set for sale on the forums now, btw). I also sold the OEM Geolanders as they were obnoxiously loud on the road and with the 8" rim, I didn't like the mini stretch on the tires. I picked up a set of Pirelli P4 Four Seasons Plus tires instead. Ride comfort and road noise is much improved. I'm now running 235/65/16 to not stretch the tires. I'm still deciding if I like the color but so far I'm pretty happy with how it came together.


The wheels stick out a bit more now with the wider tires. I have center caps on order from SSR so hopefully that'll clean up the look a little more when they arrive.

Thread Starter
Evolving Member
Joined: Sep 2013
Posts: 265
Likes: 1
From: Calgary, AB
I haven't tried the radio yet but will report back when I do!

Newbie
Joined: Oct 2015
Posts: 2
Likes: 0
From: Canada
A friend very graciously donated these to replace the stock speakers in all four doors. I do not have the RF package so this has always been on my mind. The speakers are Pioneer TS-A1674R 6.5" all around. I don't listen to music at high volumes so there isn't too much of a noticeable improvement from daily driving. I figure it's more for the brand since I'm a Pioneer *****. 


Thread Starter
Evolving Member
Joined: Sep 2013
Posts: 265
Likes: 1
From: Calgary, AB
All 4 door panels are extremely easy to remove. Two bolts and pull out, then up. That's it.
Unclip the harness and door lock/lever and you're good to go from there.