
infected's 2013 RVR SE AWD

Thread Starter
Evolving Member
Joined: Sep 2013
Posts: 265
Likes: 1
From: Calgary, AB
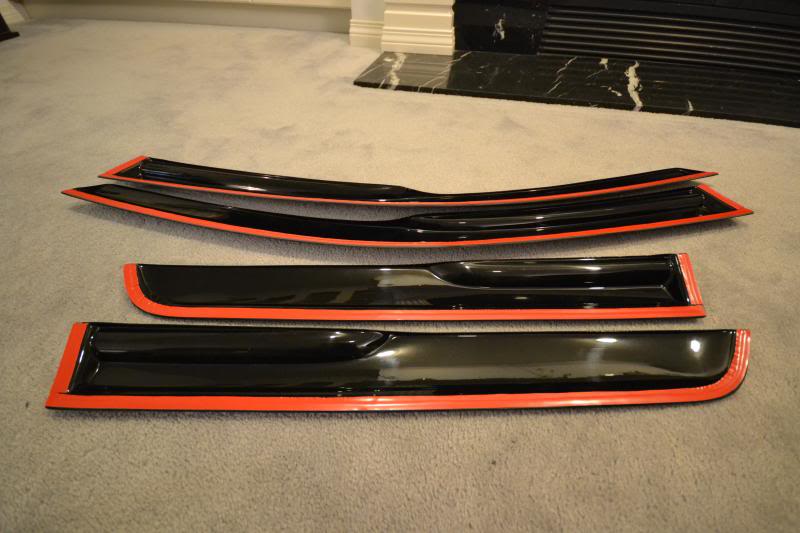
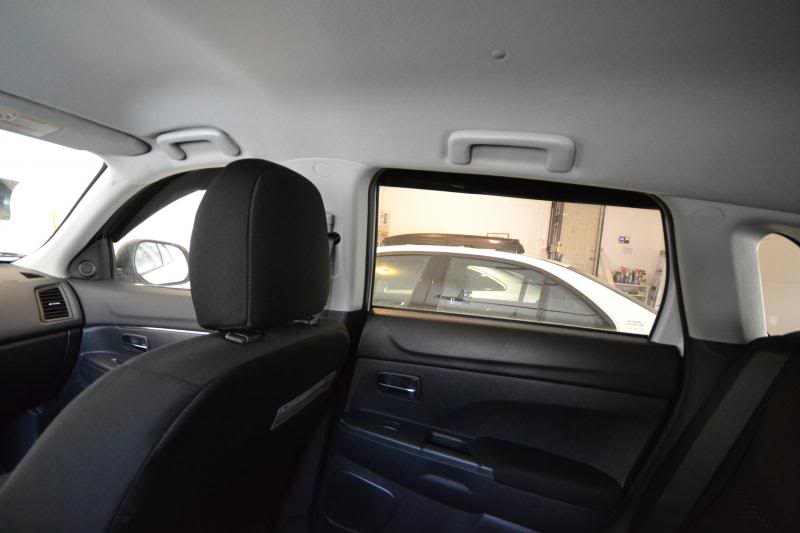
22. Aomis Window Deflectors
I've always been curios to what it would feel like to have a vehicle with window visors installed. I've never done it all this time as I seem to have a negative vibe they're brittle pieces of plastic that will eventually crack or fly off in the wind. At the same time, I have always enjoyed the look of the more streamlined visors, similar to what Mugen offers the Honda boys.
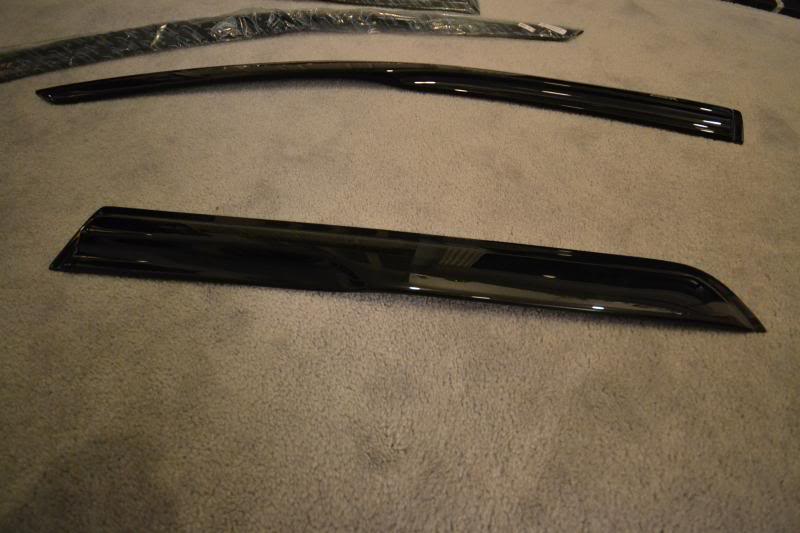
And so here we have my new Aomis rain visors. Two sets, that is. I liked how these were contoured and hugged the windows tight for a more appealing look, yet I was still nervous of them breaking over time or losing a piece on the freeway. Hence, I decided to pick up two sets and keep one for spare.
I know, I'm a hoarder.
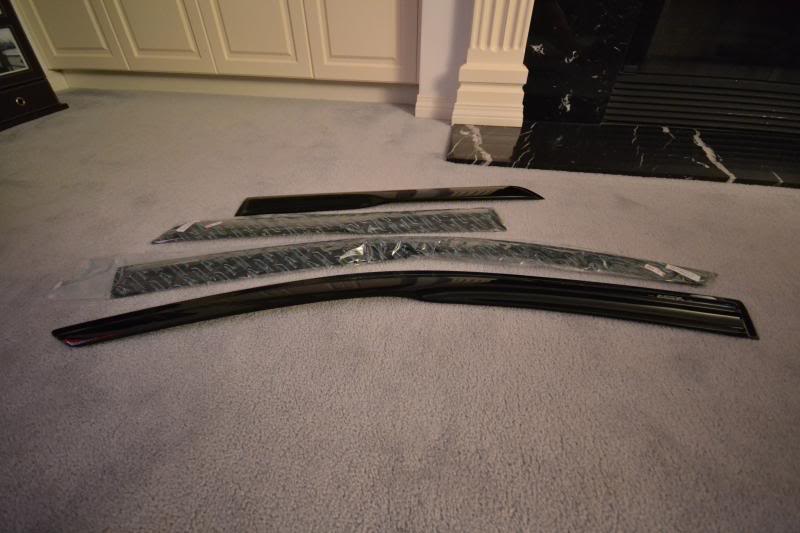
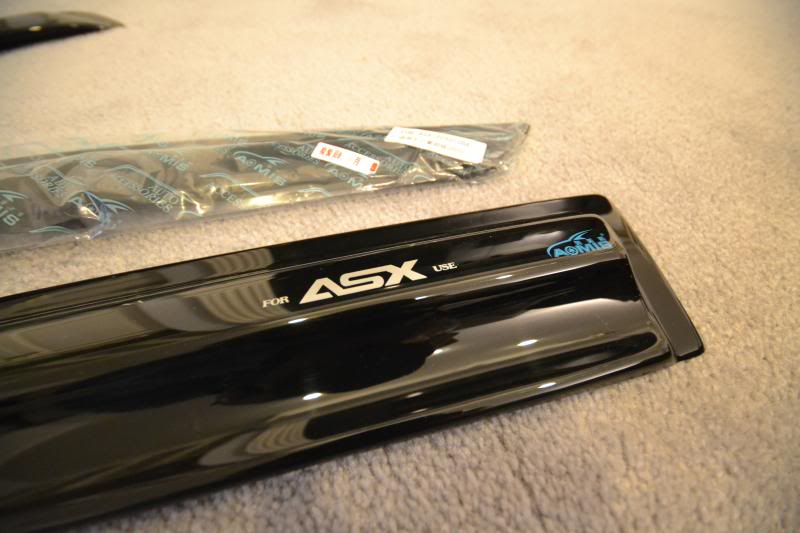
To tell you the truth, I wasn't the most excited about the branding. I tried to remove the ASX logo with nail polish remover to no avail. So I just gave up and hoped for the best that I would ignore the logo after the visors are installed.
For extra measure, I redid all the adhesive on the back to make sure I don't pull up to park one day only to find one of my visors gone and never to be found again.
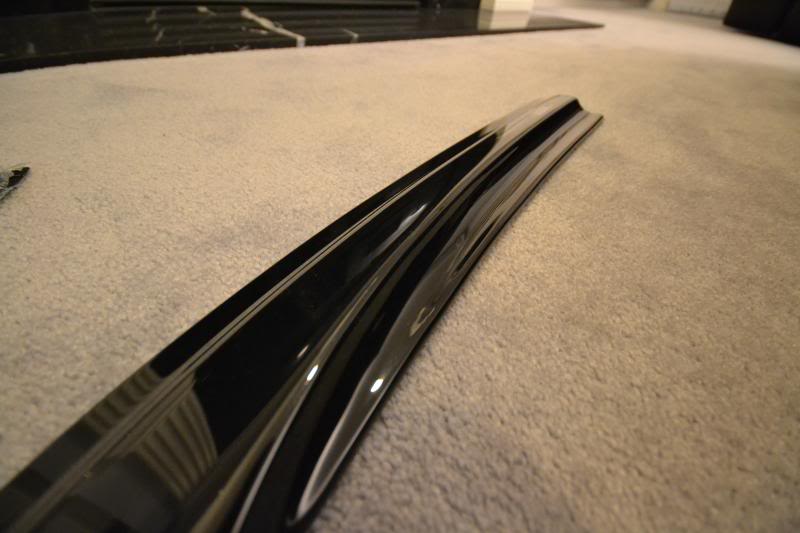
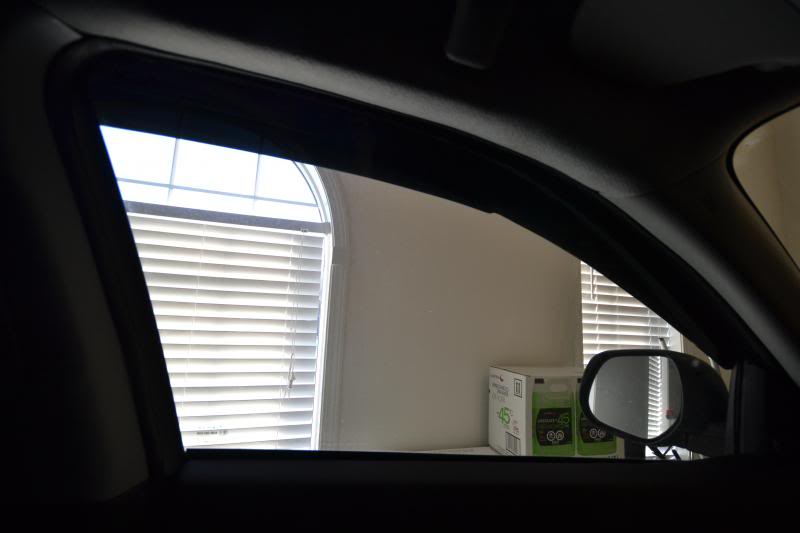
Getting measured up!
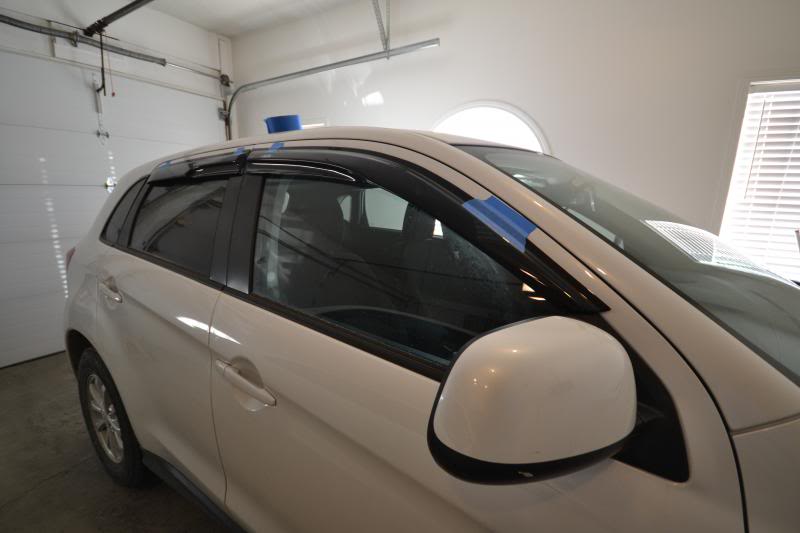
Easy peasy. Love the way it hugs the glass nice and tight without touching. Not a lot of noticeable increased road noise until a slight build up of wind noise around 80km and up. For around the city though, these are perfect, keep the afternoon sun out, and add to a sense of 'security' which is seemingly odd. But I'll take it!
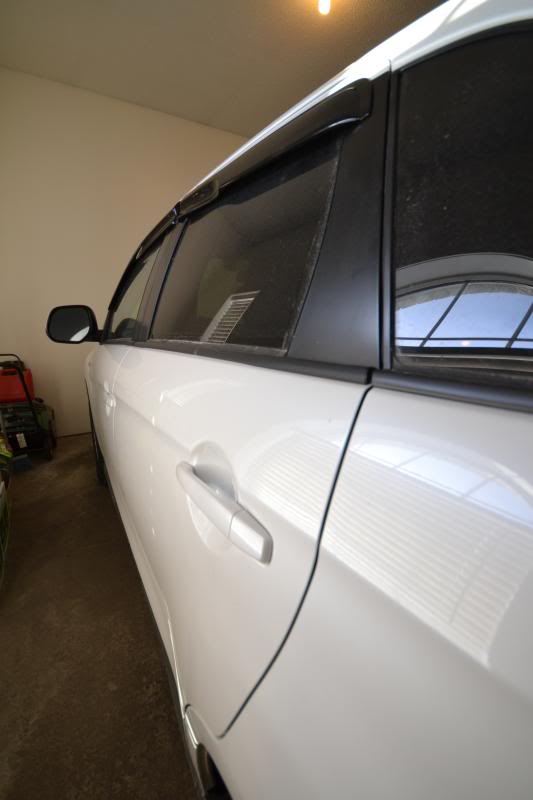


And I'm spent!
And so here we have my new Aomis rain visors. Two sets, that is. I liked how these were contoured and hugged the windows tight for a more appealing look, yet I was still nervous of them breaking over time or losing a piece on the freeway. Hence, I decided to pick up two sets and keep one for spare.
I know, I'm a hoarder.


To tell you the truth, I wasn't the most excited about the branding. I tried to remove the ASX logo with nail polish remover to no avail. So I just gave up and hoped for the best that I would ignore the logo after the visors are installed.

For extra measure, I redid all the adhesive on the back to make sure I don't pull up to park one day only to find one of my visors gone and never to be found again.

Getting measured up!

Easy peasy. Love the way it hugs the glass nice and tight without touching. Not a lot of noticeable increased road noise until a slight build up of wind noise around 80km and up. For around the city though, these are perfect, keep the afternoon sun out, and add to a sense of 'security' which is seemingly odd. But I'll take it!


And I'm spent!

Joined: Feb 2012
Posts: 1,177
Likes: 16
From: Milwaukee, WI


Account Disabled
Joined: Mar 2013
Posts: 569
Likes: 2
From: 1776
I've always been curios to what it would feel like to have a vehicle with window visors installed. I've never done it all this time as I seem to have a negative vibe they're brittle pieces of plastic that will eventually crack or fly off in the wind. At the same time, I have always enjoyed the look of the more streamlined visors, similar to what Mugen offers the Honda boys.
And so here we have my new Aomis rain visors. Two sets, that is. I liked how these were contoured and hugged the windows tight for a more appealing look, yet I was still nervous of them breaking over time or losing a piece on the freeway. Hence, I decided to pick up two sets and keep one for spare.
I know, I'm a hoarder.


To tell you the truth, I wasn't the most excited about the branding. I tried to remove the ASX logo with nail polish remover to no avail. So I just gave up and hoped for the best that I would ignore the logo after the visors are installed.

For extra measure, I redid all the adhesive on the back to make sure I don't pull up to park one day only to find one of my visors gone and never to be found again.

Getting measured up!

Easy peasy. Love the way it hugs the glass nice and tight without touching. Not a lot of noticeable increased road noise until a slight build up of wind noise around 80km and up. For around the city though, these are perfect, keep the afternoon sun out, and add to a sense of 'security' which is seemingly odd. But I'll take it!


And I'm spent!
And so here we have my new Aomis rain visors. Two sets, that is. I liked how these were contoured and hugged the windows tight for a more appealing look, yet I was still nervous of them breaking over time or losing a piece on the freeway. Hence, I decided to pick up two sets and keep one for spare.
I know, I'm a hoarder.
To tell you the truth, I wasn't the most excited about the branding. I tried to remove the ASX logo with nail polish remover to no avail. So I just gave up and hoped for the best that I would ignore the logo after the visors are installed.
For extra measure, I redid all the adhesive on the back to make sure I don't pull up to park one day only to find one of my visors gone and never to be found again.
Getting measured up!
Easy peasy. Love the way it hugs the glass nice and tight without touching. Not a lot of noticeable increased road noise until a slight build up of wind noise around 80km and up. For around the city though, these are perfect, keep the afternoon sun out, and add to a sense of 'security' which is seemingly odd. But I'll take it!
And I'm spent!
Thread Starter
Evolving Member
Joined: Sep 2013
Posts: 265
Likes: 1
From: Calgary, AB
Blast! Then it must be an Outlander Sprot vs Lancer issue then. Lucky you I couldn't even thread anything on that bolt. Not sure how I managed to secure the DIY bracket on the second bolt further back. Keep us posted on how you rigged up your setup!
Thread Starter
Evolving Member
Joined: Sep 2013
Posts: 265
Likes: 1
From: Calgary, AB
I feel like I should have gotten the cheaper stick on visors instead of weathertech, because weathertech's rattle over time, but they do look better. I also like the fact that I can crack my window an inch or two and nobody would know, but the rear window visors are pretty useless. You'll find out why soon enough lol

So stick-on it is! Hoping it also deals with the premature exterior window seal failure some of the other folks are talking about.
Thread Starter
Evolving Member
Joined: Sep 2013
Posts: 265
Likes: 1
From: Calgary, AB
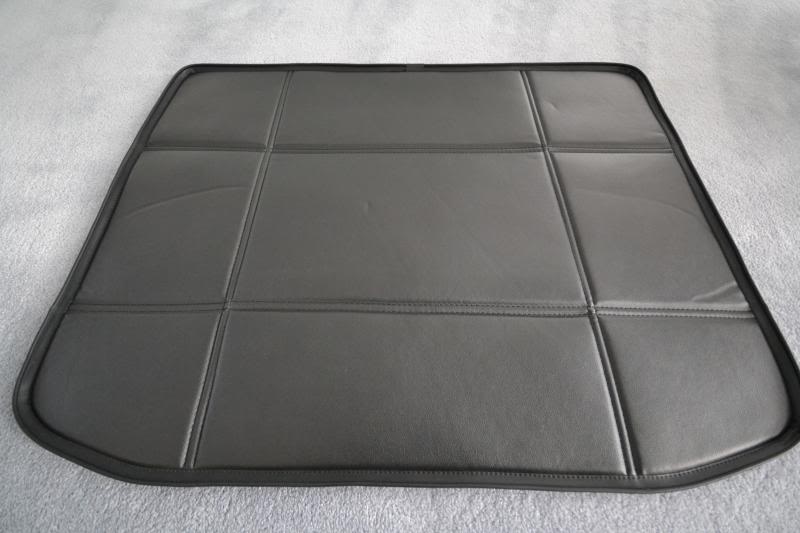
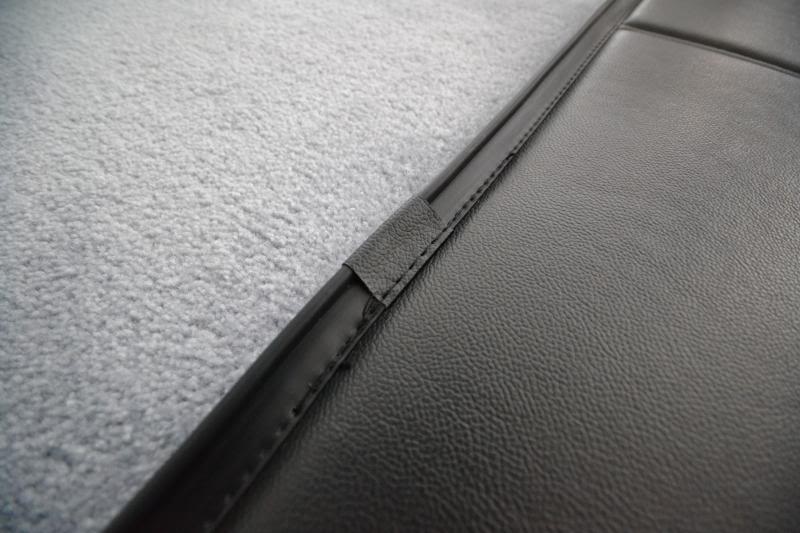
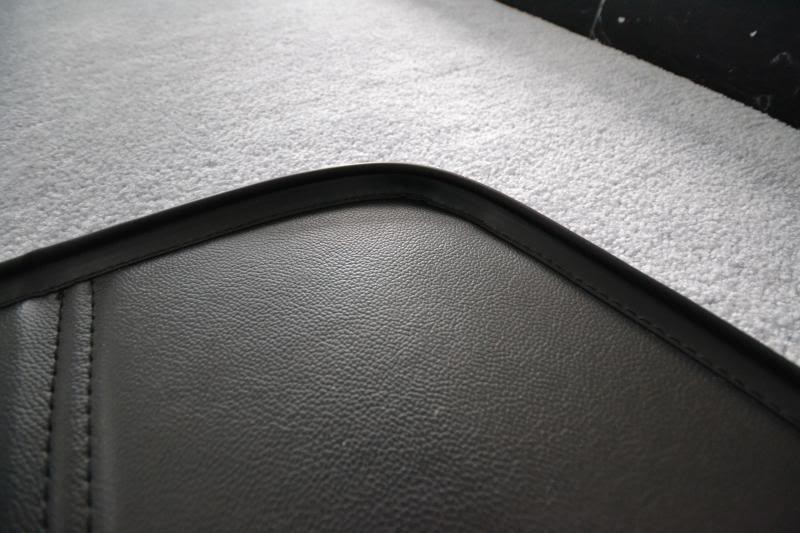
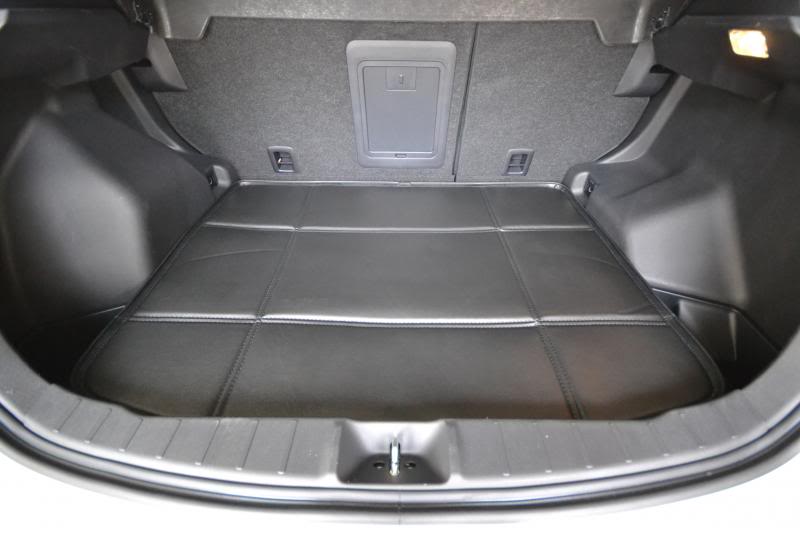
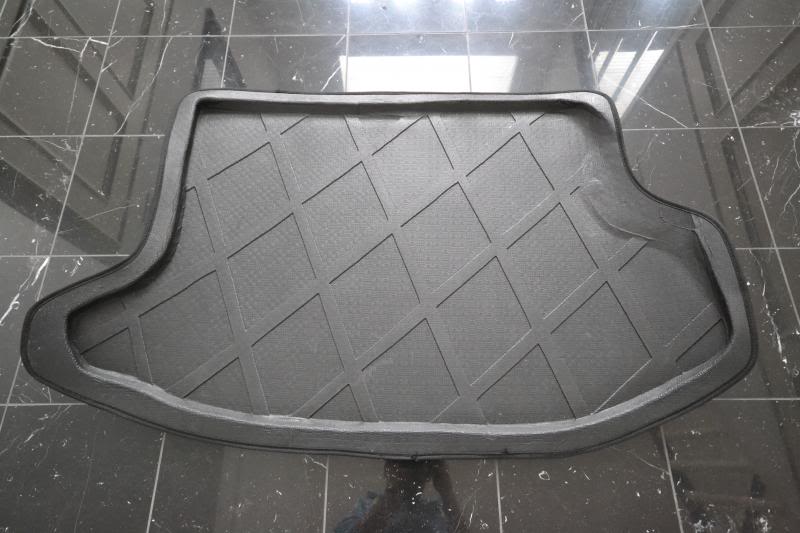
23. Trunk Liner V2
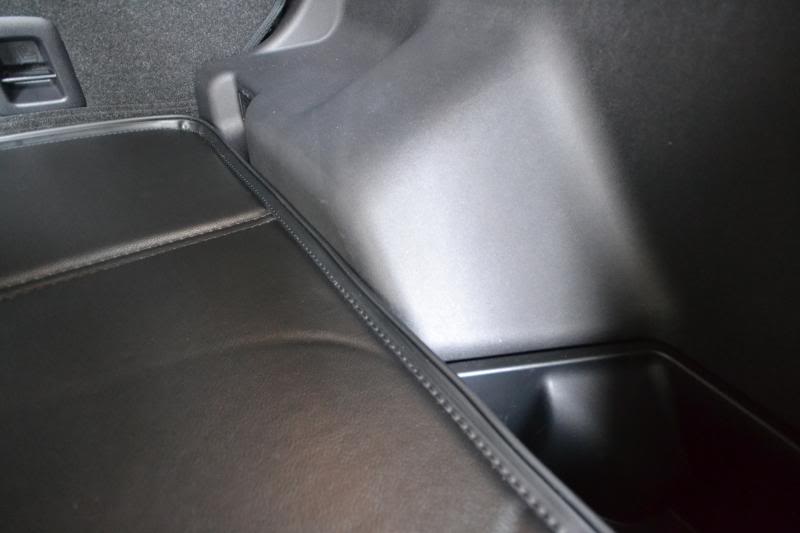
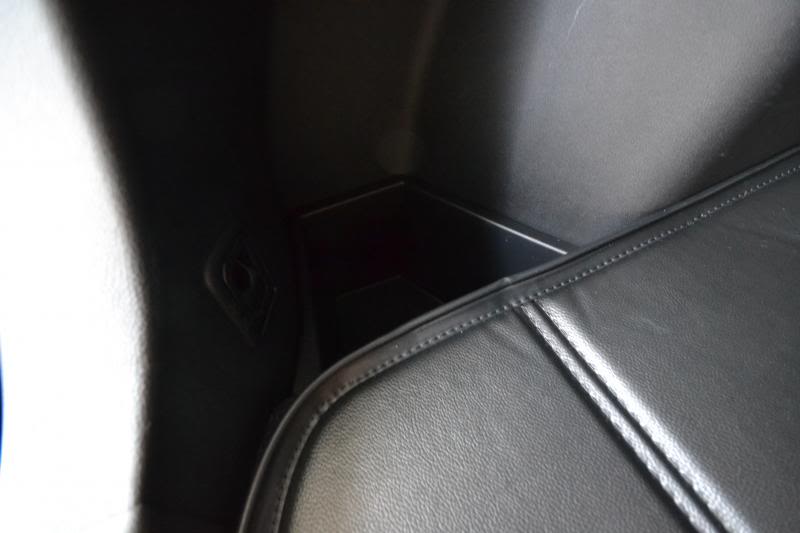
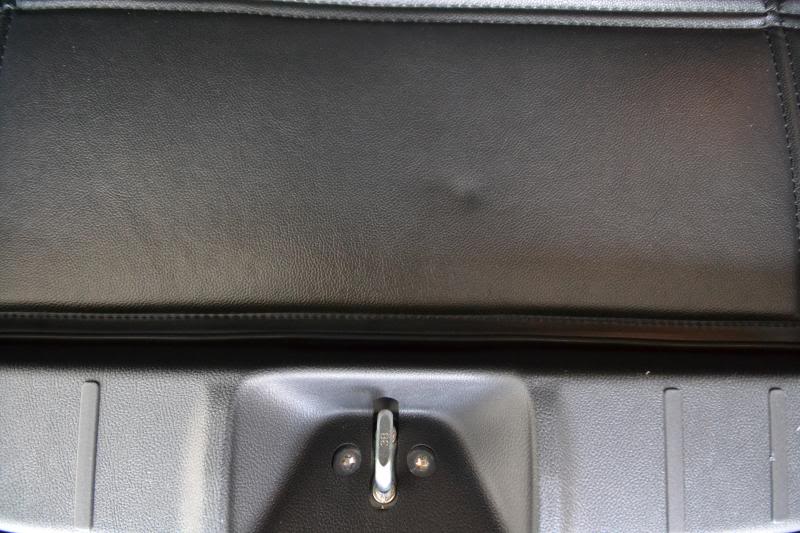
So the original trunk liner I had wasn't working out too well for me. It was a great bargain but I hated how the wings covered the storage bins on each side, and I just couldn't keep the thing flat. The fitment on the right side was also a little off which caused it to ride up over the plastic panel. Overall, it just wasn't the best fit but couldn't complain for the value. I decided to try another route though and ended up with this pleather/vinyl trunk liner. It also has a slightly raised edge and can actually be folded into a smaller piece if you're on the go. The material matches the steering wheel and shift knob quite well, and has a plush feel to it. The best fact about this new mat is that it fits PERFECT. I'll let the pictures do the talking...
So here is my old mat up for grabs if anyone doesn't want to spend a boatload for the WeatherTech and just need something quick and simple to get the job done. I don't know, I'll say $10 + whatever shipping and it's yours!


So here is my old mat up for grabs if anyone doesn't want to spend a boatload for the WeatherTech and just need something quick and simple to get the job done. I don't know, I'll say $10 + whatever shipping and it's yours!

Thread Starter
Evolving Member
Joined: Sep 2013
Posts: 265
Likes: 1
From: Calgary, AB
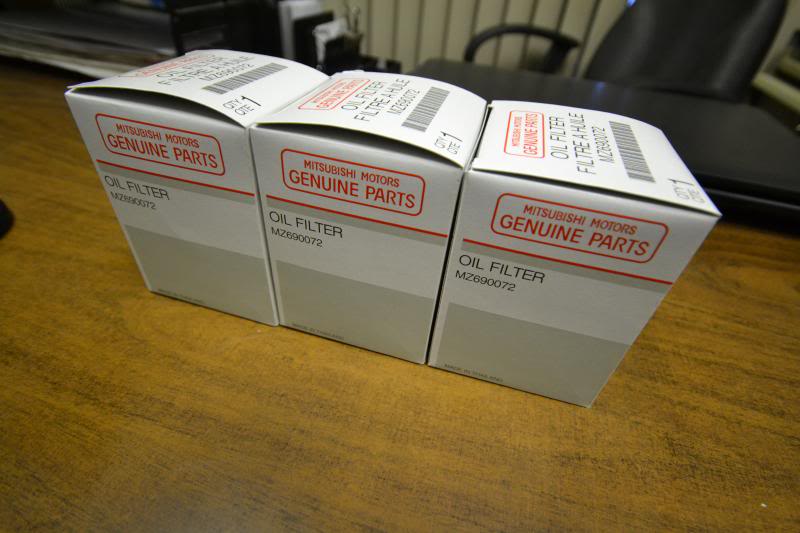
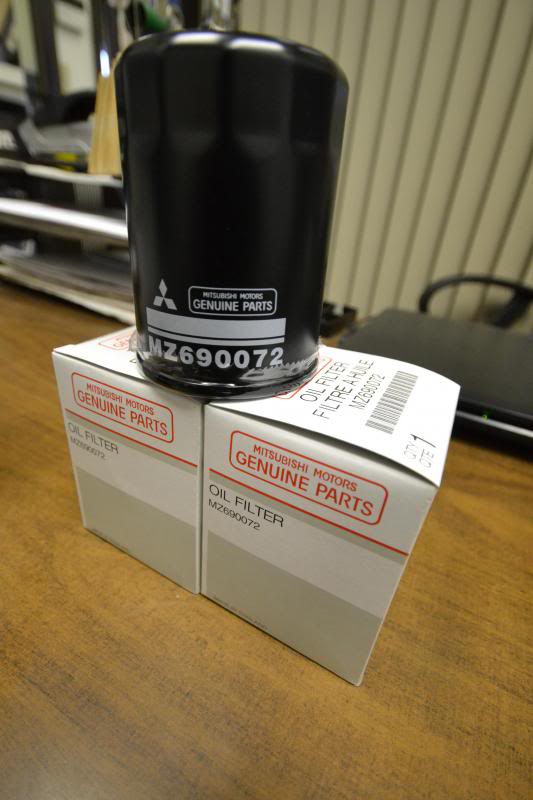
24. First Oil Change
The RVR just passed 3200kms and I thought it would be good to get some fresh oil in during the break in process. The manual calls for 8000kms but I was curious to see how many shavings would be floating around. Everything looks great and I'm happy with how things are progressing with the RVR. I picked up some OEM filters at the Dealer the other day as well. Comes with the crush washer at around $9 CDN a pop.
All lubed up! Will probably stick to the routine schedule now but switch over to synthetic for the next service after it's had more time to break in.


All lubed up! Will probably stick to the routine schedule now but switch over to synthetic for the next service after it's had more time to break in.

Thread Starter
Evolving Member
Joined: Sep 2013
Posts: 265
Likes: 1
From: Calgary, AB
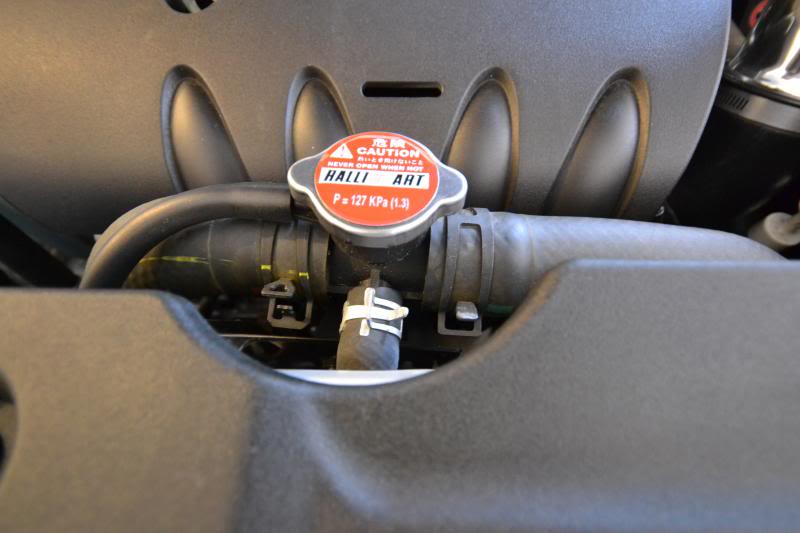
25. Ralli Art Radiator Cap
I was sent on a mission to pick up some Ralli Art rad cap for a couple fellow forum members and all I could find were the black logos. Somehow I came across this puppy by fluke. It's red!
I love red!
Of course we have to start off with a shot of the boring old factory rad cap.
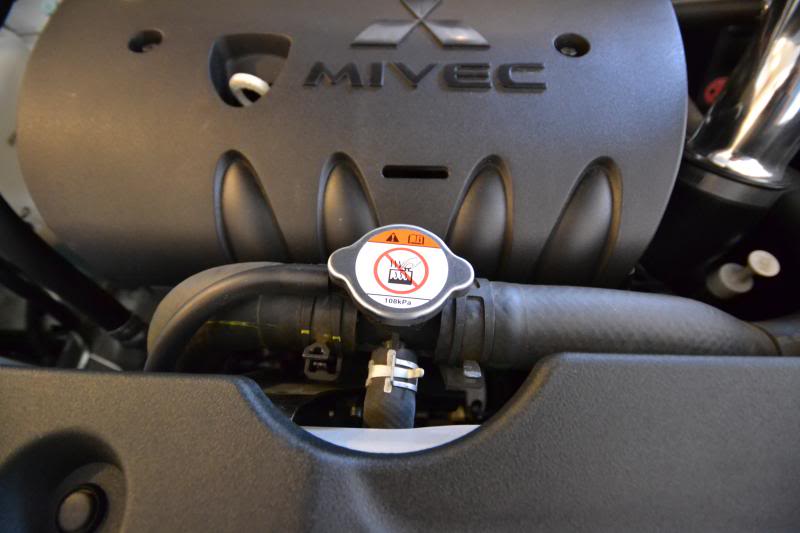
And after:
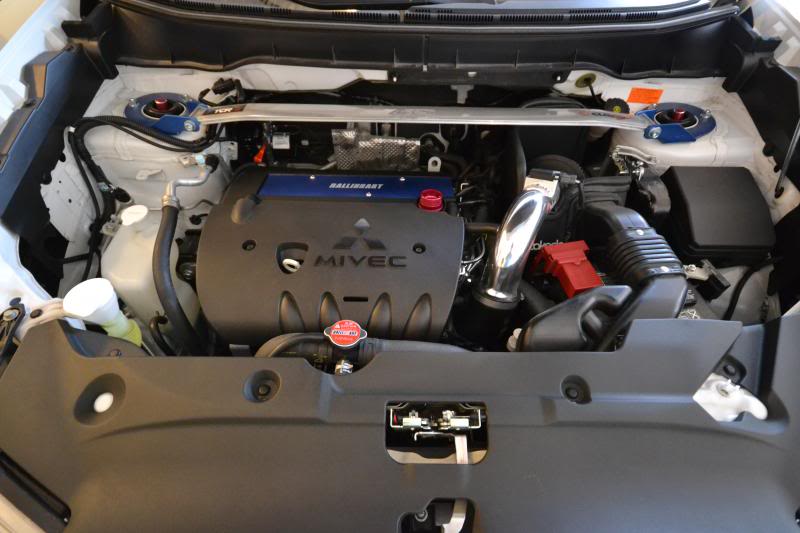
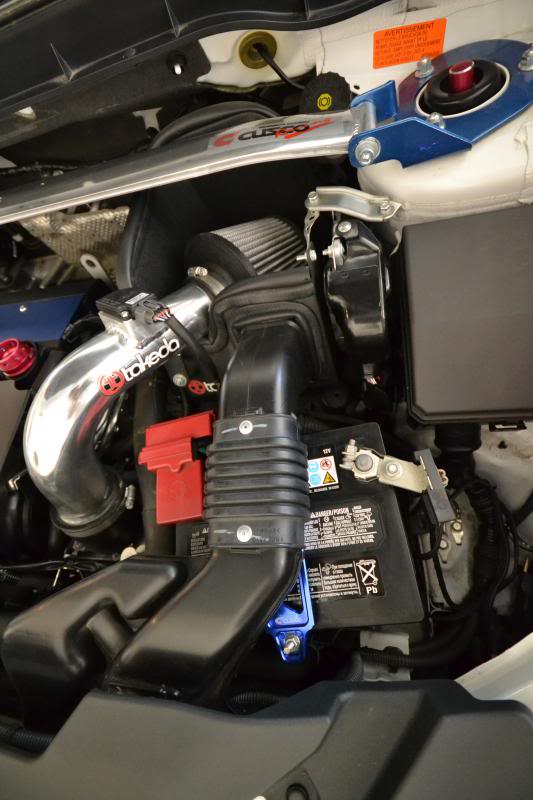
Overall shot of how the bay looks to date. I'm pretty content with where it's going but I think the whole 'race' theme will just stay under the hood. I'm hoping not to let the mods get out of hand for this vehicle and am trying my best to keep the exterior and interior stock body...
I love red!
Of course we have to start off with a shot of the boring old factory rad cap.

And after:

Overall shot of how the bay looks to date. I'm pretty content with where it's going but I think the whole 'race' theme will just stay under the hood. I'm hoping not to let the mods get out of hand for this vehicle and am trying my best to keep the exterior and interior stock body...

Last edited by infected; Dec 14, 2013 at 02:06 PM. Reason: Pics


Thread Starter
Evolving Member
Joined: Sep 2013
Posts: 265
Likes: 1
From: Calgary, AB
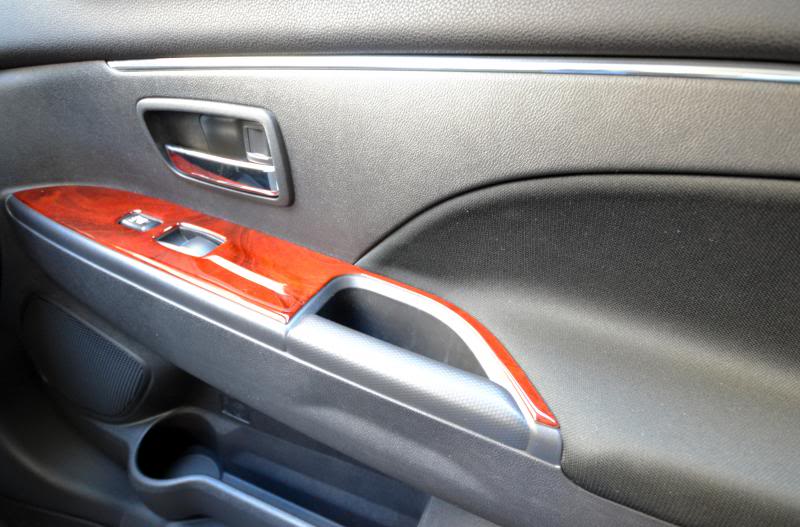
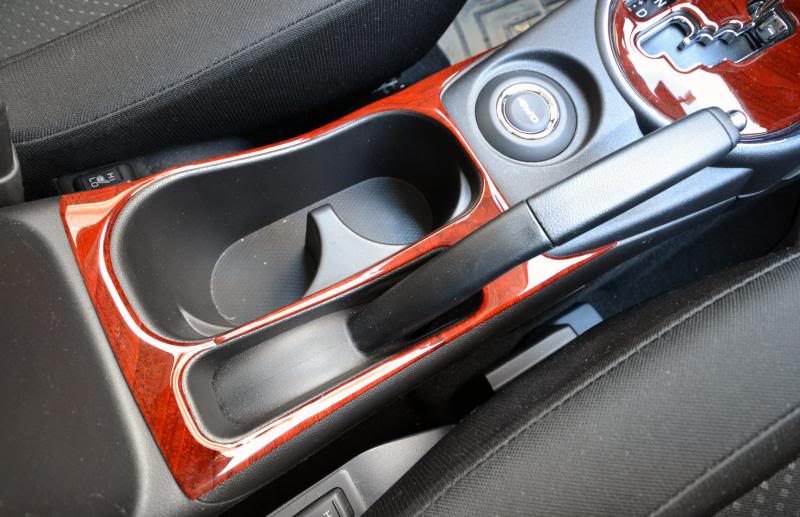
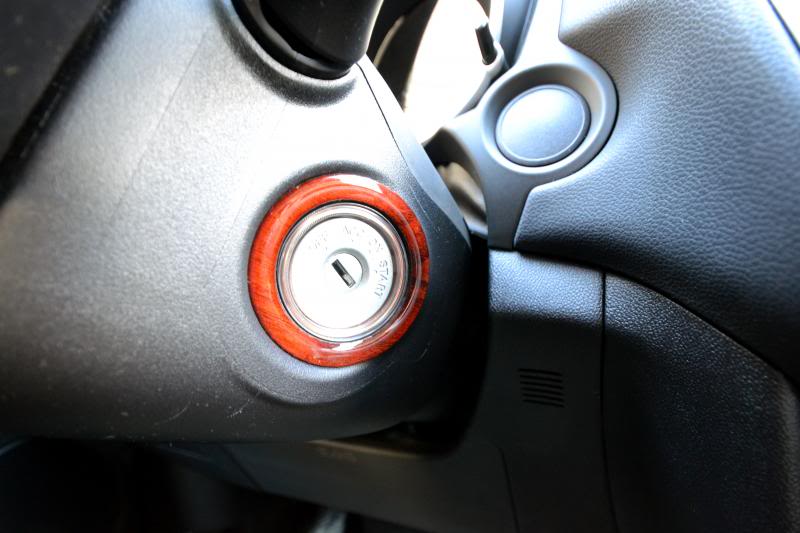
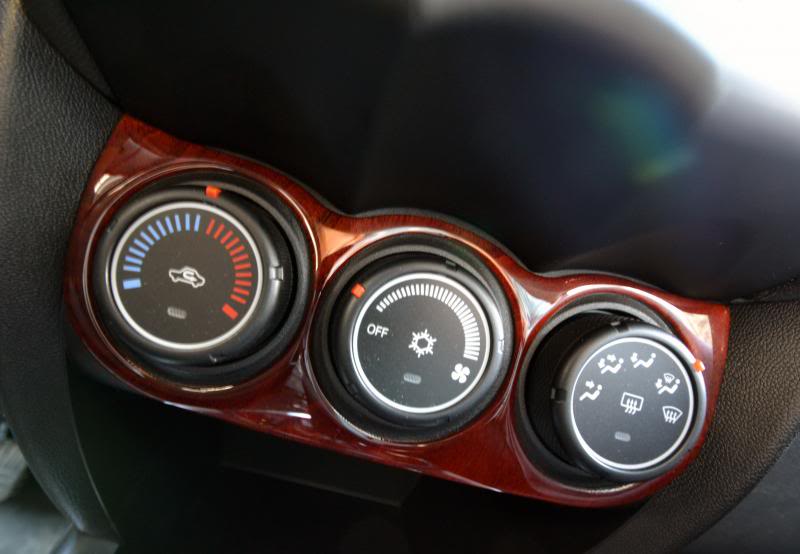
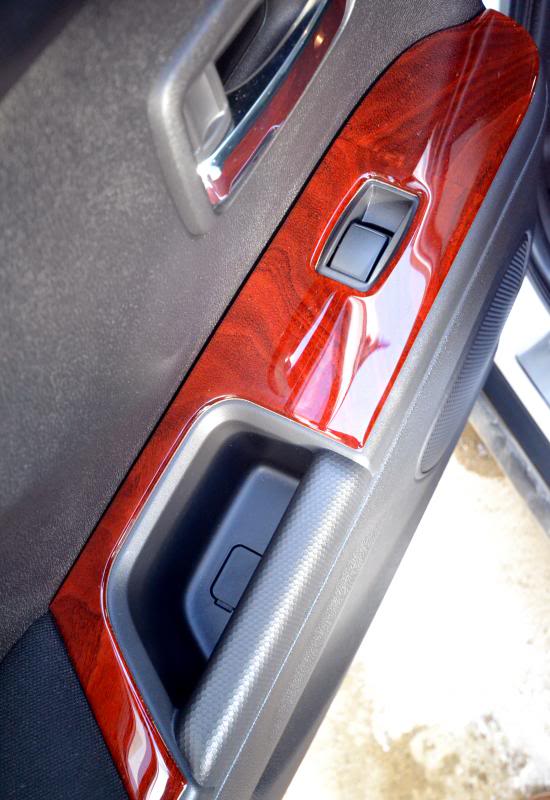
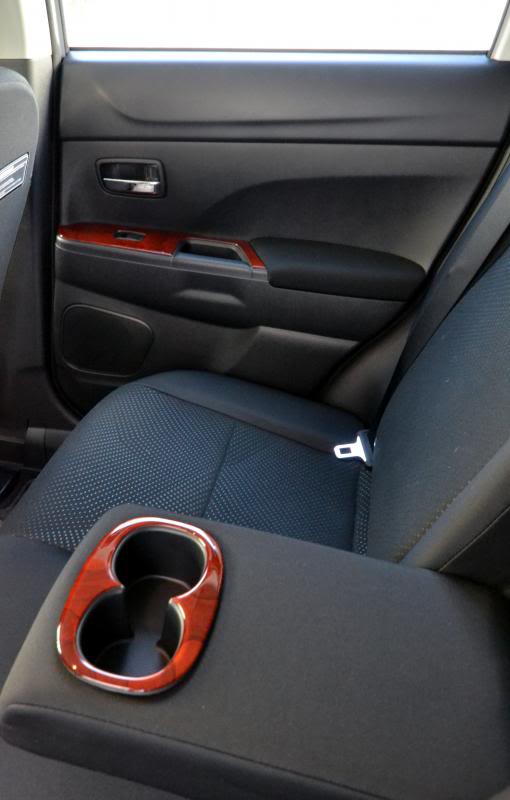
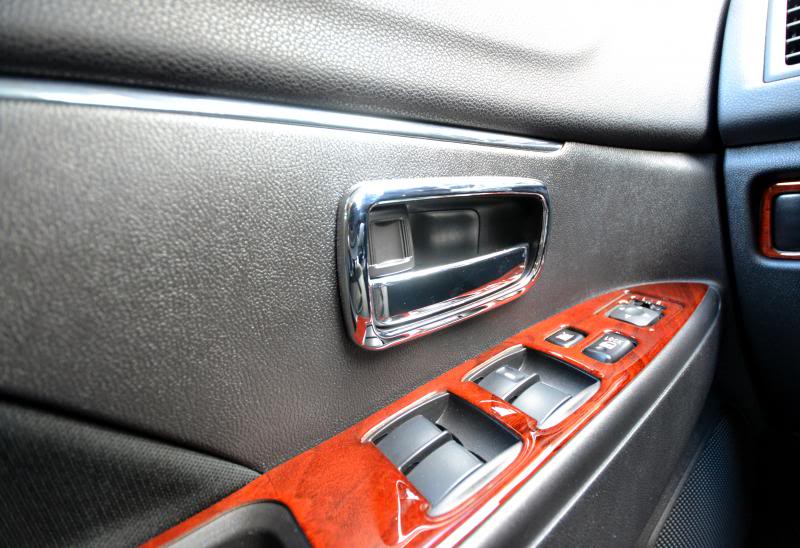
26. Remin Wood Trim Kit
I wanted to add some color to the interior of the RVR and decided on some Japanese Cherry Wood from Remin. The kits come in a variety of options, this one is the full kit so I could pick and choose on where I wanted some extra detail.


Thread Starter
Evolving Member
Joined: Sep 2013
Posts: 265
Likes: 1
From: Calgary, AB
27. Chrome Interior Door Pull Surrounds
Another small item I thought could make the RVR door panels more interesting. I'm pretty sure these are for Lancers, buy hey, if the shoe fits...
The front and rear are the same shape so it just comes in 2 sets for each side.

The front and rear are the same shape so it just comes in 2 sets for each side.


Thread Starter
Evolving Member
Joined: Sep 2013
Posts: 265
Likes: 1
From: Calgary, AB
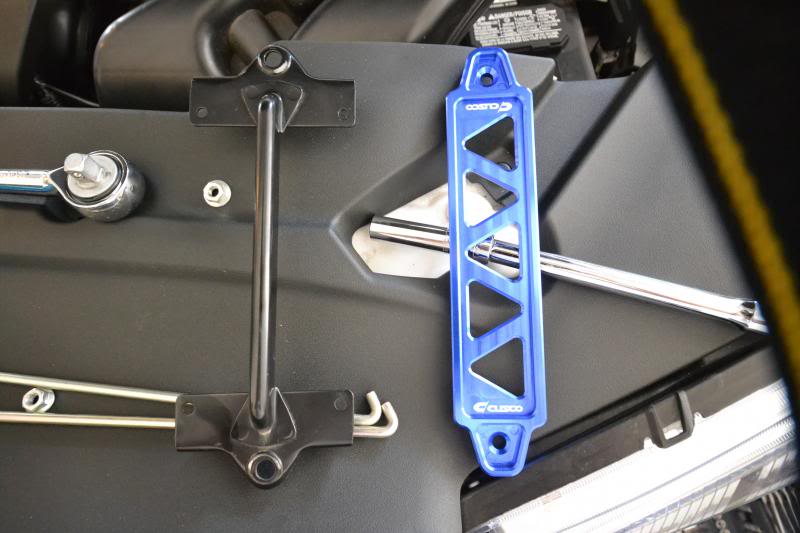
28. Cusco Battery Tie Down
The Blue is really getting to me.

Picked up this beauty to match with the engine bay theme. It goes pretty well with the color of the spark plug cover and the Cusco logo on the strut bar. The intake snorkel covers the battery tie down depending on the angle you look down at the bay, but I'm still a happy camper!
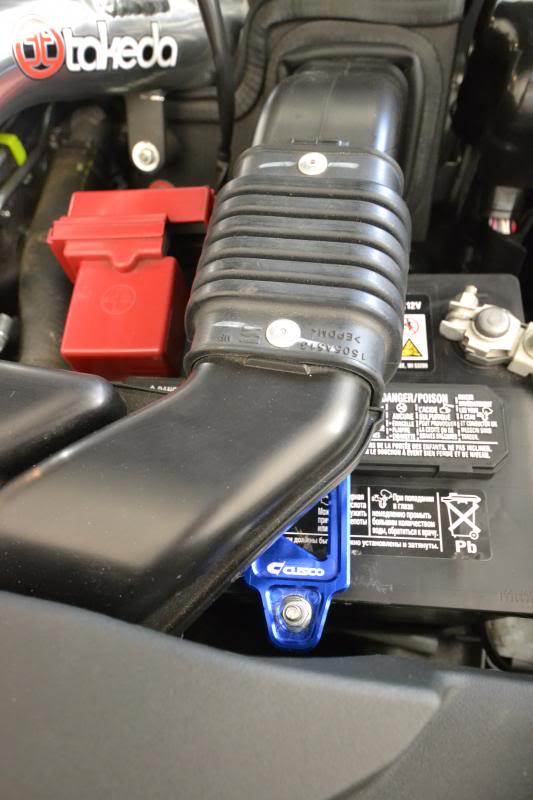

Picked up this beauty to match with the engine bay theme. It goes pretty well with the color of the spark plug cover and the Cusco logo on the strut bar. The intake snorkel covers the battery tie down depending on the angle you look down at the bay, but I'm still a happy camper!


Thread Starter
Evolving Member
Joined: Sep 2013
Posts: 265
Likes: 1
From: Calgary, AB
29. Mud Guards
I had another thread here: https://www.evolutionm.net/forums/ou...ps-2013-a.html regarding the difference between 11-12 and 13+ mud flaps with the different bumper designs, specifically on the rear. I can confirm that the two bumpers and the mud flaps on the rear are not interchangeable. The inner fender is the same but the bumper itself is not the same shape, so the mud flap is different as well. The front mud flaps are the same across all years.
The install was pretty straight forward with removing the old clips and screwing in the new brackets. The old clips aren't long enough to hold the mud flaps in place so there really isn't a choice to re-use any of the existing hardware.
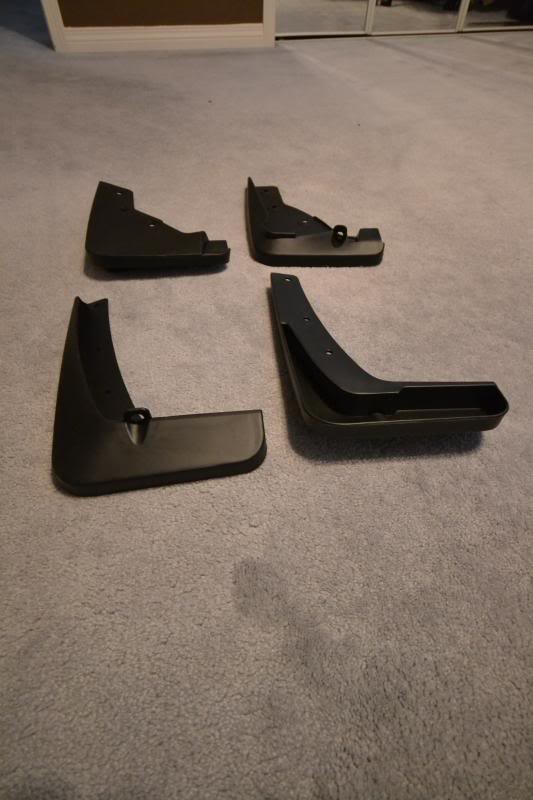
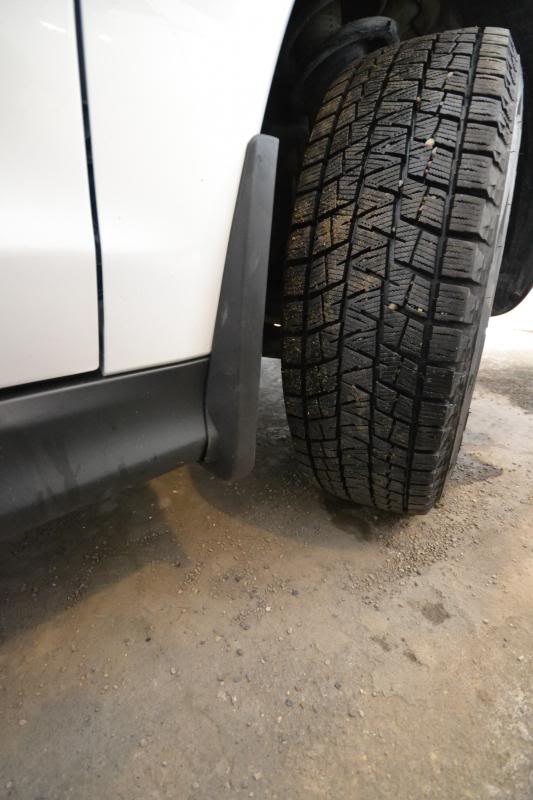
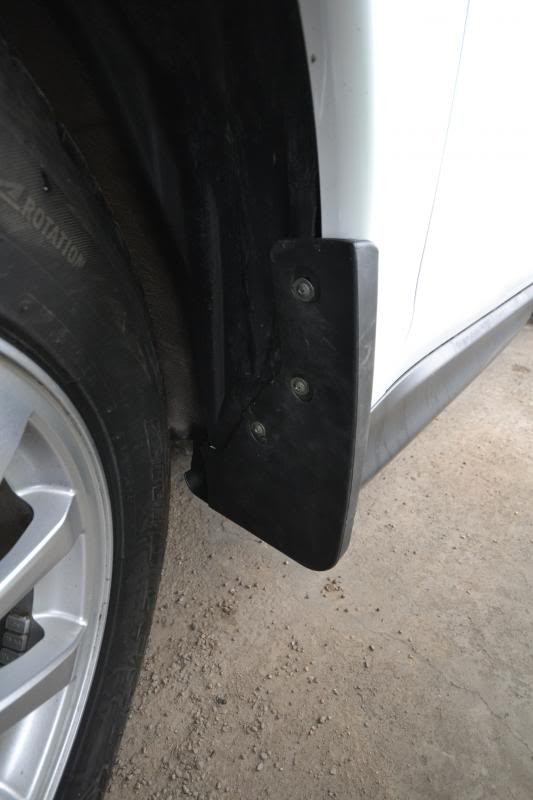
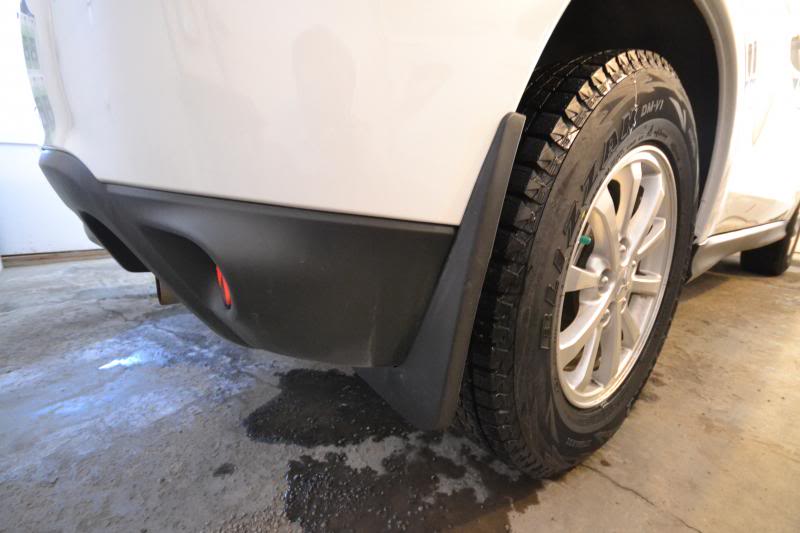
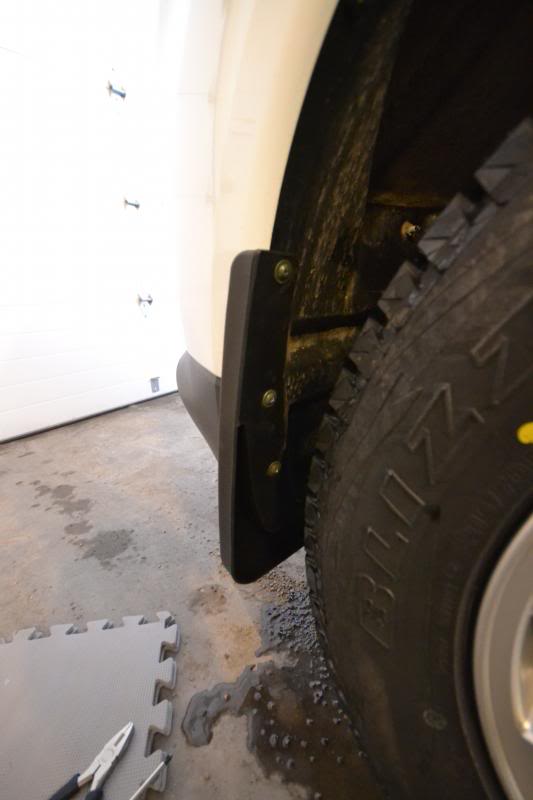
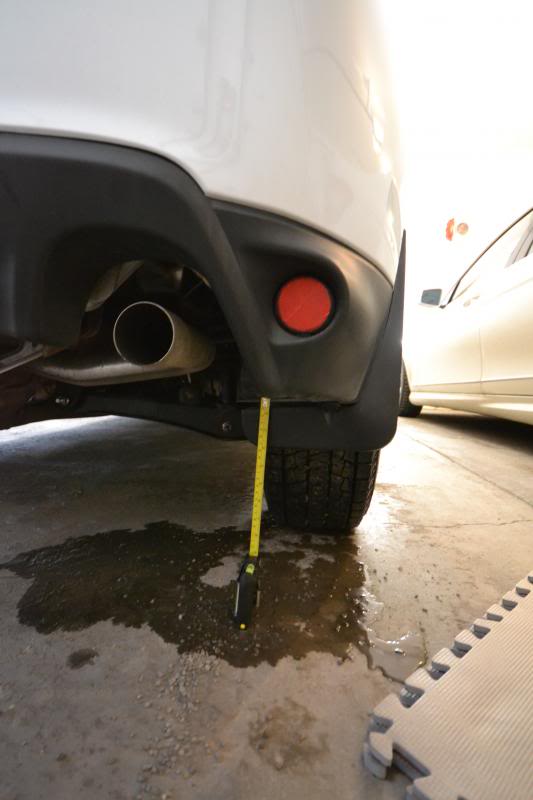
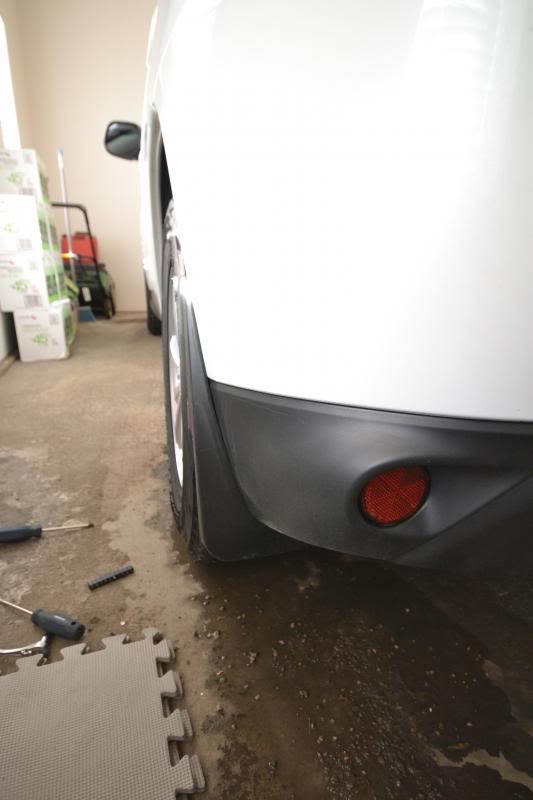
The install was pretty straight forward with removing the old clips and screwing in the new brackets. The old clips aren't long enough to hold the mud flaps in place so there really isn't a choice to re-use any of the existing hardware.


Thread Starter
Evolving Member
Joined: Sep 2013
Posts: 265
Likes: 1
From: Calgary, AB
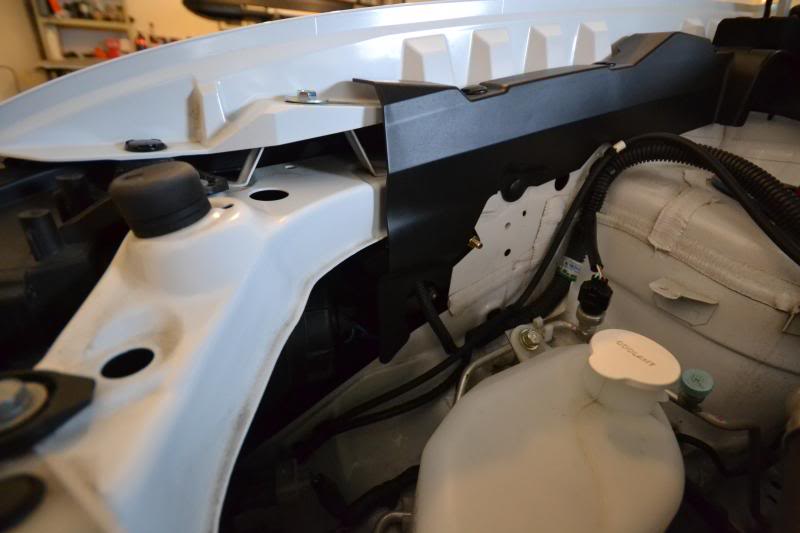
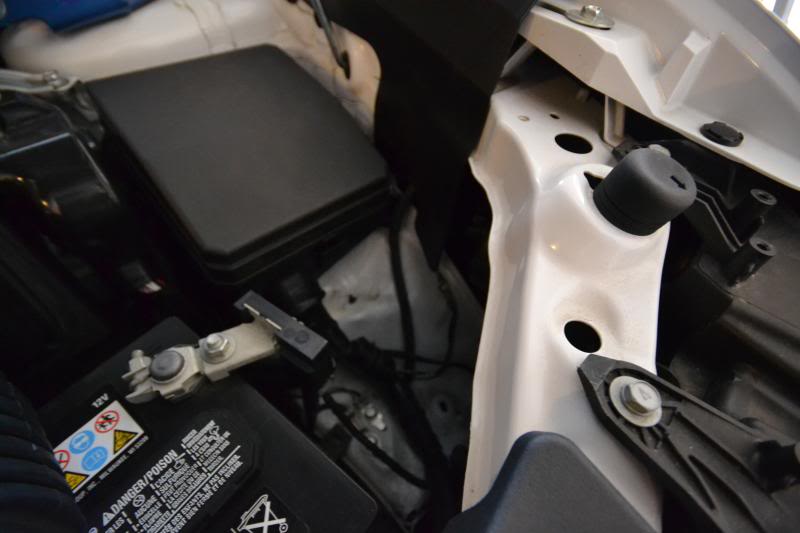
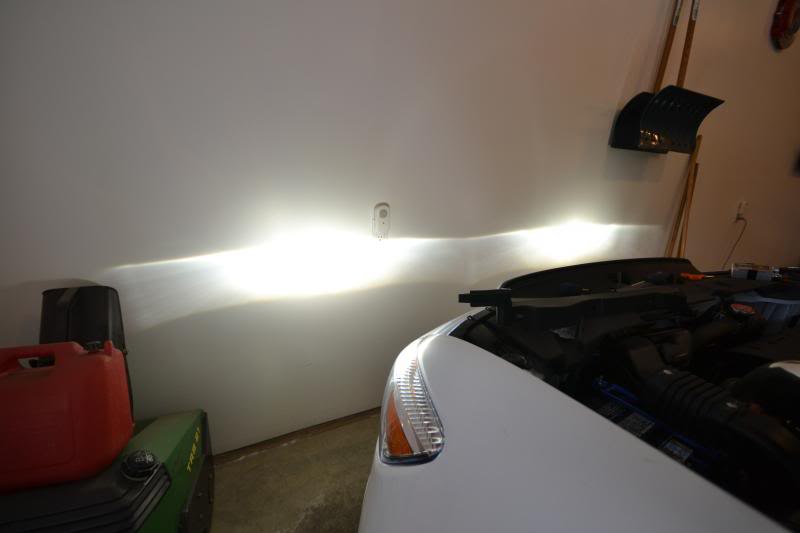
30. VVME 35W 5000K HID Low Beams
I wasn't planning on doing any exterior lighting work at first but with all the snow and stormy weather we've been experiencing as of late, I simply could not put up with the stock headlights any longer. I couldn't see!
I chose 5000K this time from experience. 4300K wasn't anything unique and 6000K would be too blue at times and begin to strain my eyes.
The kit from VVME is direct plug and play. I've always had positive experiences with them.
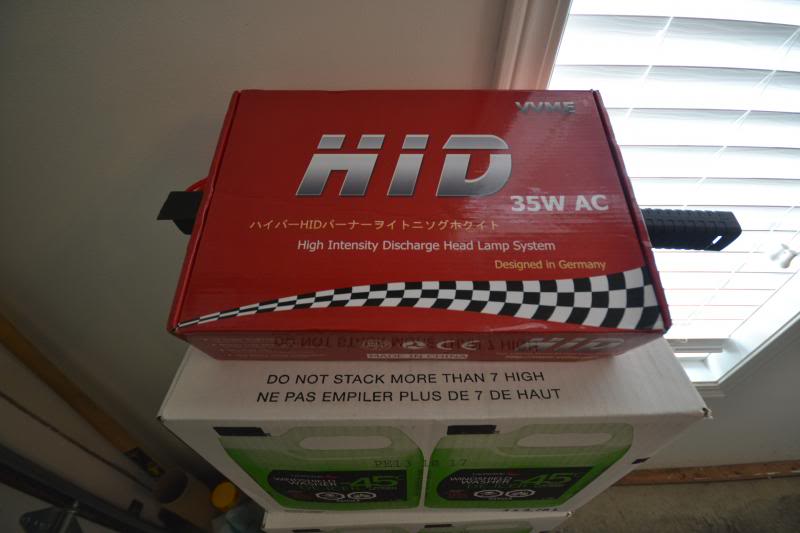
Ballasts with built in igniters, bulbs, brackets, and hardware.
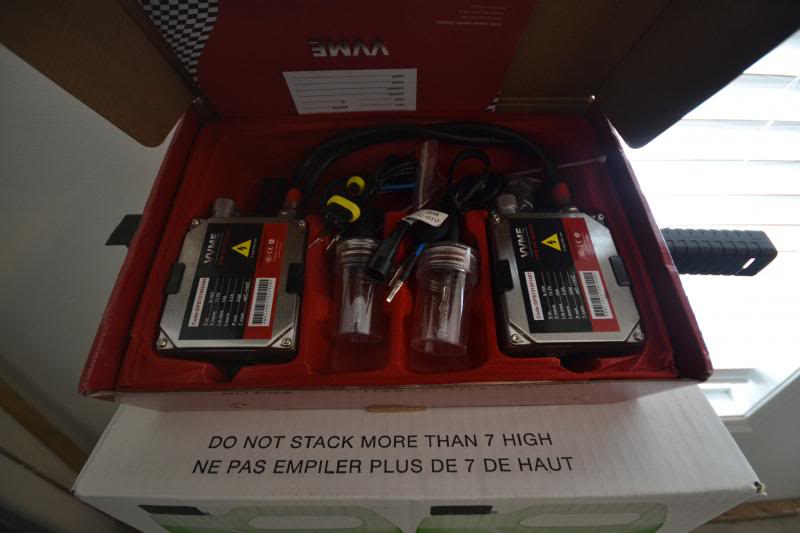
There is an option for a relay but I opted out thinking the low beams will be on full power anyways during the night. The factory wiring should be capable of handling a 35W HID kit compared to the stock 55W halogen.
Stock passenger vs HID driver.
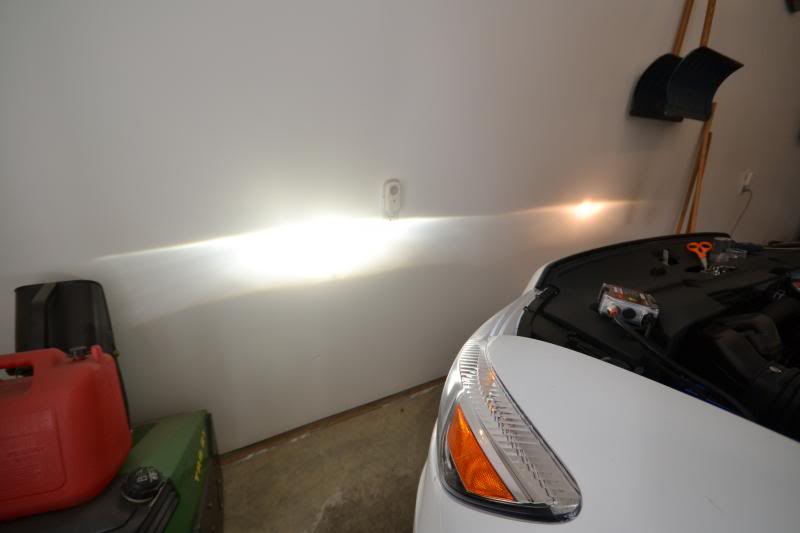
I hid the ballasts behind the splash shield under each corner of the fender. The wires tuck away nicely and there are extra holes on each side to mount the bracket. Gotta always appreciate a clean install!
That's all!
I chose 5000K this time from experience. 4300K wasn't anything unique and 6000K would be too blue at times and begin to strain my eyes.
The kit from VVME is direct plug and play. I've always had positive experiences with them.

Ballasts with built in igniters, bulbs, brackets, and hardware.

There is an option for a relay but I opted out thinking the low beams will be on full power anyways during the night. The factory wiring should be capable of handling a 35W HID kit compared to the stock 55W halogen.
Stock passenger vs HID driver.

I hid the ballasts behind the splash shield under each corner of the fender. The wires tuck away nicely and there are extra holes on each side to mount the bracket. Gotta always appreciate a clean install!


That's all!
