2.3L GT3076Build


Thread Starter
Evolved Member
iTrader: (62)
Joined: Feb 2004
Posts: 3,336
Likes: 6
From: Redmond - Lake Tapps ,WA
Didn't finish the diffuser, but I made good progress and got all the hard/time consuming stuff completed.
Started off by measuring the angle between the rear sub-frame and the spare tire bulge. This is the max angle the diffuser could be at before it hit the body, assuming the leading edge mount is the subframe. This also requires cutting about 2.5" out of the bumpers lower edge. This scenario leads to a diffuse angle of 9-10 degrees.

Here are my mounting brackets for the pre-diffuser "diff plate". Grabs the diff mount up front and the rear sub-frame.

Then I spanned the brackets with a formed plate.

Plate all riveted and welded together.

With the diff-plate installed I went back and remeasured my potential angles. The diff-plate creates a mounting point 2.5" lower than the subframe, and the diff-plate is angled at 7 degrees. If I were to cutout the bumper and bring the trailing edge of the diffuser up to the spare tire well I could get 14 degrees. But I felt that was too much considering the length of the diffuser and the surfaces feeding it. I wanted to run 9-10 degrees. This ended up being flush with the bottom of the bumper - which meant I didn't have to cut my bumper up.

Laying out the template with construction paper.

Cutting out the panels.

Panel set in-place on the car. Now I need to mount the panel to the bumper and reinforce it, as well as building the verticals.

Started off by measuring the angle between the rear sub-frame and the spare tire bulge. This is the max angle the diffuser could be at before it hit the body, assuming the leading edge mount is the subframe. This also requires cutting about 2.5" out of the bumpers lower edge. This scenario leads to a diffuse angle of 9-10 degrees.
Here are my mounting brackets for the pre-diffuser "diff plate". Grabs the diff mount up front and the rear sub-frame.
Then I spanned the brackets with a formed plate.
Plate all riveted and welded together.
With the diff-plate installed I went back and remeasured my potential angles. The diff-plate creates a mounting point 2.5" lower than the subframe, and the diff-plate is angled at 7 degrees. If I were to cutout the bumper and bring the trailing edge of the diffuser up to the spare tire well I could get 14 degrees. But I felt that was too much considering the length of the diffuser and the surfaces feeding it. I wanted to run 9-10 degrees. This ended up being flush with the bottom of the bumper - which meant I didn't have to cut my bumper up.
Laying out the template with construction paper.
Cutting out the panels.
Panel set in-place on the car. Now I need to mount the panel to the bumper and reinforce it, as well as building the verticals.


sweet diffuser!
Did you block up the front side of the diffuser to stop air getting into the bumper and acting like a parachute? i was looking to make one on my car and was wondering if you need to
Keep up the great work
Did you block up the front side of the diffuser to stop air getting into the bumper and acting like a parachute? i was looking to make one on my car and was wondering if you need to
Keep up the great work
Thread Starter
Evolved Member
iTrader: (62)
Joined: Feb 2004
Posts: 3,336
Likes: 6
From: Redmond - Lake Tapps ,WA
I got the panels riveted to the bumper this evening, along with tapping mounting holes on the diff-plate. I'm not going to try and completely block things off at the leading edge, at least at this point. I did put some wickers across the leading edges to make the panels more rigid and help stop some air from sneaking up there. I should be able to finish the verticals in the next few days.


Thread Starter
Evolved Member
iTrader: (62)
Joined: Feb 2004
Posts: 3,336
Likes: 6
From: Redmond - Lake Tapps ,WA
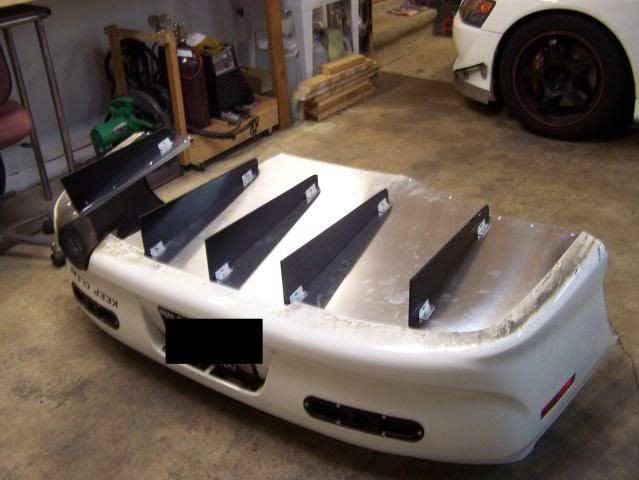
Finished up the diffuser, for now at least. I may go back and cut some more holes in the bumper at a later date - who knows.
Mounted 5 strakes.
A look from underneath.
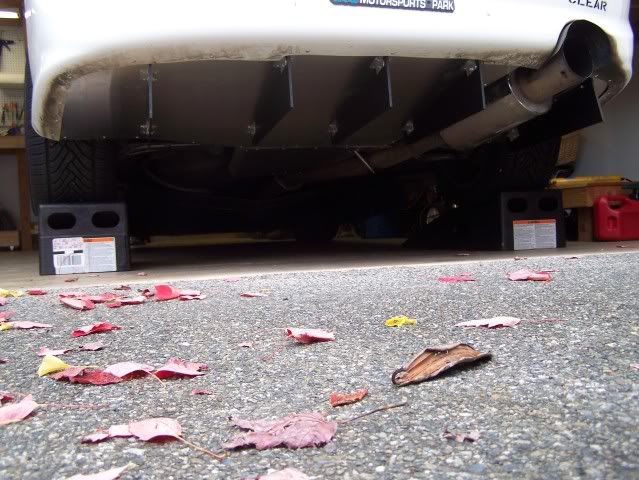
And a look from behind.

Mounted 5 strakes.
A look from underneath.
And a look from behind.

Just curious if there was a reason why the aluminum attaches to the top of the bumper, rather than being under it? With it on top, there's a lip that will cause turbulance of the air right as it exits under the car. Is it far enough back that it doesn't matter much, or just done that way for packaging (i.e. no sharp edge to cut yourself on)?
Dave
Dave
Thread Starter
Evolved Member
iTrader: (62)
Joined: Feb 2004
Posts: 3,336
Likes: 6
From: Redmond - Lake Tapps ,WA
I did the aluminum on top because it was easier and made it "cleaner". Yes the edge would have been a little sharp and the profile wasn't totally perfect so the edge wouldn't have been uniform. I may put a little speed tape on the edge to smooth it out. It would have been "better" on the bottom, but I just wasn't feeling it.
Thread Starter
Evolved Member
iTrader: (62)
Joined: Feb 2004
Posts: 3,336
Likes: 6
From: Redmond - Lake Tapps ,WA
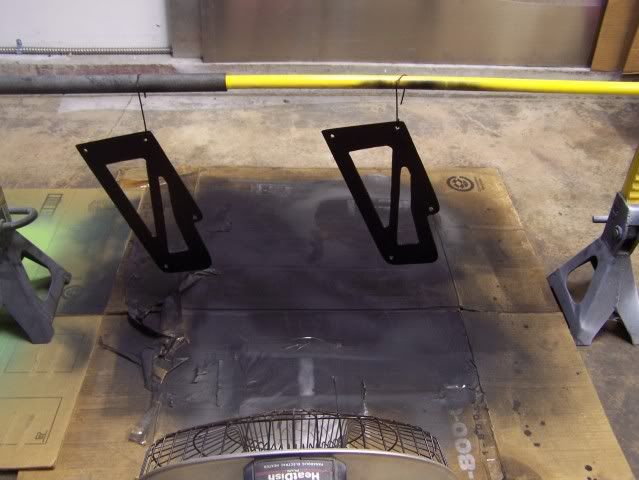
I finished the bases for the wing last night and painted them. I'll snap some pics of them this evening.
I've got the uprights ready for "milling". My milling machine consists of a few strategically drilled .5" holes and a jig saw! I thought about using the plasma cutter, but the dross it leaves is hard to clean up on inside cuts. I think this should work OK. I need a big garage so I can have a milling machine, and a lathe, and a lift!
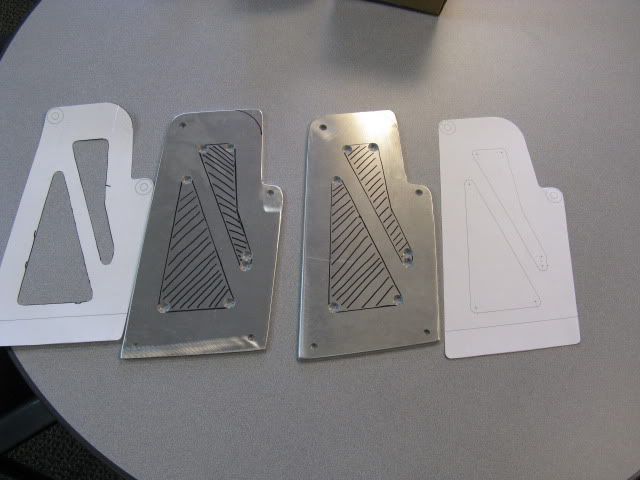
I think I came up with a pretty awesome shape for the end plates as well. I've never seen someone do what I'm planning. The idea exists in other areas of the car, but not on end plates to my knowledge. I might try and whip those out tonight as well.
Here are the patterns and the parts ready to cut.
I've got the uprights ready for "milling". My milling machine consists of a few strategically drilled .5" holes and a jig saw! I thought about using the plasma cutter, but the dross it leaves is hard to clean up on inside cuts. I think this should work OK. I need a big garage so I can have a milling machine, and a lathe, and a lift!
I think I came up with a pretty awesome shape for the end plates as well. I've never seen someone do what I'm planning. The idea exists in other areas of the car, but not on end plates to my knowledge. I might try and whip those out tonight as well.
Here are the patterns and the parts ready to cut.
Last edited by jid2; Oct 27, 2009 at 02:51 PM.