When you click on links to various merchants on this site and make a purchase, this can result in this site earning a commission. Affiliate programs and affiliations include, but are not limited to, the eBay Partner Network.
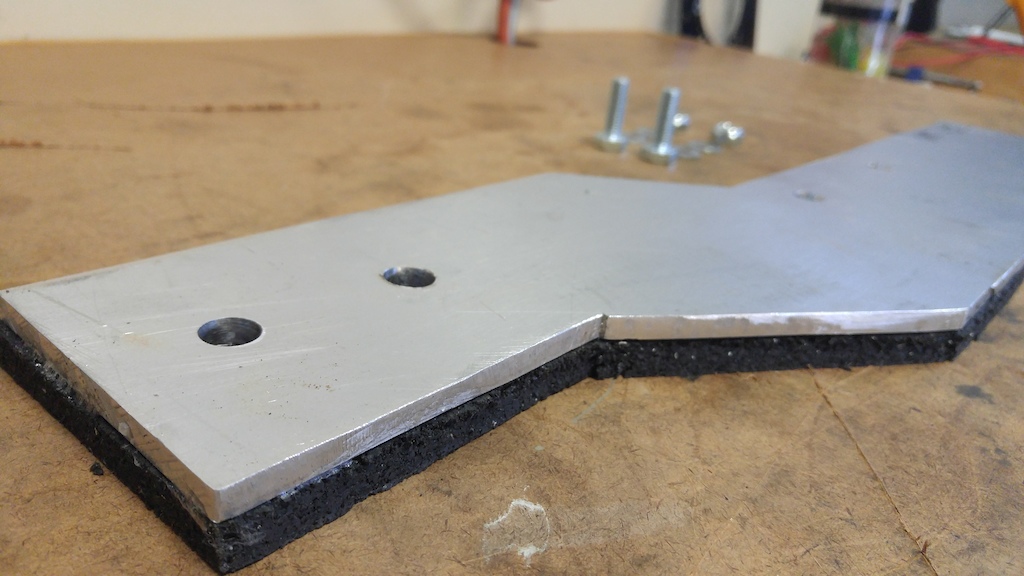
Brackets for trunk pack
The next step is to complete the harnesses for the trunk Li pack so I can reinstall it and drill mounting holes in the brackets. At that point the trunk pack will be ready for permanent mounting.
Unfortunately the OEM Nissan LEAF BMS uses negative cell taps and my BMS uses positive taps with an additional negative tap every 12 cells. Furthermore, my BMS is programmed to read the resistance in cells based on a standard length cell tap wire. The LEAF BMS wires differed in length from 6" to 2'. This would equate to a 0.7V differential at 20 amperes -unacceptable. This meant I was unable to utilize the preexisting harness, so I broke out the wire strippers and heat shrink. Here are a few steps from the laborious process of removing the OEM harness and substituting my own one-off in an unprecedented arthritis field day (it actually took several days, I'm just whining).
Removal of plastic cover reveals OEM bus bars and cell taps.
All items removed, individual cell terminals visible.
OEM piece with a section of the new harness above.
Close up picture of OEM harness.
Orion cell tap harness completely substituted.
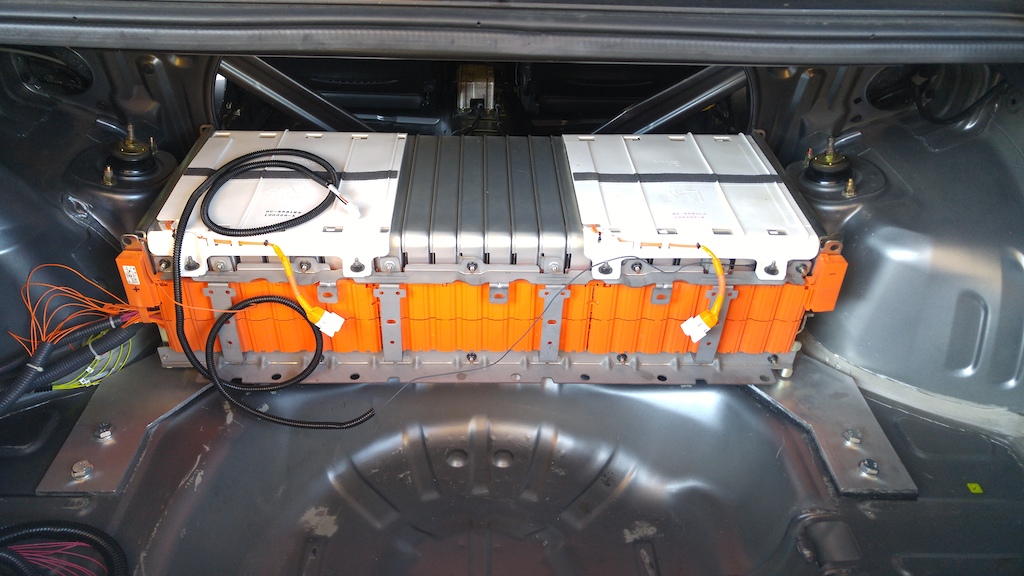
Reinstalled on Li-ion pack. Time to consolidate cables, reinstall cell warmers and exoskeleton.
Last edited by electron bom; Nov 15, 2016 at 04:17 AM.
Finally decided on a spot to pass the cables into the trunk area for pack attachment. Eventually there will be an additional pack in this spot (48-96 cells), so I will just cut out a segment of cable and connect the additional pack in series.
Drove the EV-O out of the garage yesterday and gave it a bath before making final preparations for neighborhood street testing. However, the cyclical scrape noise is still prominent and needs to be addressed. I've narrowed the source down to the motor/clutch/flywheel area. I'm going to drop the motor this weekend and attempt to identify the problem. Here is a shot of the motor bay, it's 99.5% complete. To be continued...
Last edited by electron bom; Dec 2, 2016 at 05:53 AM.
Upon removing the clutch and flywheel, I observed that the flywheel hub slid freely along the motor shaft. It appears my set screw didn't hold very well. Due to the Evo's pull style clutch disengagement, the entire clutch assembly was pulled toward the gearbox housing. This resulted in the pressure plate cover grinding against the transmission case, as evidenced by the second photo below. Solution: new set screw, liberal amounts of lock-tite, and a QM 8 leg push type clutch.
Dear sir. I am from Nagorno-Karabakh republic. I am follow the build of the CT9A erection very long to my heart and I lubricate with excite. Please more pictures in due time. Will it have 4 play action? Question for build purposes, will there be an distance pump for greater thrust? Job of greatness. The build blows wind so well
Wow, this must be a first. Between this and the R35 swap build, I may have seen it all.
Don't forget about the Mercedes Ponton bodied Evo rally car. This site definitely has some good builds on it. Glad to see the issue is identified and progress continues!