When you click on links to various merchants on this site and make a purchase, this can result in this site earning a commission. Affiliate programs and affiliations include, but are not limited to, the eBay Partner Network.
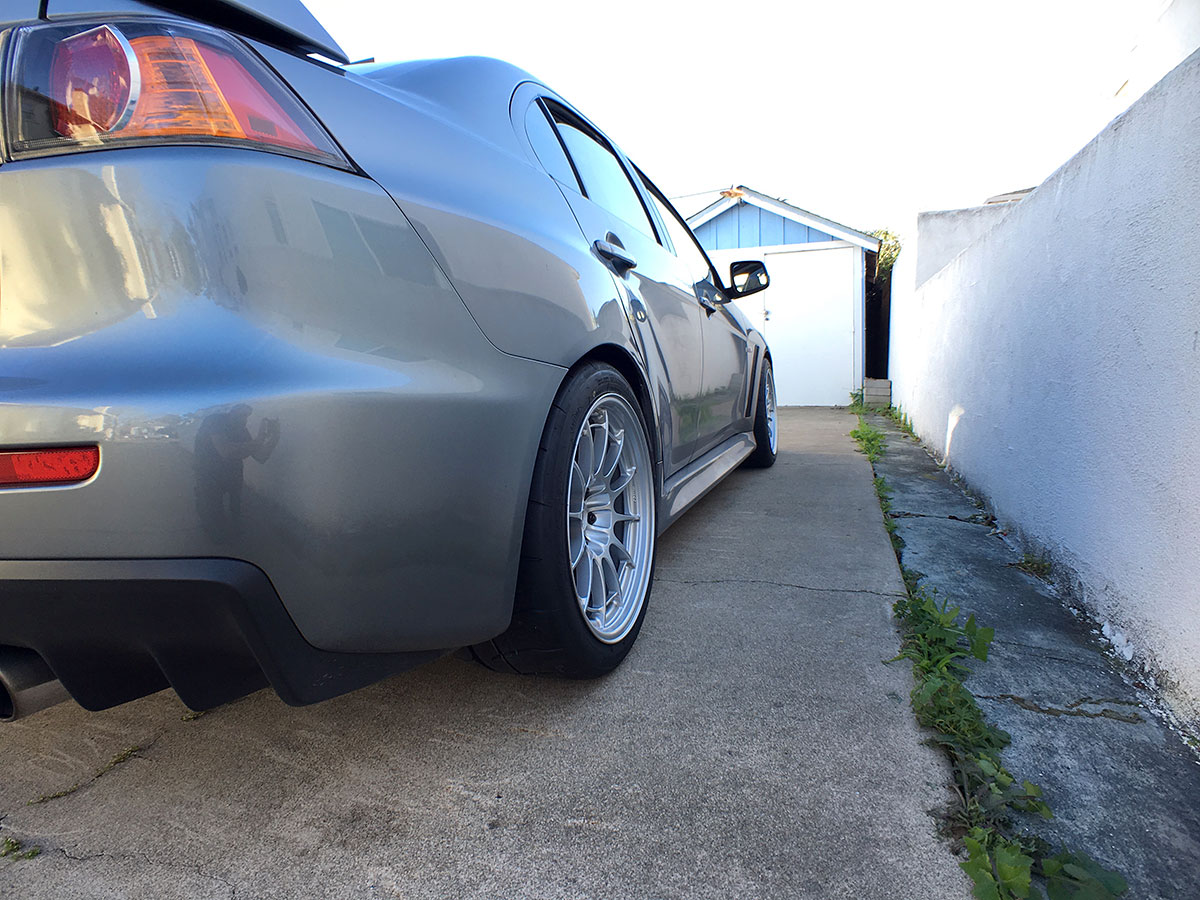
To see the wheels/tires today, I must say I was a little moist.
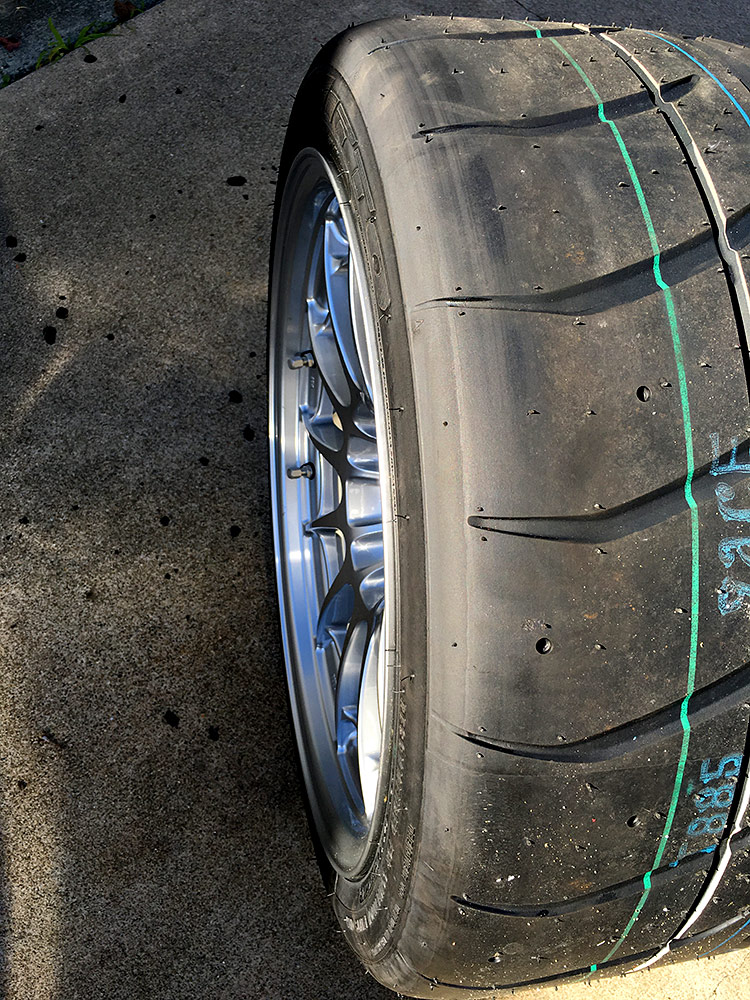
Exactly same setup I run on my Evo 10. The NT01's will kind of suck at first but they get better once they wear. Also they prefer lower pressures on the 10.5. They feel the best at around 37 hot.
Removed the rear hub/axle assembly on the drivers side. Started on the passenger side as well. The rear of the car is a lot more work than I thought it would be. Especially compared to the front. As such I am going to just do all the remaining bushings on the rear arms etc with WL since I've got it all off. Also the original ball joints with only 20k miles appear to have worn diff between left/right/upper/lower. The new ones feel much "stiffer". We'll see how they feel once its all back together. I am basically at this point rebuilding the entire suspension on the car lol.
Got the drivers side rear upper and lower A-arms off. Cleaned them up, pressed out ball joints.
Shaved trailing arms, I hope its enough. Will need to do the tab for the E-brake line too.
Got the wheel speed sensor out as well
Toe arms ready for new ball-joints
Shaved vs unshaved.
Started on 2nd one
Used AMS brake ducts from ebay. Need new tubing.
Upper and lower control arms off, and dirty. The upper one was a pain due to the proximity to the fuel filler neck.
After speaking with Andrew/Lawrence of GTWORX Going to order the following additional bushings. Also going to get WL front/rear sway-bars. 24mm for the rear, cusco adjustable mount for the front.
And that's a good looking dog. I love GSD's. Deciding between one of those or anther great dane once I get back into a house with a decent yard.
Was gonna shoot for an HPDE this summer but its looking like itll be next. Too much to do. Getting it all together is like 1/2 the battle. Getting suspension, brakes, wheels tires working right will be the hard part. Plus I'll have a trailer by next season. Hopefully at least road testing etc before fall. Maybe corner balance too.
The pup is a purebread i picked up "cheap" because she isnt documented. I guess they couldn't verify which stag? did the deed. Shes 9 months. Her name is Meeka.
A trick with those brackets is to put the left on the right, and the right on the left. The stiffest setting hole on the bracket is only used on the X, would put the stock endlinks at a real bad angle. But if you switch the sides, you can use that 4th hole for an extra soft setting.
I would also mount those to the control arm with a button head screw instead of the OEM screw. With the washer and stock bolt, it can interfere with the two holes above them when tightening down.
Also, what are you doing to clean your stock parts? Those look amazing and far cleaner than just a simple power wash. All media blasted or ultra sonic cleaning?
Wow thanks for the info!
I initially power washed it all but with unimpressive results. Now orielly's foaming engine degreaser and a wire brush doing work. Its futile to keep them clean but at least while im handling/rebuilding them they arent filthy.
They look great, Impressed by the elbow grease applied to get them clean. Might not look good for long but for pics its pretty nice.
Hopefully being a fair weather only car, since 2006 now(1/2 a winter then hard parked), will keep it looking good. Kinda amazed how bad it was for only 20K miles and 1/winter of chicago salt.
Plus Im sure after so much use Ill have to rebuild again. Ive had the car 11 years, probably will keep it forever.