
razorlab's simple build(s)

Thread Starter

Joined: Aug 2003
Posts: 14,094
Likes: 1,092
From: Mid-Hudson, NY
On that topic...
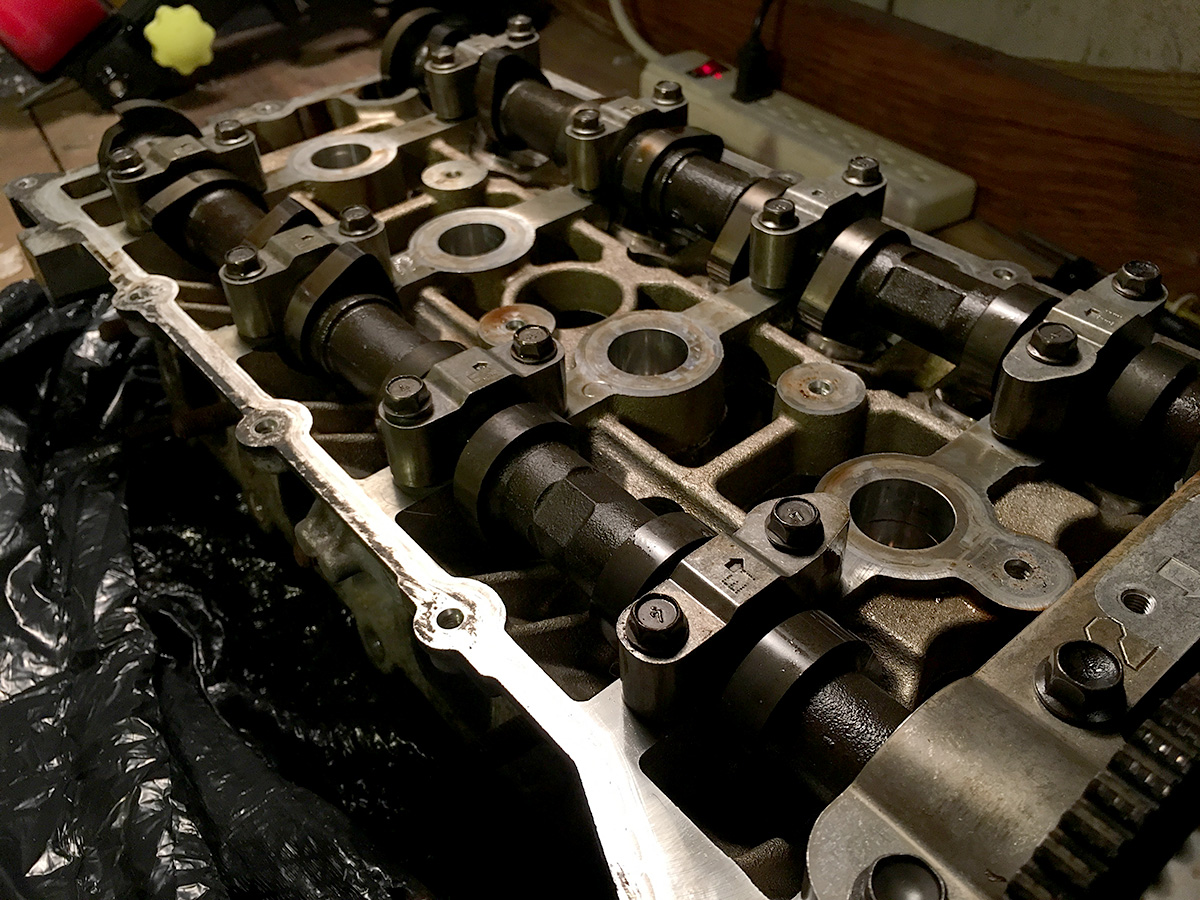
Head arrived. It had shifted in the box so one side was banging one side of the box so naturally I thought the worst...
Unpacking it, it seemed fine but I noticed some of the cam caps where loose so I ended up pulling the cams tonight to make sure all the races where fine and the cams hadn't shifted and scored them.
They all look fine. As I was putting the cam caps back on two cam cap bolts didn't want to thread in nicely. Somehow a small amount of the threads where damaged but I didn't notice that when I took them out. Very small amount, just needs to be chased with a die. I can't find my T&D set so I'll just ask the machine shop to do it for me.


Thread Starter
Joined: Aug 2003
Posts: 14,094
Likes: 1,092
From: Mid-Hudson, NY
Putting the kelfords in so I'll have them set lash as well.

Thread Starter
Joined: Aug 2003
Posts: 14,094
Likes: 1,092
From: Mid-Hudson, NY
Update on stuff...
Intake manifold(s) came in. I forgot I bid on a intake manifold so now I had two manifolds show up. Oops. One brand new, one 2015 slightly used one, and of course the 19,000 mile one on my car. Well, now I can screw up port matching and not have to sweat it. :P
Eclipse GT 65mm throttle body came in. Torque Solutions thermal gaskets for both TB and Intake manifold.
Slowly getting my "log all the things" setup going. Picked up two 10 bar pressure sensors. Found a great source of the high quality P500 Kavlico sensors for literally half the price some others sell them for. -AN line for remote oil pressure mounting.
Driven Fab billet mivec ex cam gear housing.
Bad news is that I found out yesterday I have a bit more dental work to be done than anticipated so the actual engine rebuild is going to have to wait a little longer. I swear my mouth is going to cost me more than my engine rebuild this year....
My current list of goodies now in my possession:
Used complete 4b11T cylinder head
OEM Manifold to turbo bolts - MN119783 (x4) OEM turbo lock washers - MR187848 (8x per install)
ID 1300cc injectors
Kelford 214-b Camshafts
ARP Head studs ARP 207-4206
Kelford KVS11 Valve Springs Kit
OEM Intake Manifold Core - NEW via MAP
OEM Intake Manifold Core - 2015 used via Ebay
Eclipse GT 65mm Throttle body (used via Ebay)
Torque Solution Thermal Throttle Body Gasket
42 Draft Designs 1/8" NPT oil temp adapter
10 bar Oil/Fuel pressure sensor x2
STM remote oil pressure sending line
Torque Solution Thermal Intake Manifold Gasket
OEM bolts, washers, studs for cylinder head
MAP 3" turbo inlet
Billet Mivec exh cam gear housing
1/8" NPT Tee fitting
Intake manifold(s) came in. I forgot I bid on a intake manifold so now I had two manifolds show up. Oops. One brand new, one 2015 slightly used one, and of course the 19,000 mile one on my car. Well, now I can screw up port matching and not have to sweat it. :P
Eclipse GT 65mm throttle body came in. Torque Solutions thermal gaskets for both TB and Intake manifold.
Slowly getting my "log all the things" setup going. Picked up two 10 bar pressure sensors. Found a great source of the high quality P500 Kavlico sensors for literally half the price some others sell them for. -AN line for remote oil pressure mounting.
Driven Fab billet mivec ex cam gear housing.
Bad news is that I found out yesterday I have a bit more dental work to be done than anticipated so the actual engine rebuild is going to have to wait a little longer.
I swear my mouth is going to cost me more than my engine rebuild this year....My current list of goodies now in my possession:
Used complete 4b11T cylinder head
OEM Manifold to turbo bolts - MN119783 (x4) OEM turbo lock washers - MR187848 (8x per install)
ID 1300cc injectors
Kelford 214-b Camshafts
ARP Head studs ARP 207-4206
Kelford KVS11 Valve Springs Kit
OEM Intake Manifold Core - NEW via MAP
OEM Intake Manifold Core - 2015 used via Ebay
Eclipse GT 65mm Throttle body (used via Ebay)
Torque Solution Thermal Throttle Body Gasket
42 Draft Designs 1/8" NPT oil temp adapter
10 bar Oil/Fuel pressure sensor x2
STM remote oil pressure sending line
Torque Solution Thermal Intake Manifold Gasket
OEM bolts, washers, studs for cylinder head
MAP 3" turbo inlet
Billet Mivec exh cam gear housing
1/8" NPT Tee fitting
Thread Starter
Joined: Aug 2003
Posts: 14,094
Likes: 1,092
From: Mid-Hudson, NY
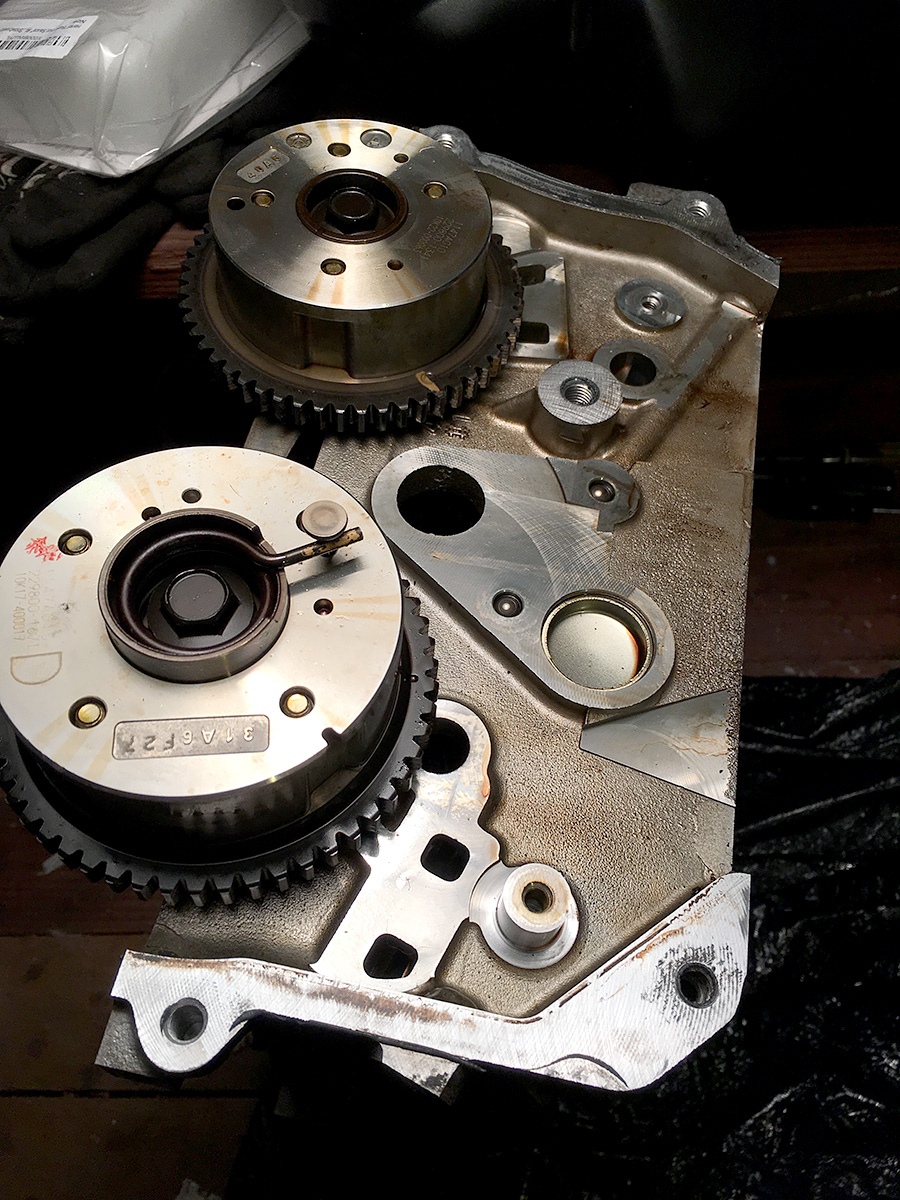
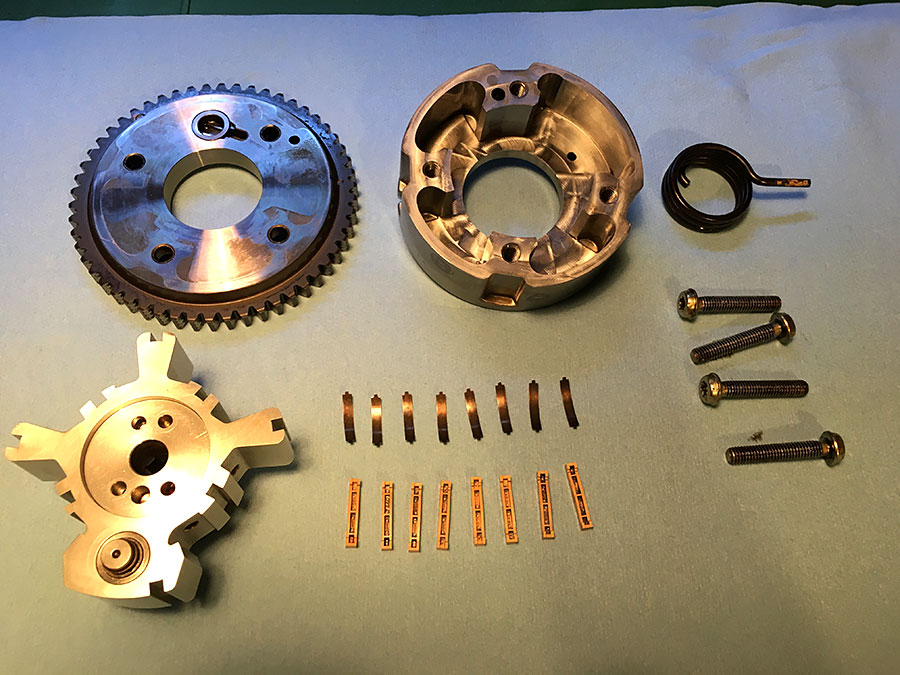
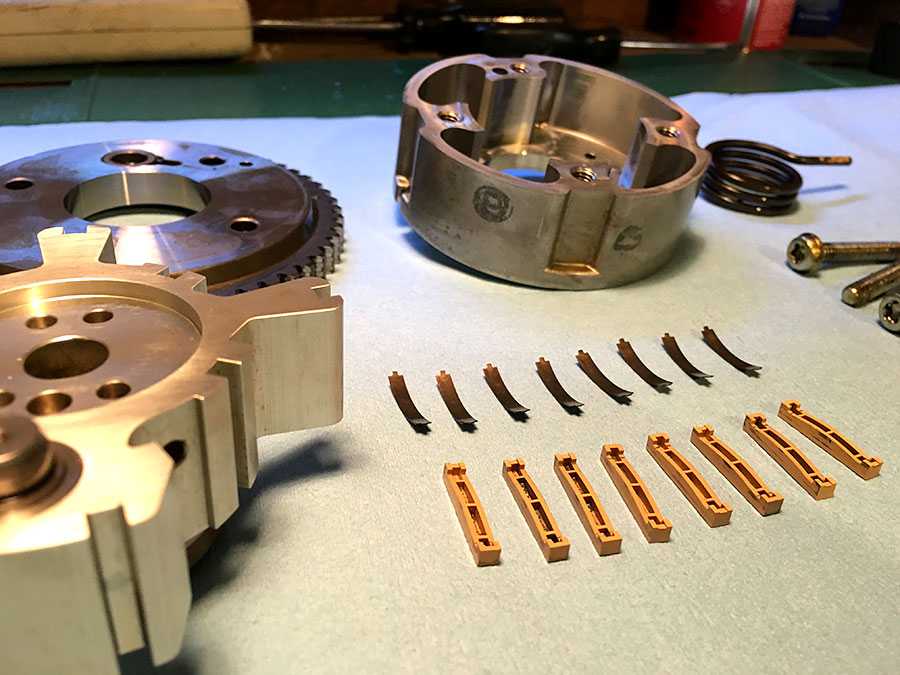
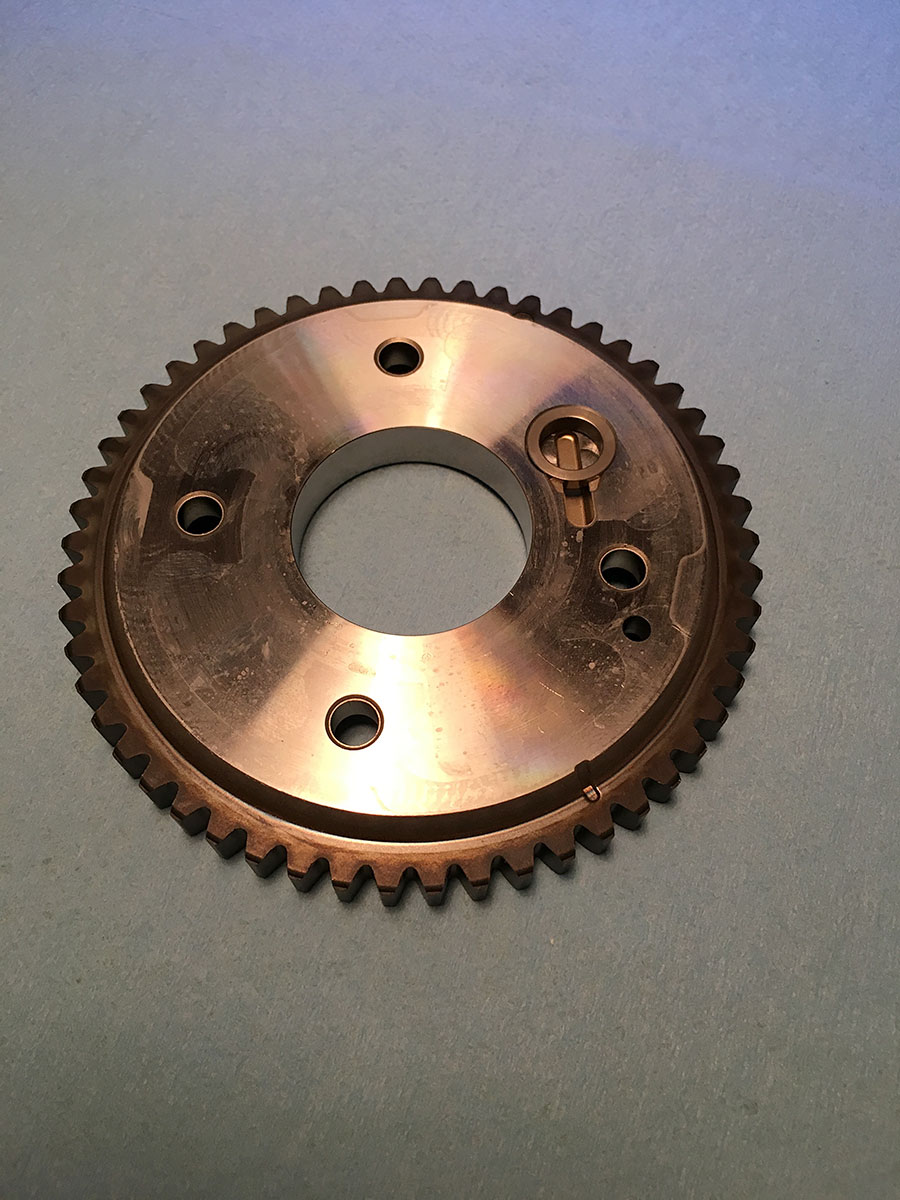
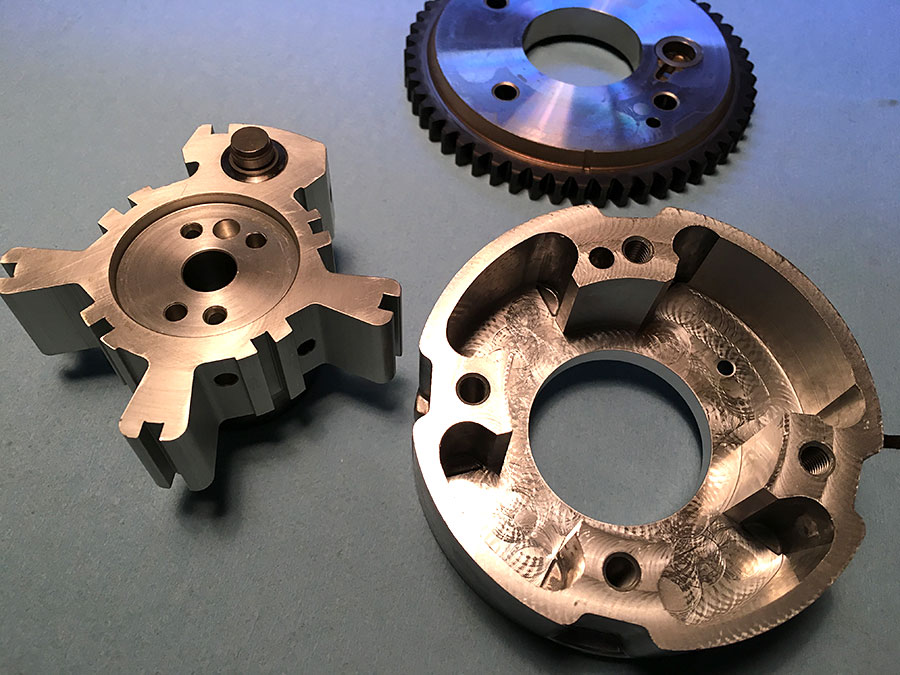
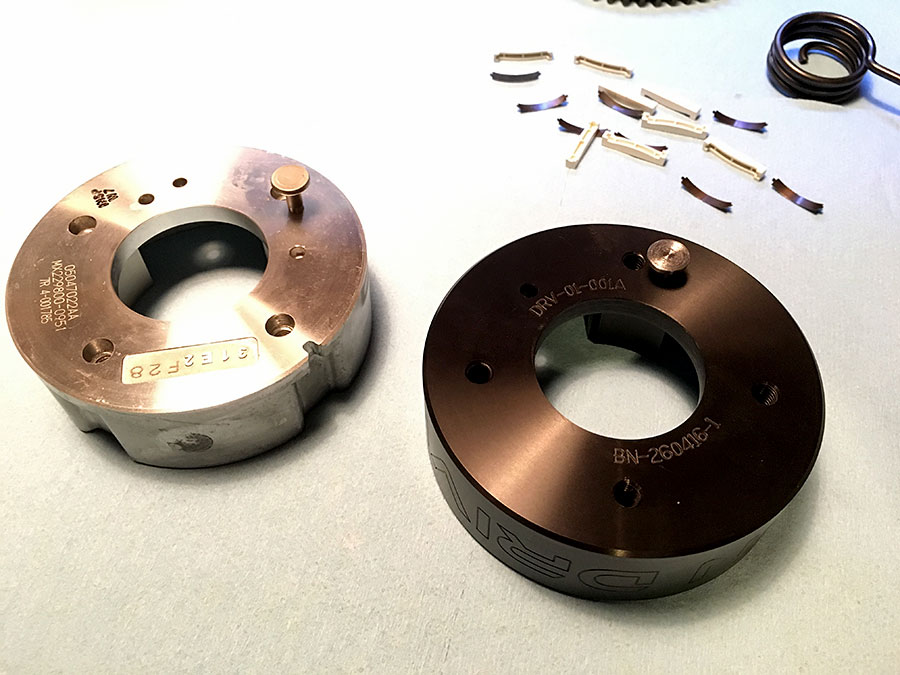
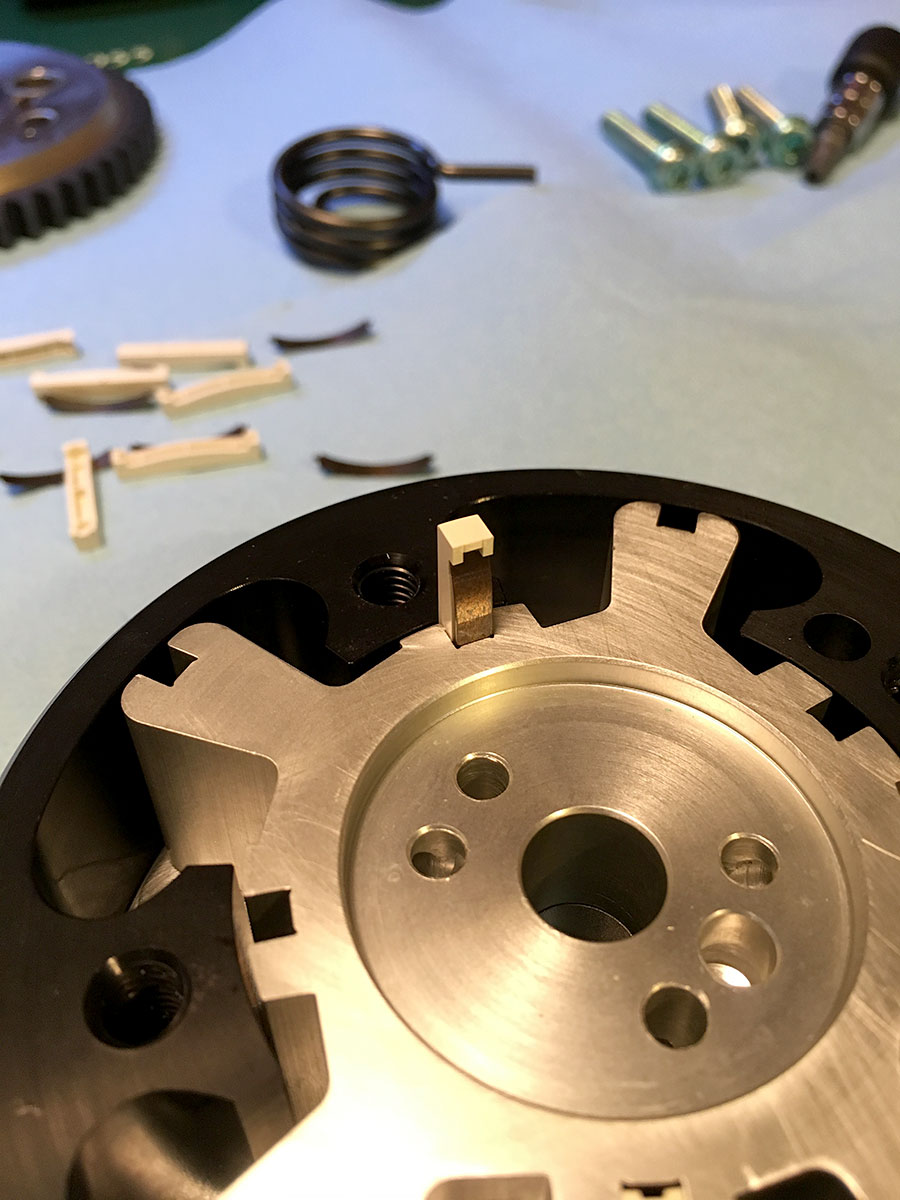
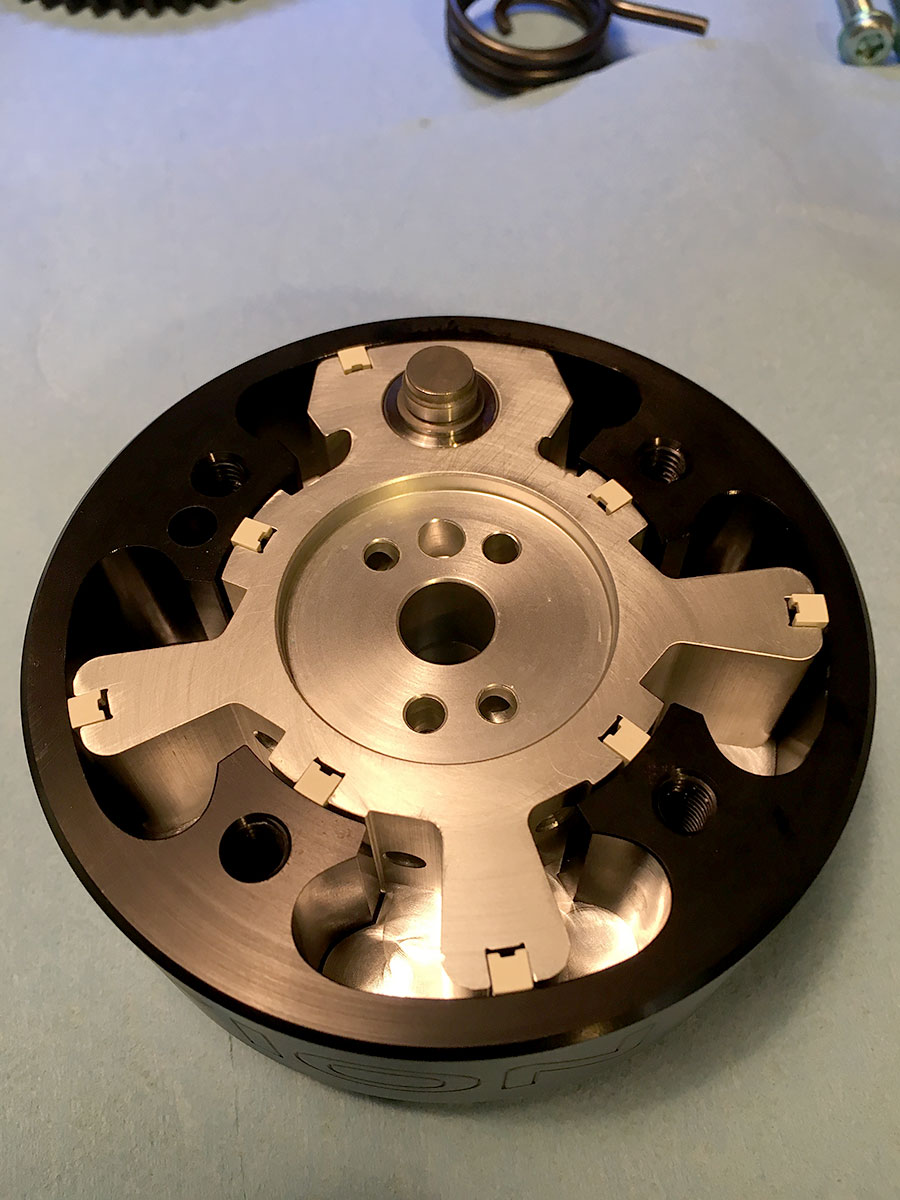
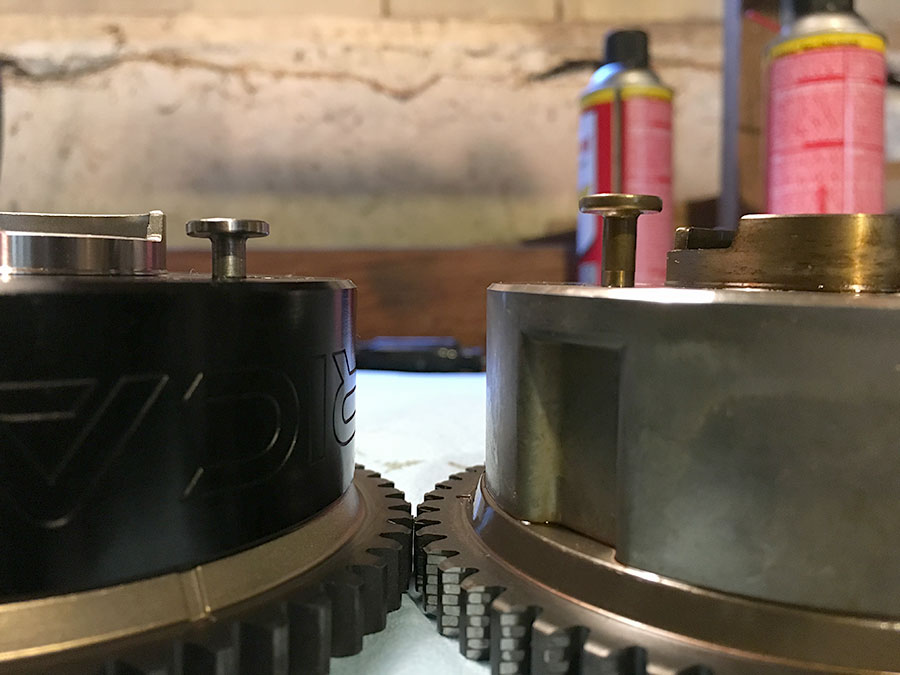
So I got around to reconstructing the exhaust cam sprocket internals into the driven fab housing. I took a bunch of photos (see below) and will do a write up soon. It's super easy as long as you keep track of everything.
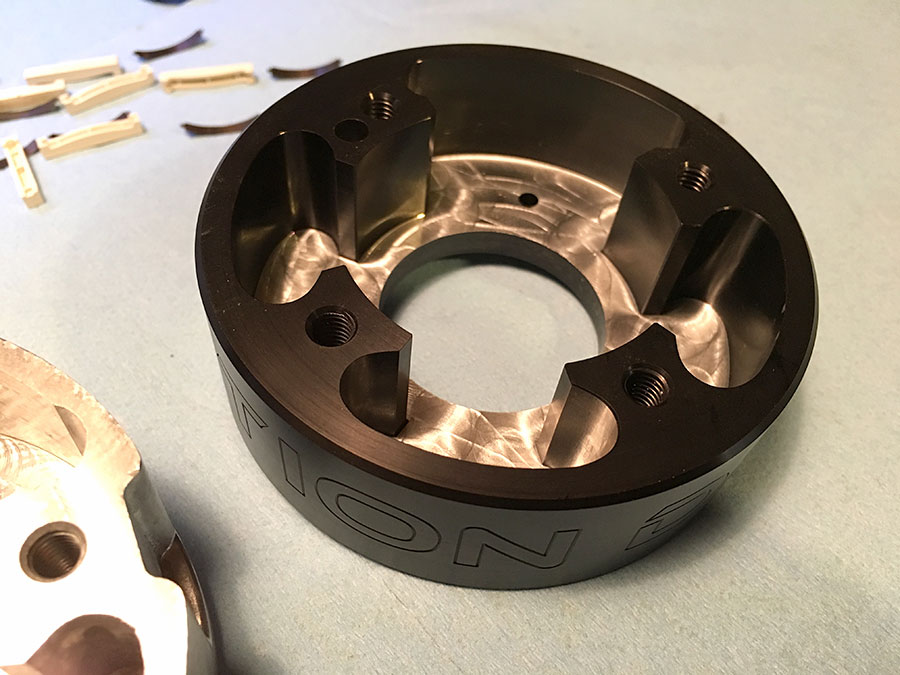
Ran into a pretty bad problem with the driven fab housing that basically won't allow me to run it. Bummer but glad I'm not in a rush. I emailed driven fab with the issue.
btw, the Chrysler cam sprocket assembly is indeed exactly the same and about 1/3 the price!


Ran into a pretty bad problem with the driven fab housing that basically won't allow me to run it. Bummer but glad I'm not in a rush. I emailed driven fab with the issue.
btw, the Chrysler cam sprocket assembly is indeed exactly the same and about 1/3 the price!
Thread Starter
Joined: Aug 2003
Posts: 14,094
Likes: 1,092
From: Mid-Hudson, NY

Thread Starter
Joined: Aug 2003
Posts: 14,094
Likes: 1,092
From: Mid-Hudson, NY
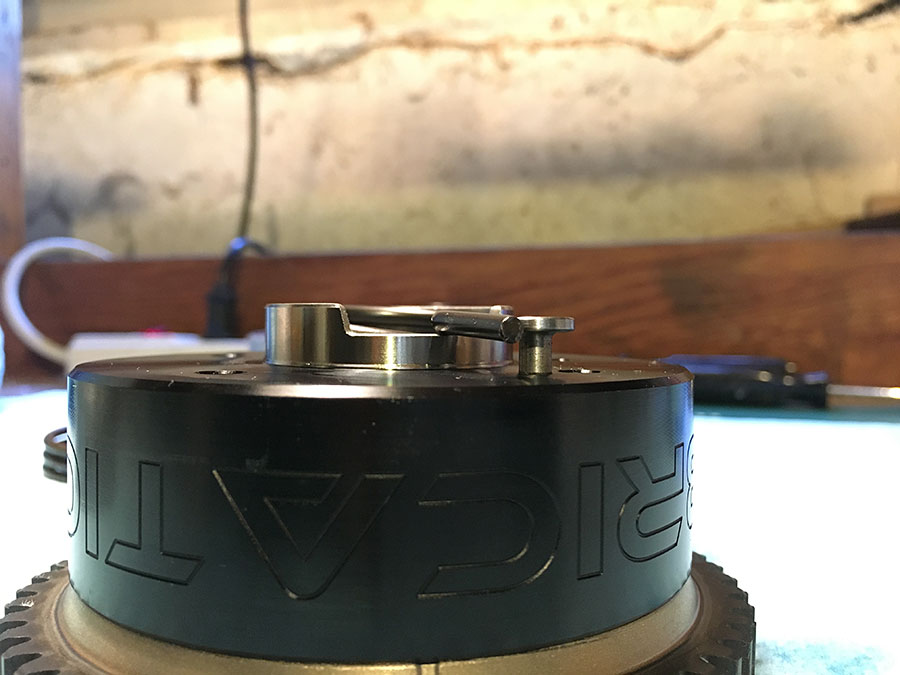
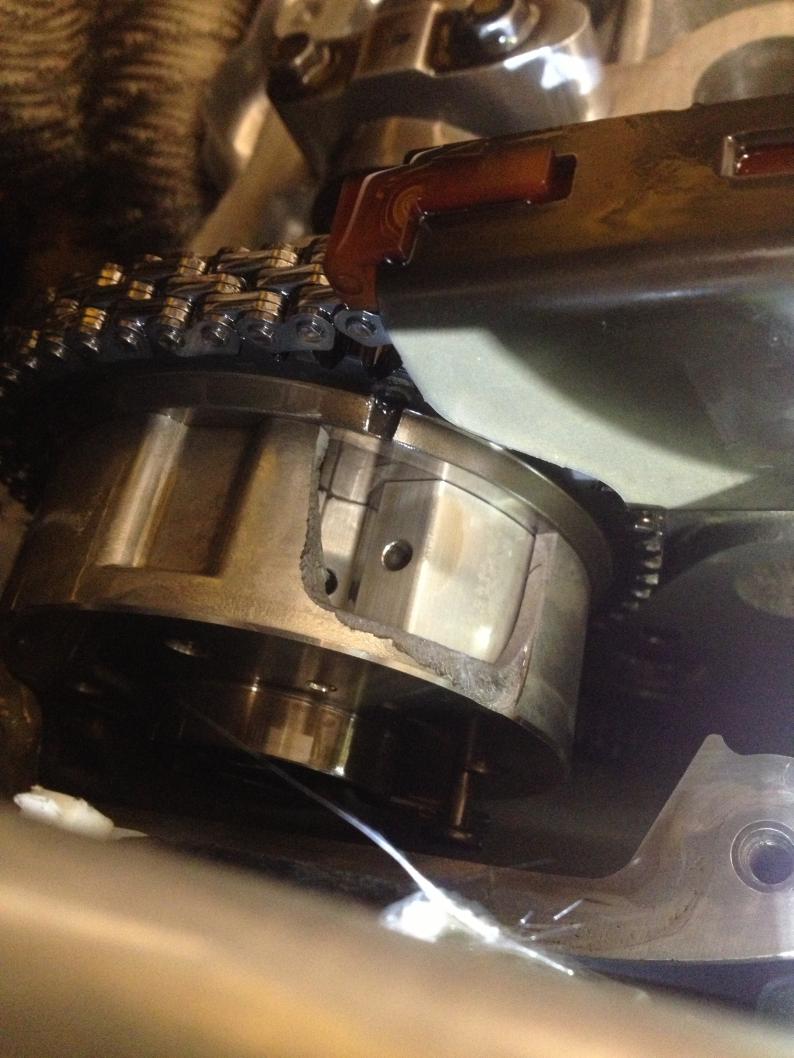
Today I tried Driven fabs suggestion on tapping out the pin with a punch. Good news is that worked. So now I can use the phaser cover! Yay.
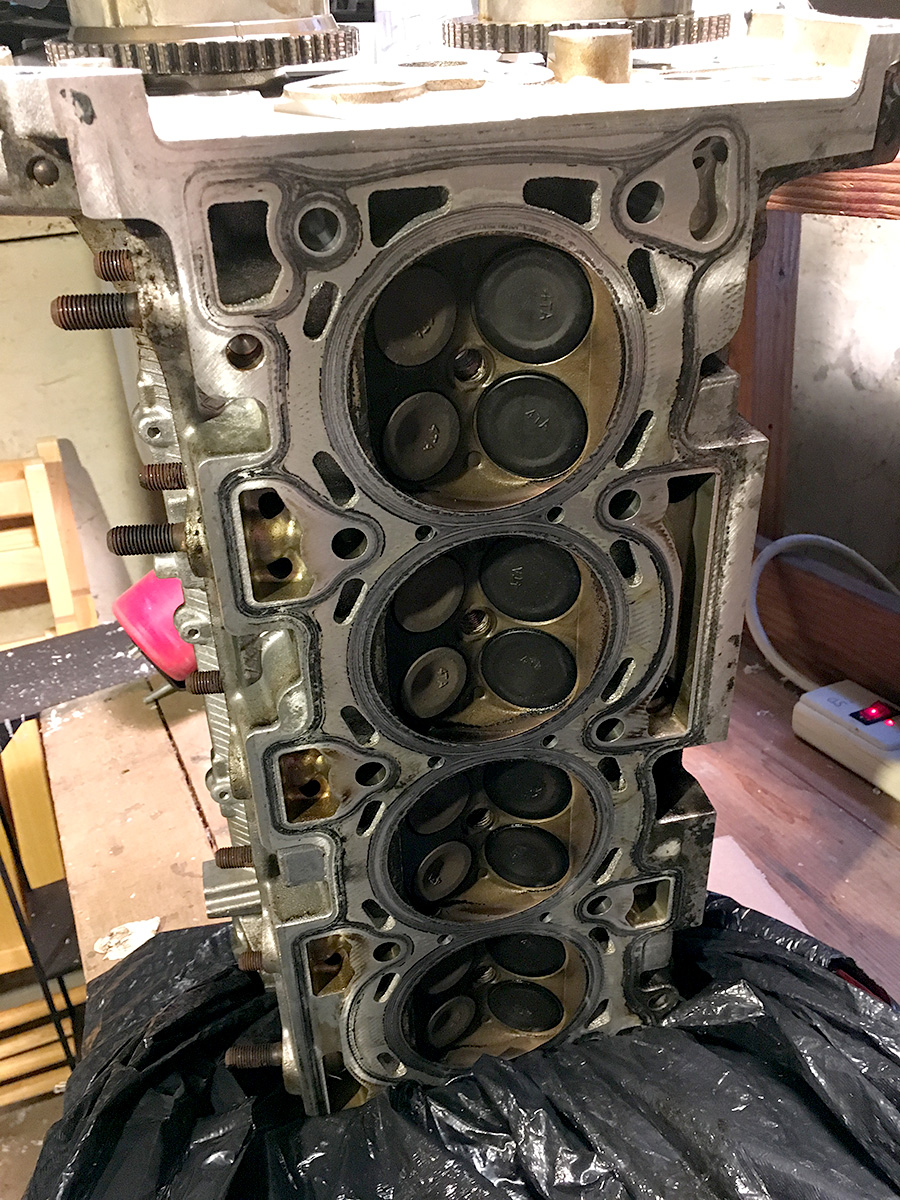
Also measured all the valve tappets in the spare head I bought. These all have approx. 40,000 miles on them.

Also measured all the valve tappets in the spare head I bought. These all have approx. 40,000 miles on them.
Thread Starter
Joined: Aug 2003
Posts: 14,094
Likes: 1,092
From: Mid-Hudson, NY
I was planning on replacing the ones that are further out of spec but not based on visual.
They are all smooth to the ol' "drag your fingernail across the surface" test.
I'm not going to do anything until I get the head reconditioned, assembled and the kelford cams in. Then I can measure the cam to tappet clearances as well.
Unfortunately most of them don't fall under the limited chrysler valve tappet sizes, so I have to spend $10 each instead of $2.50 each :-/
Evolved Member


Joined: Mar 2008
Posts: 2,110
Likes: 318
From: Croatia
did you by any chance measure your original cams.. ?
I have a evo x in the workshop with a bunch of problems one of which is worn cam lobes,... and the buckets look exactly like yours..
One think that local race shops do when putting wilder cams in the X is put in new valves (non OE) and springs. Apparently the OE valves want to break with wilder cams.
The damaged threads is from unbolting the cam caps with cams under spring tension... those need to go out slowly and all at once, turn by turn, on all bolts. Also, take care when bolting in the cam cap nr 1 (the large one)... that one wants to snap..